Sharp VL-WD450U VLWD450U|VLWD650U Operation Manual - Page 46
Aud I O Mode
 |
View all Sharp VL-WD450U manuals
Add to My Manuals
Save this manual to your list of manuals |
Page 46 highlights
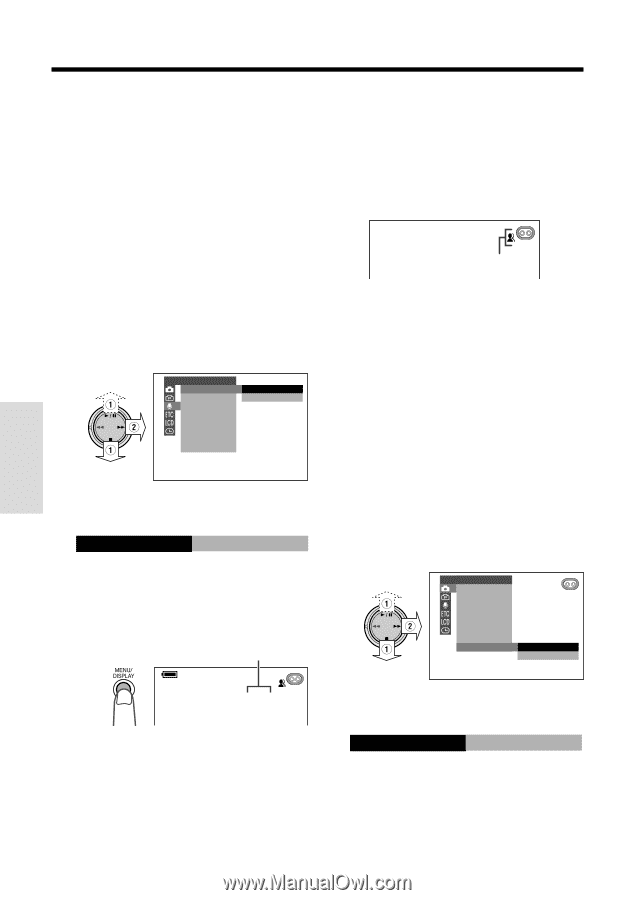
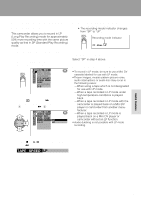
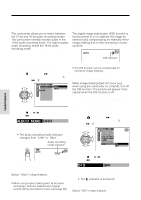
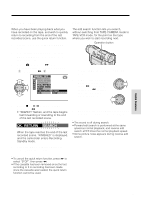
Useful Features Camera Recording Useful Features Selecting the 16-bit Audio Recording Mode Digital Image Stabilization (DIS) This camcorder allows you to select between the 12-bit and 16-bit audio recording modes. The camcorder normally records audio in the 12-bit audio recording mode. For higher-quality audio recording, select the 16-bit audio recording mode. 1 Set the camcorder to TAPE-CAMERA mode. 2 Press the MENU/DISPLAY button until the menu screen appears. 3 Select U, then press r on the Opera- tion button. Select "AUDIO MODE" (1), then press r (2). AUD I O SE T AUD I O MODE 1 2 bit Z OOM M I C 1 6 bit W I ND 4 Press d or y to select "16bit", then press e. AUD I O MODE 1 6 bit 5 Press the MENU/DISPLAY button to turn off the menu screen. • The audio recording mode indicator changes from "12bit" to "16bit". Audio recording mode indicator The digital image stabilization (DIS) function is factory preset to on to stabilize the image by electronically compensating for relatively minor image shaking that is often annoying in closeup shots. AUTO DIS indicator Note: • The DIS function cannot compensate for excessive image shaking. Turning Off the DIS Function When image shaking does not occur (e.g. when using the camcorder on a tripod), turn off the DIS function. The picture will appear more natural when the DIS function is off. 1 Set the camcorder to TAPE-CAMERA or CARD-CAMERA mode. 2 Press the MENU/DISPLAY button until the menu screen appears. 3 Select T, then press r on the Operation button. Select "DIS" (1), then press r (2). MANUAL SE T MAN. FOCUS SHUT. SPE ED E XPOSURE P I C. EFFECT SCE NE MENU FADE QK. RE TURN DIS ON OFF AUTO 16 bit To return to 12-bit audio recording mode Select "12bit" in step 4 above. Note: • When using Audio Dubbing with 16-bit audio recordings, both the dubbed and original sounds will be recorded in mono (see page 68). 31 4 Press d or y to select "OFF", then press e. DIS OFF 5 Press the MENU/DISPLAY button to turn off the menu screen. • The z indicator is turned off. To return to DIS mode Select "ON" in step 4 above.
-
 1
1 -
2
-
3
-
4
-
5
-
6
-
7
-
8
-
9
-
10
-
11
-
12
-
13
-
14
-
15
-
16
-
17
-
18
-
19
-
20
-
21
-
22
-
23
-
24
-
25
-
26
-
27
-
28
-
29
-
30
-
31
-
32
-
33
-
34
-
35
-
36
-
37
-
38
-
39
-
40
-
 41
41 -
 42
42 -
 43
43 -
 44
44 -
 45
45 -
 46
46 -
 47
47 -
 48
48 -
 49
49 -
 50
50 -
 51
51 -
52
-
53
-
54
-
55
-
56
-
57
-
58
-
59
-
60
-
61
-
62
-
63
-
64
-
65
-
66
-
67
-
68
-
69
-
70
-
71
-
72
-
73
-
74
-
75
-
76
-
77
-
78
-
79
-
80
-
81
-
82
-
83
-
84
-
85
-
86
-
87
-
88
-
89
-
90
-
91
-
92
-
93
-
94
-
95
-
96
-
97
-
98
-
99
-
100
-
101
-
102
-
103
-
104
-
105
-
106
-
107
-
108
-
109
-
110
-
111
-
112
-
113
-
114
-
115
-
116
-
117
-
118
-
119
-
120
 |
 |