Sharp VL-WD450U VLWD450U|VLWD650U Operation Manual - Page 91
Recording with the Self-timer
 |
View all Sharp VL-WD450U manuals
Add to My Manuals
Save this manual to your list of manuals |
Page 91 highlights
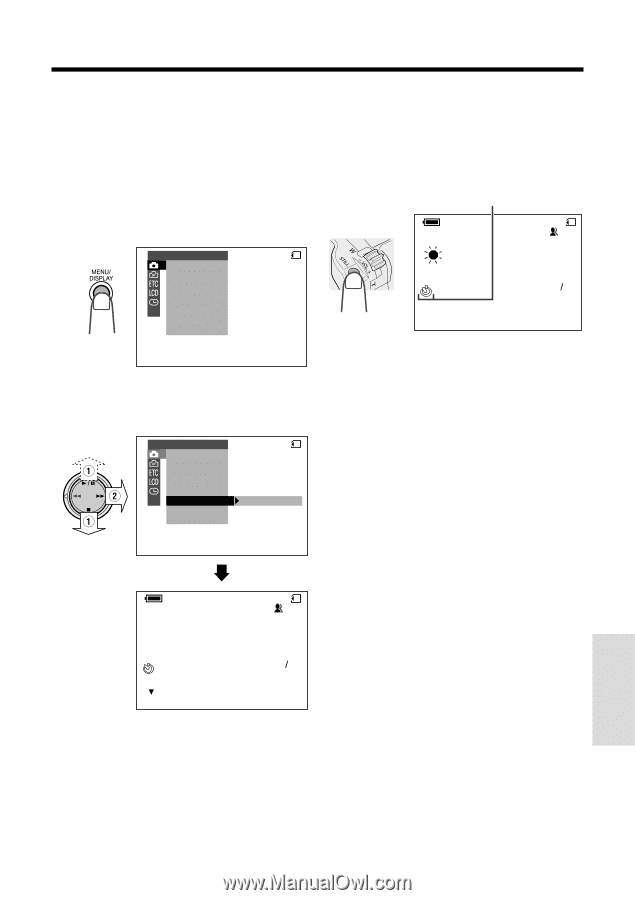
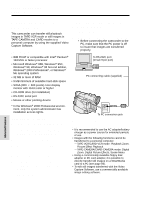
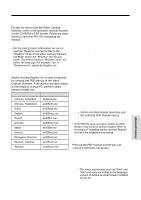
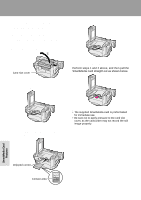
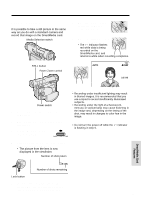
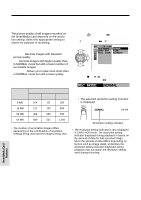
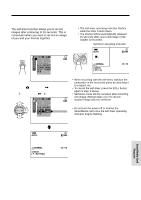
Recording with the Self-timer The self-timer function allows you to record images after a time-lag of 10 seconds. This is convenient when you want to record an image of you and your friends together. 1 In CARD-CAMERA mode, press the MENU/DISPLAY button until the menu screen appears. MANUAL SE T MAN. FOCUS CARD SHUT. SPE ED E XPOSURE P I C. EFFECT SC E NE MENU SE L F T I MER DIS 2 Select T, then press r on the Operation button. Select "SELF TIMER" (1), then press r (2). MANUAL SE T MAN. FOCUS CARD SHUT. SPE ED E XPOSURE P I C. EFFECT SCE NE MENU SE L F T I MER DIS 3 Frame the subject, and then press the STILL button to set the timer. • The self-timer operating indicator flashes while the timer counts down. • The shutter will be automatically released 10 seconds after, and a still image of the subject is recorded. Self-timer operating indicator AUTO CARD NORMAL CANCE L [ ST ILL] 10 90 Notes: • When recording with the self-timer, stabilize the camcorder in the horizontal plane by attaching it to a tripod, etc. • To cancel the self-timer, press the STILL button again in step 3 above. • Self-timer mode will be canceled after recording one image. Repeat steps 1 to 3 to record another image with the self-timer. Caution: • Do not turn the power off or remove the SmartMedia card once the self-timer operating indicator begins flashing. AUTO NORMAL CANCE L [ BUT TON] CARD 10 90 SmartMedia Card Features 76
-
 1
1 -
2
-
3
-
4
-
5
-
6
-
7
-
8
-
9
-
10
-
11
-
12
-
13
-
14
-
15
-
16
-
17
-
18
-
19
-
20
-
21
-
22
-
23
-
24
-
25
-
26
-
27
-
28
-
29
-
30
-
31
-
32
-
33
-
34
-
35
-
36
-
37
-
38
-
39
-
40
-
41
-
42
-
43
-
44
-
45
-
46
-
47
-
48
-
49
-
50
-
51
-
52
-
53
-
54
-
55
-
56
-
57
-
58
-
59
-
60
-
61
-
62
-
63
-
64
-
65
-
66
-
67
-
68
-
69
-
70
-
71
-
72
-
73
-
74
-
75
-
76
-
77
-
78
-
79
-
80
-
81
-
82
-
83
-
84
-
85
-
 86
86 -
 87
87 -
 88
88 -
 89
89 -
 90
90 -
 91
91 -
 92
92 -
 93
93 -
 94
94 -
 95
95 -
 96
96 -
97
-
98
-
99
-
100
-
101
-
102
-
103
-
104
-
105
-
106
-
107
-
108
-
109
-
110
-
111
-
112
-
113
-
114
-
115
-
116
-
117
-
118
-
119
-
120
 |
 |