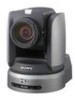
Sony BRCH900 Product Manual (BRC-H900 Operating Manual) - Page 20
Remote Commander (supplied), Switch 3 RS-232C/RS-422 selector
 |
View all Sony BRCH900 manuals
Add to My Manuals
Save this manual to your list of manuals |
Page 20 highlights
Overview 1 Switch 1, 2 (signal format selector) Depending on the setting of the Switch 1, 2, the signal format is changed as follows: Signal format Switch 1 Switch 2 1080/ 59.94i OFF OFF 1080/50i ON OFF 720/ 59.94p OFF ON 720/50p ON ON 2 Switch 3 (RS-232C/RS-422 selector) Set to ON for RS-422, or OFF for RS-232C. 3 Switch 4 (Communication baud rate selector) Set to ON for 38,400 bps, or OFF for 9,600 bps. 4 Switch 1, 2, 3 (Camera address selectors) Set the address of the camera. Normally set to "0". With this setting, addresses are assigned to the cameras automatically in the connected order by pressing the POWER button while holding down the RESET button on the RMBR300 Remote Control Unit. You can assign the camera address "1" to "7" manually by setting these selectors as follows: Camera address Switch 1 Switch 2 Switch 3 0 12 3 4567 OFF ON OFF ON OFF ON OFF ON OFF OFF ON ON OFF OFF ON ON OFF OFF OFF OFF ON ON ON ON 5 Switch 4 (Infrared signal output switch) Set to ON to enable an infrared signal output, or OFF to disable the output. For details about the output connector, see "Pin Assignments" on page 85. Note Set the switches before you turn on the power of the camera. The switch 4 (Infrared signal output switch) setting is effective whenever you change its setting. Remote Commander (supplied) 1 2 3 4 5 POWER CAMERA SELECT 1 2 3 AUTO FOCUS MANUAL FAR NEAR DATA SCREEN BACK LIGHT STD REV 123 456 PRESET RESET POSITION PAN-TILT HOME PAN-TILT RESET SLOW ZOOM FAST TT W L/R DIRECTION SET W RM-EV100 6 7 8 9 q; A CAMERA SELECT buttons Press the button corresponding to the camera you want to operate with the Remote Commander. The camera number can be set using the IR SELECT switch on the rear of the camera. Note If two or more cameras are adjacent and have the same camera number, they are operated simultaneously with the same Remote Commander. When you install the cameras close to each other, set different camera numbers. For the camera number setting, see "Operating Multiple Cameras with the Remote Commander" on page 45. B FOCUS buttons Used for focus adjustment. Press the AUTO button to adjust the focus automatically. To adjust the focus manually, press the MANUAL button, and adjust it with the FAR and NEAR buttons. 20 GB Location and Function of Parts
-
 1
1 -
2
-
3
-
4
-
5
-
6
-
7
-
8
-
9
-
10
-
11
-
12
-
13
-
14
-
 15
15 -
 16
16 -
 17
17 -
 18
18 -
 19
19 -
 20
20 -
 21
21 -
 22
22 -
 23
23 -
 24
24 -
 25
25 -
26
-
27
-
28
-
29
-
30
-
31
-
32
-
33
-
34
-
35
-
36
-
37
-
38
-
39
-
40
-
41
-
42
-
43
-
44
-
45
-
46
-
47
-
48
-
49
-
50
-
51
-
52
-
53
-
54
-
55
-
56
-
57
-
58
-
59
-
60
-
61
-
62
-
63
-
64
-
65
-
66
-
67
-
68
-
69
-
70
-
71
-
72
-
73
-
74
-
75
-
76
-
77
-
78
-
79
-
80
-
81
-
82
-
83
-
84
-
85
-
86
-
87
-
88
-
89
-
90
-
91
-
92
-
93
-
94
-
95
-
96
-
97
-
98
-
99
-
100
-
101
-
102
-
103
-
104
-
105
-
106
-
107
-
108
-
109
-
110
-
111
-
112
-
113
-
114
-
115
-
116
-
117
-
118
-
119
-
120
-
121
-
122
-
123
-
124
-
125
-
126
-
127
-
128
-
129
-
130
-
131
-
132
-
133
-
134
-
135
-
136
-
137
-
138
-
139
-
140
-
141
-
142
-
143
-
144
-
145
-
146
-
147
-
148
-
149
-
150
-
151
-
152
-
153
-
154
-
155
-
156
-
157
-
158
-
159
-
160
-
161
-
162
-
163
-
164
-
165
-
166
-
167
-
168
-
169
-
170
-
171
-
172
-
173
-
174
-
175
-
176
-
177
-
178
-
179
-
180
-
181
-
182
-
183
-
184
-
185
-
186
-
187
-
188
-
189
-
190
-
191
-
192
-
193
-
194
-
195
-
196
-
197
-
198
-
199
-
200
-
201
-
202
-
203
-
204
-
205
-
206
-
207
-
208
-
209
-
210
-
211
-
212
-
213
-
214
-
215
-
216
-
217
-
218
-
219
-
220
-
221
-
222
-
223
-
224
-
225
-
226
-
227
-
228
-
229
-
230
-
231
-
232
-
233
-
234
-
235
-
236
-
237
-
238
-
239
-
240
-
241
-
242
-
243
-
244
-
245
-
246
-
247
-
248
-
249
-
250
-
251
-
252
-
253
-
254
-
255
-
256
-
257
-
258
-
259
-
260
-
261
-
262
-
263
-
264
-
265
-
266
-
267
-
268
-
269
-
270
-
271
 |
 |
