Sony BRCH900 Product Manual (BRC-H900 Operating Manual) - Page 25
BRU-SF10 HD Optical Multiplex Unit (not supplied), EXT SYNC IN connector
 |
View all Sony BRCH900 manuals
Add to My Manuals
Save this manual to your list of manuals |
Page 25 highlights
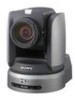
Overview BRU-SF10 HD Optical Multiplex Unit (not supplied) Front 1 2 345 ON/STANDBY LINK ALARM DATA MIX SD OFF ON 6 1234567 1080i 59.94 RS232C 9600bps 720p 50 RS422 38400bps 7 HD OPTICAL MULTIPLEX UNIT 8 A Power switch Turns on/off the power of this unit. Turn on the power of the BRC-H900 camera before you turn on this unit. B Power indicator Off: The unit's power switch is turned off. Lit orange: The unit is starting up or in sleep mode. Lit green: The unit is in normal operation. C LINK indicator Lit green: The optical fiber connection between the unit and the camera is normal. (The indicator lights in green after the system starts up.) Lit red: Check for the following. • The BRU-SF10 is not properly connected to the camera via optical fiber cable. Check the connections, and restart the unit. • Image frequency settings for the camera and the BRU-SF10 are different. Check the settings after turning off the power, then restart the unit. • The camera may be unable to start properly due to the AC adaptor being improperly connected to the DC IN connector on the camera. Check that the camera is turned on. D ALARM indicator Lit red: Check for the following. • The BRU-SF10 is not properly connected to the camera via an optical fiber cable. Check the connections, then restart the unit. • Image frequency settings for the camera and the BRU-SF10 are different. Check the settings after turning off the power, then restart the unit. • The camera may be unable to start properly due to the AC adaptor being improperly connected to the DC IN connector on the camera. Check that the camera is turned on. • An unsupported optional interface card is inserted in the card slot of the BRU-SF10. Remove the card after turning off the power, then restart the unit. Off: The unit is in normal operation. E SD indicator This indicator lights when a BRBK-SA1 optional interface card is installed, or when a BRBK-HSD2 is installed and its rear switch is set to SD. F Camera ID indicators The number for the current camera address lights in orange. For details on setting the camera address, see "Q VISCA FUNCTION switches" on page 26. G Status indicators The current communication format, baud rate, and video format settings light in green. For details on configuring these settings, see "Q VISCA FUNCTION switches" on page 26. H DATA MIX switch When the SD indicator is lit, set this switch to ON to overlap the menu display with the SD image signals from any installed BRBK-SA1 and BRBK-HSD2 interface card on which the rear switch is set to SD. Set this switch to OFF to hide the menu display. Rear 9 0 qa qs qd qf qg qh IN OUT CAMERA EXT SYNC IN OUT RGB/COMPONENT VISCA RS232C 123456789 VISCA RS422 AUDIO OUT L FUNCTION R 1 10 DC 12V ql qk qj I CAMERA connector Connect to the optical connector of the BRBK-SF1 HD Optical Multiplex Card installed in the BRC-H900 camera using the CCFC-S200 Optical Fiber Cable. A dustproof cap is attached at the factory. Do not remove this cap if you do not intend to connect an optical fiber cable. Dustproof caps are also attached to the BRBK-SF1 and CCFC-S200. Do not remove these caps when the connectors are not in use. J EXT SYNC IN connector Accepts external video sync signals. 25 Location and Function of Parts GB
-
 1
1 -
2
-
3
-
4
-
5
-
6
-
7
-
8
-
9
-
10
-
11
-
12
-
13
-
14
-
15
-
16
-
17
-
18
-
19
-
 20
20 -
 21
21 -
 22
22 -
 23
23 -
 24
24 -
 25
25 -
 26
26 -
 27
27 -
 28
28 -
 29
29 -
 30
30 -
31
-
32
-
33
-
34
-
35
-
36
-
37
-
38
-
39
-
40
-
41
-
42
-
43
-
44
-
45
-
46
-
47
-
48
-
49
-
50
-
51
-
52
-
53
-
54
-
55
-
56
-
57
-
58
-
59
-
60
-
61
-
62
-
63
-
64
-
65
-
66
-
67
-
68
-
69
-
70
-
71
-
72
-
73
-
74
-
75
-
76
-
77
-
78
-
79
-
80
-
81
-
82
-
83
-
84
-
85
-
86
-
87
-
88
-
89
-
90
-
91
-
92
-
93
-
94
-
95
-
96
-
97
-
98
-
99
-
100
-
101
-
102
-
103
-
104
-
105
-
106
-
107
-
108
-
109
-
110
-
111
-
112
-
113
-
114
-
115
-
116
-
117
-
118
-
119
-
120
-
121
-
122
-
123
-
124
-
125
-
126
-
127
-
128
-
129
-
130
-
131
-
132
-
133
-
134
-
135
-
136
-
137
-
138
-
139
-
140
-
141
-
142
-
143
-
144
-
145
-
146
-
147
-
148
-
149
-
150
-
151
-
152
-
153
-
154
-
155
-
156
-
157
-
158
-
159
-
160
-
161
-
162
-
163
-
164
-
165
-
166
-
167
-
168
-
169
-
170
-
171
-
172
-
173
-
174
-
175
-
176
-
177
-
178
-
179
-
180
-
181
-
182
-
183
-
184
-
185
-
186
-
187
-
188
-
189
-
190
-
191
-
192
-
193
-
194
-
195
-
196
-
197
-
198
-
199
-
200
-
201
-
202
-
203
-
204
-
205
-
206
-
207
-
208
-
209
-
210
-
211
-
212
-
213
-
214
-
215
-
216
-
217
-
218
-
219
-
220
-
221
-
222
-
223
-
224
-
225
-
226
-
227
-
228
-
229
-
230
-
231
-
232
-
233
-
234
-
235
-
236
-
237
-
238
-
239
-
240
-
241
-
242
-
243
-
244
-
245
-
246
-
247
-
248
-
249
-
250
-
251
-
252
-
253
-
254
-
255
-
256
-
257
-
258
-
259
-
260
-
261
-
262
-
263
-
264
-
265
-
266
-
267
-
268
-
269
-
270
-
271
 |
 |
