Sony BRCH900 Product Manual (BRC-H900 Operating Manual) - Page 57
Before installation, Installation on a ceiling example, Caution
 |
View all Sony BRCH900 manuals
Add to My Manuals
Save this manual to your list of manuals |
Page 57 highlights
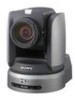
Before installation After deciding the shooting direction, make the required holes for the ceiling bracket (B) and connecting cables on the ceiling or shelf, etc. For the dimensions of the ceiling bracket (B), see page 82. Notes • The connecting cables cannot be passed through the ceiling bracket (A). A hole for the wiring is required through the surface on which the camera is to be installed. • Do not attach any object other than the camera to the ceiling brackets. • The ceiling bracket cannot be attached to a junction box when installing the camera on a ceiling. Installation on a ceiling (example) 1 Set IMG FLIP to ON in the SYSTEM menu. 2 Remove the four screws on the bottom of the camera to remove the four feet. 3 Attach the ceiling bracket (A) to the bottom of the camera using the supplied four screws (3M3 × 8). Position the a hole for screwing on the ceiling bracket (A) to the front of the camera as illustrated, align the screw holes on the ceiling bracket with those on the bottom of the camera, then attach the bracket to the camera. a hole 3M3 × 8 (supplied) Ceiling bracket (A) Front of camera Installation and Connections Caution For attaching the camera to the ceiling bracket, use only the supplied screws. Using other screws may damage the camera. 4 Attach the attachment materials (not supplied) to the ceiling bracket (B), and install the bracket on the ceiling. Align the f hole on the ceiling bracket (B) in the direction where the front of the camera will be positioned later. Attachment materials Ceiling Ceiling bracket (B) f hole 57 Installation GB
-
 1
1 -
2
-
3
-
4
-
5
-
6
-
7
-
8
-
9
-
10
-
11
-
12
-
13
-
14
-
15
-
16
-
17
-
18
-
19
-
20
-
21
-
22
-
23
-
24
-
25
-
26
-
27
-
28
-
29
-
30
-
31
-
32
-
33
-
34
-
35
-
36
-
37
-
38
-
39
-
40
-
41
-
42
-
43
-
44
-
45
-
46
-
47
-
48
-
49
-
50
-
51
-
 52
52 -
 53
53 -
 54
54 -
 55
55 -
 56
56 -
 57
57 -
 58
58 -
 59
59 -
 60
60 -
 61
61 -
 62
62 -
63
-
64
-
65
-
66
-
67
-
68
-
69
-
70
-
71
-
72
-
73
-
74
-
75
-
76
-
77
-
78
-
79
-
80
-
81
-
82
-
83
-
84
-
85
-
86
-
87
-
88
-
89
-
90
-
91
-
92
-
93
-
94
-
95
-
96
-
97
-
98
-
99
-
100
-
101
-
102
-
103
-
104
-
105
-
106
-
107
-
108
-
109
-
110
-
111
-
112
-
113
-
114
-
115
-
116
-
117
-
118
-
119
-
120
-
121
-
122
-
123
-
124
-
125
-
126
-
127
-
128
-
129
-
130
-
131
-
132
-
133
-
134
-
135
-
136
-
137
-
138
-
139
-
140
-
141
-
142
-
143
-
144
-
145
-
146
-
147
-
148
-
149
-
150
-
151
-
152
-
153
-
154
-
155
-
156
-
157
-
158
-
159
-
160
-
161
-
162
-
163
-
164
-
165
-
166
-
167
-
168
-
169
-
170
-
171
-
172
-
173
-
174
-
175
-
176
-
177
-
178
-
179
-
180
-
181
-
182
-
183
-
184
-
185
-
186
-
187
-
188
-
189
-
190
-
191
-
192
-
193
-
194
-
195
-
196
-
197
-
198
-
199
-
200
-
201
-
202
-
203
-
204
-
205
-
206
-
207
-
208
-
209
-
210
-
211
-
212
-
213
-
214
-
215
-
216
-
217
-
218
-
219
-
220
-
221
-
222
-
223
-
224
-
225
-
226
-
227
-
228
-
229
-
230
-
231
-
232
-
233
-
234
-
235
-
236
-
237
-
238
-
239
-
240
-
241
-
242
-
243
-
244
-
245
-
246
-
247
-
248
-
249
-
250
-
251
-
252
-
253
-
254
-
255
-
256
-
257
-
258
-
259
-
260
-
261
-
262
-
263
-
264
-
265
-
266
-
267
-
268
-
269
-
270
-
271
 |
 |
