Sony BRCH900 Product Manual (BRC-H900 Operating Manual) - Page 47
Storing the Camera Settings in Memory - Presetting Feature, Presetting Feature
 |
View all Sony BRCH900 manuals
Add to My Manuals
Save this manual to your list of manuals |
Page 47 highlights
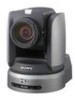
Operation Using the Supplied Remote Commander Storing the Camera Settings in Memory - Presetting Feature Up to six combinations of settings (six positions) including camera position, zooming, focusing, and backlighting, can be preset. Note The camera can store up to sixteen combinations of settings (sixteen positions) in the memory, but the supplied Remote Commander supports preset of six positions only (POSITION 1 to 6). Use the RM-BR300 Remote Control Unit (not supplied) to store the settings in POSITION 7 to 16. For details of the camera settings to be preset, see "Presetting Items" on page 78. POWER CAMERA SELECT 2 1 FOCUS FAR 3 MANUAL NEAR BACK LIGHT 2 3 POSITION 1~6 AUTO DATA SCREEN 3 PRESET 3 REV 2 6 STD RESET 1 4 5 PRESET POSITIOPNAN-TILT HOME PARNE-TSIELTT FAST RESET 1 ZOOM T 2 T SLOW W W RM-EV100 DIREL/CRTION SET 1 Press the PAN-TILT RESET button to reset the pan/ tilt position. 2 Adjust the position, zooming, focusing and backlighting of the camera (pages 44 to 46). 3 While holding down the PRESET button, press any of the POSITION buttons, 1 to 6, in which you want to store the settings. DATA SCREEN BACK LIGHT While holding down STD REV 123 456 PRESET RESET POSITION Press a POSITION button. The message "PRESET No.xx" (selected POSITION number) is displayed for about 2 seconds. Note Before you store camera settings such as camera position, zooming, focusing, etc., in the memory, install the camera suitably and fix the camera securely. If you change the installation of the camera after storing, differences may arise on the preset. To recall the stored settings Press any of the POSITION buttons, 1 to 6, in which you have stored the settings. To cancel the preset memory While holding down the RESET button, press the POSITION button from which you want to cancel the settings. DATA SCREEN BACK LIGHT While holding down STD REV 123 456 PRESET RESET POSITION Press a POSITION button. Notes • When the power is turned on, the camera starts with the settings stored in POSITION 1. • If you want to retain the previous pan and tilt positions, etc., when the power is turned off and turned on again, store those positions in POSITION 1. • Storing or canceling the settings in POSITION 1 takes about two seconds longer than those of other positions. • When you are storing or canceling the settings in one POSITION, you cannot call up, store or cancel the settings in another POSITION. • For details about the memory that you can erase, see "Presetting Items" on page 78. 47 Storing the Camera Settings in Memory - Presetting Feature GB
-
 1
1 -
2
-
3
-
4
-
5
-
6
-
7
-
8
-
9
-
10
-
11
-
12
-
13
-
14
-
15
-
16
-
17
-
18
-
19
-
20
-
21
-
22
-
23
-
24
-
25
-
26
-
27
-
28
-
29
-
30
-
31
-
32
-
33
-
34
-
35
-
36
-
37
-
38
-
39
-
40
-
41
-
 42
42 -
 43
43 -
 44
44 -
 45
45 -
 46
46 -
 47
47 -
 48
48 -
 49
49 -
 50
50 -
 51
51 -
 52
52 -
53
-
54
-
55
-
56
-
57
-
58
-
59
-
60
-
61
-
62
-
63
-
64
-
65
-
66
-
67
-
68
-
69
-
70
-
71
-
72
-
73
-
74
-
75
-
76
-
77
-
78
-
79
-
80
-
81
-
82
-
83
-
84
-
85
-
86
-
87
-
88
-
89
-
90
-
91
-
92
-
93
-
94
-
95
-
96
-
97
-
98
-
99
-
100
-
101
-
102
-
103
-
104
-
105
-
106
-
107
-
108
-
109
-
110
-
111
-
112
-
113
-
114
-
115
-
116
-
117
-
118
-
119
-
120
-
121
-
122
-
123
-
124
-
125
-
126
-
127
-
128
-
129
-
130
-
131
-
132
-
133
-
134
-
135
-
136
-
137
-
138
-
139
-
140
-
141
-
142
-
143
-
144
-
145
-
146
-
147
-
148
-
149
-
150
-
151
-
152
-
153
-
154
-
155
-
156
-
157
-
158
-
159
-
160
-
161
-
162
-
163
-
164
-
165
-
166
-
167
-
168
-
169
-
170
-
171
-
172
-
173
-
174
-
175
-
176
-
177
-
178
-
179
-
180
-
181
-
182
-
183
-
184
-
185
-
186
-
187
-
188
-
189
-
190
-
191
-
192
-
193
-
194
-
195
-
196
-
197
-
198
-
199
-
200
-
201
-
202
-
203
-
204
-
205
-
206
-
207
-
208
-
209
-
210
-
211
-
212
-
213
-
214
-
215
-
216
-
217
-
218
-
219
-
220
-
221
-
222
-
223
-
224
-
225
-
226
-
227
-
228
-
229
-
230
-
231
-
232
-
233
-
234
-
235
-
236
-
237
-
238
-
239
-
240
-
241
-
242
-
243
-
244
-
245
-
246
-
247
-
248
-
249
-
250
-
251
-
252
-
253
-
254
-
255
-
256
-
257
-
258
-
259
-
260
-
261
-
262
-
263
-
264
-
265
-
266
-
267
-
268
-
269
-
270
-
271
 |
 |
