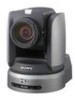
Sony BRCH900 Product Manual (BRC-H900 Operating Manual) - Page 45
Zooming, Operating Multiple Cameras with the Remote Commander, If the STANDBY lamp of the camera
 |
View all Sony BRCH900 manuals
Add to My Manuals
Save this manual to your list of manuals |
Page 45 highlights
Operation Using the Supplied Remote Commander Arrow button Movement of the camera Setting L/R DIRECTION SET While holding down STD 1 Press. L/R DIRECTION SET While holding down REV 2 Press. Note The setting above only changes the signal emitted from the Remote Commander, and does not change the setting of the camera itself. Therefore, repeat the setting for each Remote Commander if you are using more than one Remote Commander. If the STANDBY lamp of the camera flashes When the camera is moved or turned by hand or by external shock, the microcomputer inside the camera may not be able to memorize the pan/tilt position properly and the camera may stop. To reset the pan/tilt position, press the PAN-TILT RESET button or turn the power of the camera off, then turn it on again. Zooming Press either of the ZOOM buttons. Subject appears farther away. (Wide angle) Zooms in or out slowly (SLOW side) PAN-TILT RESET SLOW ZOOM FAST TT W L/R DIRECTION SET W RM-EV100 Subject appears closer. (Telephoto) Zooms in or out quickly (FAST side) Note When you perform pan/tilt operation while the camera is in the telephoto mode, the moving speed of the image on the screen may be a little jerky. Operating Multiple Cameras with the Remote Commander 1 Set the IR SELECT switch on the rear of the camera you want to operate to 1, 2 or 3. 1 2 3 IR SELECT 2 Press the CAMERA SELECT button on the Remote Commander that corresponds to the number set in step 1. STANDBY flashes POWER CAMERA SELECT 1 2 3 AUTO FOCUS MANUAL FAR NEAR DATA SCREEN BACK LIGHT CAMERA SELECT You can then operate the camera(s) specified by number. Every time you operate the camera(s) using the Remote Commander, the CAMERA SELECT button pressed in step 2 lights. 45 Pan/Tilt and Zoom Operation GB
-
 1
1 -
2
-
3
-
4
-
5
-
6
-
7
-
8
-
9
-
10
-
11
-
12
-
13
-
14
-
15
-
16
-
17
-
18
-
19
-
20
-
21
-
22
-
23
-
24
-
25
-
26
-
27
-
28
-
29
-
30
-
31
-
32
-
33
-
34
-
35
-
36
-
37
-
38
-
39
-
 40
40 -
 41
41 -
 42
42 -
 43
43 -
 44
44 -
 45
45 -
 46
46 -
 47
47 -
 48
48 -
 49
49 -
 50
50 -
51
-
52
-
53
-
54
-
55
-
56
-
57
-
58
-
59
-
60
-
61
-
62
-
63
-
64
-
65
-
66
-
67
-
68
-
69
-
70
-
71
-
72
-
73
-
74
-
75
-
76
-
77
-
78
-
79
-
80
-
81
-
82
-
83
-
84
-
85
-
86
-
87
-
88
-
89
-
90
-
91
-
92
-
93
-
94
-
95
-
96
-
97
-
98
-
99
-
100
-
101
-
102
-
103
-
104
-
105
-
106
-
107
-
108
-
109
-
110
-
111
-
112
-
113
-
114
-
115
-
116
-
117
-
118
-
119
-
120
-
121
-
122
-
123
-
124
-
125
-
126
-
127
-
128
-
129
-
130
-
131
-
132
-
133
-
134
-
135
-
136
-
137
-
138
-
139
-
140
-
141
-
142
-
143
-
144
-
145
-
146
-
147
-
148
-
149
-
150
-
151
-
152
-
153
-
154
-
155
-
156
-
157
-
158
-
159
-
160
-
161
-
162
-
163
-
164
-
165
-
166
-
167
-
168
-
169
-
170
-
171
-
172
-
173
-
174
-
175
-
176
-
177
-
178
-
179
-
180
-
181
-
182
-
183
-
184
-
185
-
186
-
187
-
188
-
189
-
190
-
191
-
192
-
193
-
194
-
195
-
196
-
197
-
198
-
199
-
200
-
201
-
202
-
203
-
204
-
205
-
206
-
207
-
208
-
209
-
210
-
211
-
212
-
213
-
214
-
215
-
216
-
217
-
218
-
219
-
220
-
221
-
222
-
223
-
224
-
225
-
226
-
227
-
228
-
229
-
230
-
231
-
232
-
233
-
234
-
235
-
236
-
237
-
238
-
239
-
240
-
241
-
242
-
243
-
244
-
245
-
246
-
247
-
248
-
249
-
250
-
251
-
252
-
253
-
254
-
255
-
256
-
257
-
258
-
259
-
260
-
261
-
262
-
263
-
264
-
265
-
266
-
267
-
268
-
269
-
270
-
271
 |
 |
