Sony DSLR A700H User's Guide - Page 115
Format, Protect
 |
UPC - 027242736122
View all Sony DSLR A700H manuals
Add to My Manuals
Save this manual to your list of manuals |
Page 115 highlights
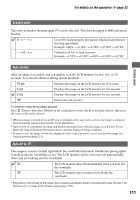
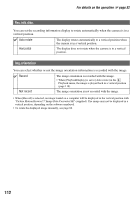
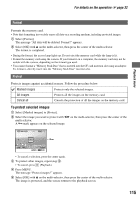
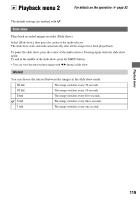
Playback menu For details on the operation 1 page 32 Format Formats the memory card. • Note that formatting irrevocably erases all data on a recording medium, including protected images. 1 Select [Format]. The message "All data will be deleted. Format?" appears. 2 Select [OK] with v on the multi-selector, then press the center of the multi-selector. The format is completed. • During the format, the access lamp lights up. Do not eject the memory card while the lamp is lit. • Format the memory card using the camera. If you format it on a computer, the memory card may not be usable with the camera, depending on the format type used. • You cannot format a "Memory Stick Duo" that is inserted into the CF card insertion slot using an adaptor. To format it, directly insert into the "Memory Stick Duo" insertion slot. Protect Protects images against accidental erasure. Follow the procedure below. Marked images Protects only the selected images. All images Protects all the images on the memory card. Cancel all Cancels the protection of all the images on the memory card. To protect selected images 1 Select [Marked images] in [Protect]. 2 Select the image you want to protect with b/B on the multi-selector, then press the center of the multi-selector. A - mark appears on the selected image. - • To cancel a selection, press the center again. 3 To protect other images, repeat step 2. • To cancel, press (Playback). 4 Press MENU. The message "Protect images?" appears. 5 Select [OK] with v on the multi-selector, then press the center of the multi-selector. The image is protected, and the screen returns to the playback screen. 115
-
 1
1 -
2
-
3
-
4
-
5
-
6
-
7
-
8
-
9
-
10
-
11
-
12
-
13
-
14
-
15
-
16
-
17
-
18
-
19
-
20
-
21
-
22
-
23
-
24
-
25
-
26
-
27
-
28
-
29
-
30
-
31
-
32
-
33
-
34
-
35
-
36
-
37
-
38
-
39
-
40
-
41
-
42
-
43
-
44
-
45
-
46
-
47
-
48
-
49
-
50
-
51
-
52
-
53
-
54
-
55
-
56
-
57
-
58
-
59
-
60
-
61
-
62
-
63
-
64
-
65
-
66
-
67
-
68
-
69
-
70
-
71
-
72
-
73
-
74
-
75
-
76
-
77
-
78
-
79
-
80
-
81
-
82
-
83
-
84
-
85
-
86
-
87
-
88
-
89
-
90
-
91
-
92
-
93
-
94
-
95
-
96
-
97
-
98
-
99
-
100
-
101
-
102
-
103
-
104
-
105
-
106
-
107
-
108
-
109
-
 110
110 -
 111
111 -
 112
112 -
 113
113 -
 114
114 -
 115
115 -
 116
116 -
 117
117 -
 118
118 -
 119
119 -
 120
120 -
121
-
122
-
123
-
124
-
125
-
126
-
127
-
128
-
129
-
130
-
131
-
132
-
133
-
134
-
135
-
136
-
137
-
138
-
139
-
140
-
141
-
142
-
143
-
144
-
145
-
146
-
147
-
148
-
149
-
150
-
151
-
152
-
153
-
154
-
155
-
156
-
157
-
158
-
159
-
160
-
161
-
162
-
163
-
164
-
165
-
166
-
167
-
168
-
169
-
170
-
171
-
172
-
173
-
174
-
175
-
176
-
177
-
178
-
179
 |
 |
