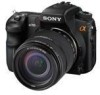
Sony DSLR A700H User's Guide - Page 125
Setup menu 3, Menu start, Delete confirm., Audio signals, Cleaning mode
 |
UPC - 027242736122
View all Sony DSLR A700H manuals
Add to My Manuals
Save this manual to your list of manuals |
Page 125 highlights
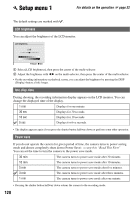
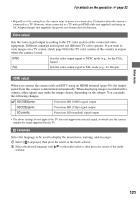
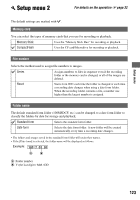
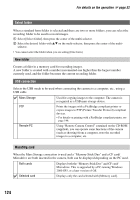
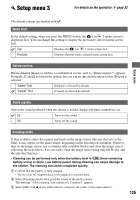
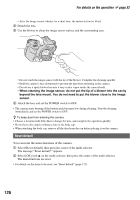
Setup menu 3 For details on the operation 1 page 32 The default settings are marked with . Menu start In the default setting, when you press the MENU button, the 1 or 1 menu screen is displayed first. You can change this setting to display the previously selected menu screen first. Top Displays the 1 or 1 menu screen first. Previous Displays the previously selected menu screen first. Setup menu Delete confirm. Before deleting images or folders, a confirmation screen, such as "Delete images?", appears. Normally, [Cancel] is selected by default, but you can set this default option so that [Delete] is selected. "Delete" first [Delete] is selected by default. "Cancel" first [Cancel] is selected by default. Audio signals Selects the sound produced when the shutter is locked, during self-timer countdown, etc. On Turns on the sound. Off Turns off the sound. Cleaning mode If dust or debris enters the camera and lands on the image sensor (the part that acts as the film), it may appear on the photo image, depending on the shooting environment. If there is dust on the image sensor, use a commercially available blower and clean the image sensor following the steps below. You can easily clean the image sensor using only the blower and the anti-dust function. • Cleaning can be performed only when the battery level is (three remaining battery icons) or more. Low battery power during cleaning can cause damage to the shutter. The cleaning should be completed quickly. 1 Confirm that the battery is fully charged. • The use of an AC Adaptor/charger (not supplied) is recommended. 2 Select [Cleaning mode], then press the center of the multi-selector. The message "After cleaning, turn camera off. Continue?" appears. 3 Select [OK] with v on the multi-selector, and press the center of the multi-selector. 125
-
 1
1 -
2
-
3
-
4
-
5
-
6
-
7
-
8
-
9
-
10
-
11
-
12
-
13
-
14
-
15
-
16
-
17
-
18
-
19
-
20
-
21
-
22
-
23
-
24
-
25
-
26
-
27
-
28
-
29
-
30
-
31
-
32
-
33
-
34
-
35
-
36
-
37
-
38
-
39
-
40
-
41
-
42
-
43
-
44
-
45
-
46
-
47
-
48
-
49
-
50
-
51
-
52
-
53
-
54
-
55
-
56
-
57
-
58
-
59
-
60
-
61
-
62
-
63
-
64
-
65
-
66
-
67
-
68
-
69
-
70
-
71
-
72
-
73
-
74
-
75
-
76
-
77
-
78
-
79
-
80
-
81
-
82
-
83
-
84
-
85
-
86
-
87
-
88
-
89
-
90
-
91
-
92
-
93
-
94
-
95
-
96
-
97
-
98
-
99
-
100
-
101
-
102
-
103
-
104
-
105
-
106
-
107
-
108
-
109
-
110
-
111
-
112
-
113
-
114
-
115
-
116
-
117
-
118
-
119
-
 120
120 -
 121
121 -
 122
122 -
 123
123 -
 124
124 -
 125
125 -
 126
126 -
 127
127 -
 128
128 -
 129
129 -
 130
130 -
131
-
132
-
133
-
134
-
135
-
136
-
137
-
138
-
139
-
140
-
141
-
142
-
143
-
144
-
145
-
146
-
147
-
148
-
149
-
150
-
151
-
152
-
153
-
154
-
155
-
156
-
157
-
158
-
159
-
160
-
161
-
162
-
163
-
164
-
165
-
166
-
167
-
168
-
169
-
170
-
171
-
172
-
173
-
174
-
175
-
176
-
177
-
178
-
179
 |
 |
