Sony DSLR A700H User's Guide - Page 116
DPOF setup
 |
UPC - 027242736122
View all Sony DSLR A700H manuals
Add to My Manuals
Save this manual to your list of manuals |
Page 116 highlights
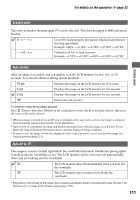
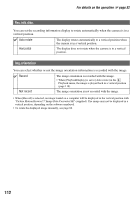
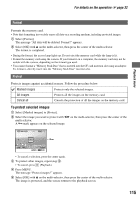
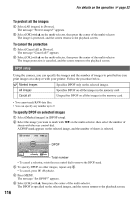
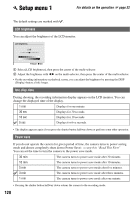
For details on the operation 1 page 32 To protect all the images 1 Select [All images] in [Protect]. The message "Protect images?" appears. 2 Select [OK] with v on the multi-selector, then press the center of the multi-selector. The image is protected, and the screen returns to the playback screen. To cancel the protection 1 Select [Cancel all] in [Protect]. The message "Cancel all?" appears. 2 Select [OK] with v on the multi-selector, then press the center of the multi-selector. The image protection is canceled, and the screen returns to the playback screen. DPOF setup Using the camera, you can specify the images and the number of images to print before you print images at a shop or with your printer. Follow the procedure below. Marked images Specifies DPOF only on the selected images. All images Specifies DPOF on all the images in the memory card. Cancel all Unspecifies DPOF on all the images in the memory card. • You cannot mark RAW data files. • You can specify any number up to 9. To specify DPOF on selected images 1 Select [Marked images] in [DPOF setup]. 2 Select the image you want to mark with b/B on the multi-selector, then select the number of sheets with the rear control dial. A DPOF mark appears on the selected image, and the number of sheets is selected. DPOF Total number • To cancel a selection, rotate the rear control dial to remove the DPOF mark. 3 To specify DPOF on other images, repeat step 2. • To cancel, press (Playback). 4 Press MENU. The message "Set DPOF?" appears. 5 Select [OK] with v, then press the center of the multi-selector. The DPOF is specified on the selected images, and the screen returns to the playback screen. 116
-
 1
1 -
2
-
3
-
4
-
5
-
6
-
7
-
8
-
9
-
10
-
11
-
12
-
13
-
14
-
15
-
16
-
17
-
18
-
19
-
20
-
21
-
22
-
23
-
24
-
25
-
26
-
27
-
28
-
29
-
30
-
31
-
32
-
33
-
34
-
35
-
36
-
37
-
38
-
39
-
40
-
41
-
42
-
43
-
44
-
45
-
46
-
47
-
48
-
49
-
50
-
51
-
52
-
53
-
54
-
55
-
56
-
57
-
58
-
59
-
60
-
61
-
62
-
63
-
64
-
65
-
66
-
67
-
68
-
69
-
70
-
71
-
72
-
73
-
74
-
75
-
76
-
77
-
78
-
79
-
80
-
81
-
82
-
83
-
84
-
85
-
86
-
87
-
88
-
89
-
90
-
91
-
92
-
93
-
94
-
95
-
96
-
97
-
98
-
99
-
100
-
101
-
102
-
103
-
104
-
105
-
106
-
107
-
108
-
109
-
110
-
 111
111 -
 112
112 -
 113
113 -
 114
114 -
 115
115 -
 116
116 -
 117
117 -
 118
118 -
 119
119 -
 120
120 -
 121
121 -
122
-
123
-
124
-
125
-
126
-
127
-
128
-
129
-
130
-
131
-
132
-
133
-
134
-
135
-
136
-
137
-
138
-
139
-
140
-
141
-
142
-
143
-
144
-
145
-
146
-
147
-
148
-
149
-
150
-
151
-
152
-
153
-
154
-
155
-
156
-
157
-
158
-
159
-
160
-
161
-
162
-
163
-
164
-
165
-
166
-
167
-
168
-
169
-
170
-
171
-
172
-
173
-
174
-
175
-
176
-
177
-
178
-
179
 |
 |
