Toshiba 3200 Owners Manual - Page 30
Connectors
 |
View all Toshiba 3200 manuals
Add to My Manuals
Save this manual to your list of manuals |
Page 30 highlights
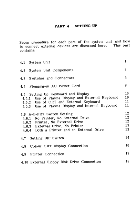
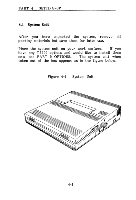
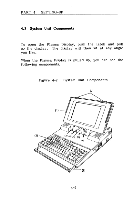
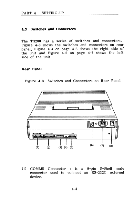
PART 4 SETTING-UP Setup procedure for each part of the system unit and how to connect external devices are discussed here. This part contains: 4.1 System Unit 1 4.2 System Unit Components 2 4.3 Switches and Connectors 4 4.4 Plugging-in AC Power Cord 8 4.5 Setting Up Keyboard and Display 10 4.5.1 Use of Plasma Display and External Keyboard 10 4.5.2 Use of CRT and External Keyboard 11 4.5.3 Use of Plasma Display and Internal Keyboard 11 4.6 A-B-PRT Switch Setting 12 4.6.1 No Printer, No External Drive 12 4.6.2 Printer, No External Drive 12 4.6.3 External Drive, No Printer 13 4.6.4 Both a Printer and an External Drive 13 4.7 Setting DIP Switch 14 4.8 Colour CRT Display Connection 16 4.9 Printer Connection 17 4.10 External Floppy Disk Drive Connection 18
-
 1
1 -
2
-
3
-
4
-
5
-
6
-
7
-
8
-
9
-
10
-
11
-
12
-
13
-
14
-
15
-
16
-
17
-
18
-
19
-
20
-
21
-
22
-
23
-
24
-
 25
25 -
 26
26 -
 27
27 -
 28
28 -
 29
29 -
 30
30 -
 31
31 -
 32
32 -
 33
33 -
 34
34 -
 35
35 -
36
-
37
-
38
-
39
-
40
-
41
-
42
-
43
-
44
-
45
-
46
-
47
-
48
-
49
-
50
-
51
-
52
-
53
-
54
-
55
-
56
-
57
-
58
-
59
-
60
-
61
-
62
-
63
-
64
-
65
-
66
-
67
-
68
-
69
-
70
-
71
-
72
-
73
-
74
-
75
-
76
-
77
-
78
-
79
-
80
-
81
-
82
-
83
-
84
-
85
-
86
-
87
-
88
-
89
-
90
-
91
-
92
-
93
-
94
-
95
-
96
-
97
-
98
-
99
-
100
-
101
-
102
-
103
-
104
-
105
-
106
-
107
-
108
-
109
-
110
-
111
-
112
-
113
-
114
-
115
-
116
-
117
-
118
-
119
-
120
-
121
-
122
-
123
-
124
-
125
-
126
-
127
-
128
-
129
-
130
-
131
-
132
-
133
-
134
-
135
-
136
-
137
-
138
-
139
-
140
-
141
-
142
-
143
-
144
-
145
-
146
-
147
-
148
-
149
-
150
-
151
-
152
-
153
-
154
-
155
-
156
-
157
-
158
-
159
-
160
-
161
-
162
-
163
-
164
-
165
-
166
-
167
-
168
-
169
-
170
-
171
-
172
-
173
-
174
-
175
-
176
-
177
-
178
-
179
-
180
-
181
-
182
-
183
-
184
-
185
-
186
-
187
-
188
-
189
-
190
-
191
-
192
-
193
-
194
-
195
-
196
-
197
-
198
-
199
-
200
-
201
-
202
-
203
-
204
-
205
 |
 |
