Canon MF3240 imageCLASS MF3200 Series Software Guide - Page 100
Add/Delete the Output Size, Simple Mode Toolbar
 |
UPC - 013803059915
View all Canon MF3240 manuals
Add to My Manuals
Save this manual to your list of manuals |
Page 100 highlights
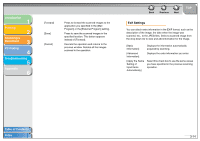
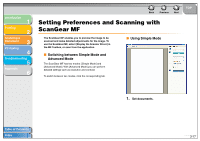
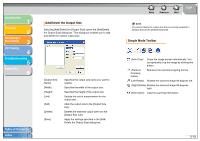
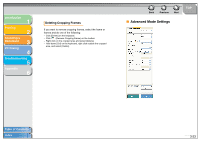
Introduction 1 Printing 2 Scanning a Document 3 PC Faxing 4 Troubleshooting 5 Appendix 6 Table of Contents Index Add/Delete the Output Size Selecting [Add/Delete] for [Output Size] opens the [Add/Delete the Output Size] dialog box. This dialog box enables you to add and delete the custom output size. [Output Size Name] [Width] [Height] [Unit] [Add] [Delete] [Save] Specifies the output size name you want to register. Specifies the width of the output size. Specifies the height of the output size. Selects the unit of measurement for the output size. Adds the output size to the [Output Size List]. Deletes the selected output size from the [Output Size List]. Apply the settings specified in the [Add/ Delete the Output Size] dialog box. Back Previous Next TOP NOTE You cannot delete the output size that is currently selected in [Output Size] of the [Simple Mode] tab. Simple Mode Toolbar (Auto Crop) Crops the image border automatically. You can gradually crop the image by clicking this button. (Remove Cropping Frame) Removes the selected cropping frames. (Left Rotate) Rotates the scanned image 90 degrees left. (Right Rotate) Rotates the scanned image 90 degrees right. (Information) Lists the scanning information. 3-19
-
 1
1 -
2
-
3
-
4
-
5
-
6
-
7
-
8
-
9
-
10
-
11
-
12
-
13
-
14
-
15
-
16
-
17
-
18
-
19
-
20
-
21
-
22
-
23
-
24
-
25
-
26
-
27
-
28
-
29
-
30
-
31
-
32
-
33
-
34
-
35
-
36
-
37
-
38
-
39
-
40
-
41
-
42
-
43
-
44
-
45
-
46
-
47
-
48
-
49
-
50
-
51
-
52
-
53
-
54
-
55
-
56
-
57
-
58
-
59
-
60
-
61
-
62
-
63
-
64
-
65
-
66
-
67
-
68
-
69
-
70
-
71
-
72
-
73
-
74
-
75
-
76
-
77
-
78
-
79
-
80
-
81
-
82
-
83
-
84
-
85
-
86
-
87
-
88
-
89
-
90
-
91
-
92
-
93
-
94
-
 95
95 -
 96
96 -
 97
97 -
 98
98 -
 99
99 -
 100
100 -
 101
101 -
 102
102 -
 103
103 -
 104
104 -
 105
105 -
106
-
107
-
108
-
109
-
110
-
111
-
112
-
113
-
114
-
115
-
116
-
117
-
118
-
119
-
120
-
121
-
122
-
123
-
124
-
125
-
126
-
127
-
128
-
129
-
130
-
131
-
132
-
133
-
134
-
135
-
136
-
137
-
138
-
139
-
140
-
141
-
142
-
143
-
144
-
145
-
146
-
147
-
148
-
149
-
150
-
151
-
152
-
153
-
154
-
155
-
156
-
157
-
158
-
159
-
160
-
161
-
162
-
163
-
164
-
165
-
166
-
167
-
168
-
169
-
170
-
171
-
172
-
173
-
174
-
175
-
176
-
177
-
178
-
179
-
180
-
181
-
182
-
183
-
184
-
185
-
186
-
187
-
188
-
189
-
190
-
191
-
192
-
193
-
194
-
195
-
196
-
197
-
198
-
199
-
200
-
201
-
202
-
203
-
204
-
205
-
206
-
207
-
208
-
209
-
210
-
211
-
212
-
213
-
214
-
215
-
216
-
217
-
218
-
219
-
220
-
221
-
222
-
223
-
224
-
225
-
226
 |
 |
