Canon MF3240 imageCLASS MF3200 Series Software Guide - Page 105
Favorite Settings, Input Settings, Settings, Image Settings and Color Settings
 |
UPC - 013803059915
View all Canon MF3240 manuals
Add to My Manuals
Save this manual to your list of manuals |
Page 105 highlights
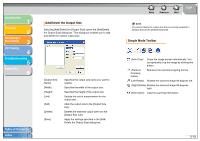
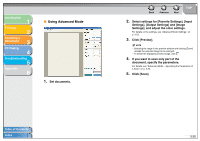
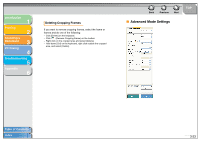
Introduction 1 Printing 2 Scanning a Document 3 PC Faxing 4 Troubleshooting 5 Appendix 6 Favorite Settings Favorite Settings enables you to save a set of settings (Input Settings, Output Settings, Image Settings and Color Settings) made for the focal cropping frame. If there are no cropping frames, settings for the whole preview area are saved. You can also recall the saved settings and apply them to the selected frames or the whole preview area. NOTE The following items cannot be saved in Favorite Settings: - Values of (Width) and (Height) in [Input Settings] and in [Output Settings] - Activation of button (maintaining the proportion of width and height) in [Input Settings] - Value of [%] (Scale) in [Output Settings] [User Defined] [Default] [Add/Delete] When this option is selected, specify a value for each setting. Restores the default settings. The preview image will be cleared. Opens the [Add/Delete Favorite Settings] dialog box. This dialog box enables you to name and register a set of settings for the current preview image. Back Previous Next TOP Input Settings [Original Input Method] Selects where the document is placed. NOTE You can select [Platen Glass] only. [Input Size] Selects the size and orientation of the original document. NOTE If you change this setting after previewing, the preview image will be deleted. Scan Size You can specify the parameters of the scan by entering a value in (Width) and (Height). Click to maintain the current width and height proportions of the image. NOTE - Some applications have a limit to the amount of image data they can receive. If the parameters of a scan contain more than 21,000 x 30,000 pixels, the image will not be received. - When [Output Resolution] is set to [600] dpi, minimum parameters of an image are 96 x 96 pixels. Table of Contents Index 3-24
-
 1
1 -
2
-
3
-
4
-
5
-
6
-
7
-
8
-
9
-
10
-
11
-
12
-
13
-
14
-
15
-
16
-
17
-
18
-
19
-
20
-
21
-
22
-
23
-
24
-
25
-
26
-
27
-
28
-
29
-
30
-
31
-
32
-
33
-
34
-
35
-
36
-
37
-
38
-
39
-
40
-
41
-
42
-
43
-
44
-
45
-
46
-
47
-
48
-
49
-
50
-
51
-
52
-
53
-
54
-
55
-
56
-
57
-
58
-
59
-
60
-
61
-
62
-
63
-
64
-
65
-
66
-
67
-
68
-
69
-
70
-
71
-
72
-
73
-
74
-
75
-
76
-
77
-
78
-
79
-
80
-
81
-
82
-
83
-
84
-
85
-
86
-
87
-
88
-
89
-
90
-
91
-
92
-
93
-
94
-
95
-
96
-
97
-
98
-
99
-
 100
100 -
 101
101 -
 102
102 -
 103
103 -
 104
104 -
 105
105 -
 106
106 -
 107
107 -
 108
108 -
 109
109 -
 110
110 -
111
-
112
-
113
-
114
-
115
-
116
-
117
-
118
-
119
-
120
-
121
-
122
-
123
-
124
-
125
-
126
-
127
-
128
-
129
-
130
-
131
-
132
-
133
-
134
-
135
-
136
-
137
-
138
-
139
-
140
-
141
-
142
-
143
-
144
-
145
-
146
-
147
-
148
-
149
-
150
-
151
-
152
-
153
-
154
-
155
-
156
-
157
-
158
-
159
-
160
-
161
-
162
-
163
-
164
-
165
-
166
-
167
-
168
-
169
-
170
-
171
-
172
-
173
-
174
-
175
-
176
-
177
-
178
-
179
-
180
-
181
-
182
-
183
-
184
-
185
-
186
-
187
-
188
-
189
-
190
-
191
-
192
-
193
-
194
-
195
-
196
-
197
-
198
-
199
-
200
-
201
-
202
-
203
-
204
-
205
-
206
-
207
-
208
-
209
-
210
-
211
-
212
-
213
-
214
-
215
-
216
-
217
-
218
-
219
-
220
-
221
-
222
-
223
-
224
-
225
-
226
 |
 |
