Dell 5330dn Workgroup User's Guide
Dell 5330dn Workgroup Manual
 |
View all Dell 5330dn Workgroup manuals
Add to My Manuals
Save this manual to your list of manuals |
Dell 5330dn Workgroup manual content summary:
- Dell 5330dn Workgroup | User's Guide - Page 1
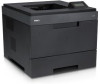
™ 5330dn Mono Laser Printer User's Guide Dell™ 5330dn Mono Laser Printer User's Guide Click the links on the left for information on the features, options, and operation of your printer. For information on other documentation included with your printer, see "Finding Information". To order - Dell 5330dn Workgroup | User's Guide - Page 2
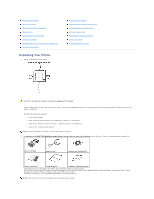
2. In addition to the Dell™ 5330dn Mono Laser Printer, ensure that you have the following items in the box. If there is a missing item, contact Dell: toner cartridge power cord*a drivers and Utilities CD*b owner's manual*C setup diagram product Information Guide a.The appearance of the power - Dell 5330dn Workgroup | User's Guide - Page 3
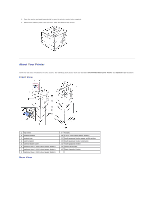
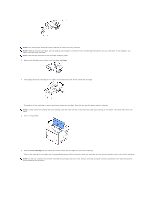
the front, back and sides of the printer. About Your Printer These are the main components of your printer. The following illustrations show the standard Dell 5330dn Mono Laser Printer and optional trays attached: Front View 1 top cover 2 output support 3 output tray 4 control panel 5 control board - Dell 5330dn Workgroup | User's Guide - Page 4
2 duplex unit 3 power receptacle 4 network port 5 parallel port 6 USB port 7 power switch Operator Panel Button Functions Button: Discription: Dual Color LED Shows the Printer status. 4-way Scroll, increasing or decreasing values. Confirms screen selection. Goes back to the upper menu level. - Dell 5330dn Workgroup | User's Guide - Page 5
Enter Menu mode and scroll through the available menus. Stops an operation at any time. Internal Fonts The Dell 5330dn Mono Laser Printer supports PCL and PS fonts. Font Supported List Standard Font List PCL93 scalable fonts, 1 bitmapped fonts. PostScript® Level 3 Emulation: 136 scalable fonts - Dell 5330dn Workgroup | User's Guide - Page 6
top cover. 6. Hold the toner cartridge by the handle and slowly insert the cartridge into the printer opening. Tabs on the sides of the cartridge and corresponding grooves within the printer guide the cartridge into the correct position until it locks firmly into place. NOTE: Do not use excessive - Dell 5330dn Workgroup | User's Guide - Page 7
. CAUTION: Do not use glued paepr or pad note. It could cause damage to the printer. To load a stack of A4 or Letter-sized paper: 1. Pull open tray 1 and remove from the printer. 2. Squeeze the paper width guide and slide it to the desired paper size marked at the bottom of the tray. - Dell 5330dn Workgroup | User's Guide - Page 8
. The printed side should be facing up with an uncurled edge at the top side. If you experience problems with the paper feed, turn the paper around. NOTE: You need to adjust the paper guides when loading paper of a different size. Refer to "Setting the Paper Type" and "For standard, Optional 500 - Dell 5330dn Workgroup | User's Guide - Page 9
7. Insert and slide tray 1 back into the printer. 8. Set the paper type and size. See "Setting the Paper size, depending on country specifications. To change the size, you need to adjust the Paper guides. 1. Push the back plate of the tray outwards completely so that the length of the tray can - Dell 5330dn Workgroup | User's Guide - Page 10
Printer to the Network". USB and Parallel cables are sold separately. Contact Dell to purchase printer cable. Using a USB cable: NOTE: Connecting the printer refer to your computer's User's Guide. Connecting the Printer to the Network 1. Ensure the printer, computer, and any other attached devices - Dell 5330dn Workgroup | User's Guide - Page 11
of menus are available to assist in changing printer settings. The diagram below shows the menus and items available in each menu. NOTE: Some menus may not appear in the display depending on options or models. If so, it is not applicable to your machine. Dell 5330dn Mono Laser Printer Menu Function - Dell 5330dn Workgroup | User's Guide - Page 12
application by selecting type and size. Automatically link paper sources. Any sources containing the same type and size of paper are automatically linked by the printer if you have set the Paper Size and the Paper Type to the correct values. Oficio Folio A4 (non-US) - Dell 5330dn Workgroup | User's Guide - Page 13
MPF Type Select the paper type currently loaded in the multi-purpose feeder. ISO B5 JIS B5 Statement Executive A5 A6 Monarch Env. DL Env. C5 Env. C6 Env. 10 Env. Custom Plain Paper Thick Thicker Thin Colored Preprinted Recycled Transparency Labels Card Stock Bond Letter Head Custom Setup This - Dell 5330dn Workgroup | User's Guide - Page 14
Linking When you select any other value On except Auto from Paper Size/Type and the selected tray Off is empty, you can set the printer automatically to print from other trays. Substitute Size Substitutes the specified paper size if the requested size is not loaded. Nearest Size Off Configure - Dell 5330dn Workgroup | User's Guide - Page 15
120 min Specifies the number of minutes after a print job before the printer goes into Power Save mode. (Your printer may not support the entire range of values.) The factory default Power Save setting depends on your printer model. Print the menu settings page to determine the current Power Save - Dell 5330dn Workgroup | User's Guide - Page 16
Only if HDD is installed) See "Setting Daylight Savings Time". Manual Auto Off Quality Use this menu selection to change settings that to save toner. Finishing Use this menu selection to define how the printer delivers the printed output. Menu selection: Purpose: Values: Copies Set the - Dell 5330dn Workgroup | User's Guide - Page 17
. For example, if you set Copies to 2 and send three pages to print, the printer prints page 1, page 2, page 3, page 1, page 2, page 3. l Off: Prints each example, if you set Copies to 2, and send three pages to print, the printer prints page 1, page 1, page 2, page 2, page 3, page 3. Separator - Dell 5330dn Workgroup | User's Guide - Page 18
hard disk Values: User ID1 User ID2 Job Expiaration Menu selection: Job Expiration Purpose: Limits the amount of time a confidential job stays in the printer before it is deleted. Values: Off 1 hour 4 hour 24 hour 1 week RAM Disk Limit Menu selection: RAM Disk Limit Purpose: Uses up to 96 - Dell 5330dn Workgroup | User's Guide - Page 19
manually set the TCP/IP addresses or receive the addresses from the network. Manual IP Address You can enter IP Address, Subnet Mask, and Gateway manually frame type. Auto 802.2 802.3 Ethernet II SNAP l Auto: Set the printer to select the frame type automatically. l 802.2: Select this value to - Dell 5330dn Workgroup | User's Guide - Page 20
selection: Clean Drum Clean Fuser Supplies Life Purpose: Values: If printouts are blurred, faded, or smeared, correct the problem by printing a cleaning sheet provided with your printer. Printing... Printing... Allows you to check how many pages have been printed and how much toner is left in - Dell 5330dn Workgroup | User's Guide - Page 21
when a PS error occurs. l On: Prints PS 3 emulation errors. If an error occurs, the job stops processing, the error message prints, and the printer flushes the job. l Off: The job is flushed without an indication of any error. Accessing Operator Panel Menus 1. Press Menu ( ). 2. Press Scroll ( to - Dell 5330dn Workgroup | User's Guide - Page 22
5, 10, 15, 30, 60 and 120(minutes). 6. Press Select ( ) to save the selection. 7. Press Cancel ( ) to return to Standby mode. Changing the Font Setting Your printer has preset the font for your region or country. To change the font or to set the font under special conditions, such as the DOS - Dell 5330dn Workgroup | User's Guide - Page 23
- Dell 5330dn Workgroup | User's Guide - Page 24
Guide Troubleshooting: l Clearing Jams in the Paper Tray l Understanding display messages l Solving Problems Express Service Code l Latest drivers for my printer l Answers to technical service and support questions l Documentation for my printer Identify your printer when you use support.dell - Dell 5330dn Workgroup | User's Guide - Page 25
Contact information, order status, warranty, and repair information l Downloads - Drivers l Reference - Printer documentation and product specifications You can access Dell Support at support.dell.com. Select your region on the WELCOME TO DELL SUPPORT page and fill in the requested details to access - Dell 5330dn Workgroup | User's Guide - Page 26
Started Installing the Printer Driver Using the Configurator Configuring Printer Properties Printing a Document Unix Getting Started The supplied Drivers and Utilities CD provides you with Dell's printer driver package for use with a Linux-based computer. Dell's printer driver package provides the - Dell 5330dn Workgroup | User's Guide - Page 27
click Next. 4. Installation starts. When the installation is almost complete, the Add printer wizard appears automatically. Click Next. 5. If you connect your printer using the USB cable, the following window appears. Select your printer from the drop-down list and click Next. OR If you connect your - Dell 5330dn Workgroup | User's Guide - Page 28
Next. 6. If you connect your printer using the USB cable, choose a port you will use with your printer. After choosing the port, click Next. OR If you connect your printer using the network cable, skip to the next step. 7. Select the driver and click Next. 8. Enter your printer's name, location, and - Dell 5330dn Workgroup | User's Guide - Page 29
the Configurator desktop icon and Dell Printer group to the system menu for your convenience. If you have any difficulties, consult the on-screen help available through your system menu or from the driver package windows applications. Uninstalling the Printer Driver 1. When the Administrator Login - Dell 5330dn Workgroup | User's Guide - Page 30
a single I/O channel. After installing the printer driver, the Configurator icon will automatically be created on your desktop. Opening the Configurator 1. Double-click Configurator on the desktop. You can also click the Startup Menu icon, select Dell printer, and then Configurator. 2. Press each - Dell 5330dn Workgroup | User's Guide - Page 31
control buttons: l Refresh: renews the available printers list. l Add Printer: allows you to add a new printer. l Remove Printer: removes the selected printer. l Set as Default: sets the current printer as a default printer. l Stop/Start: stops/starts the printer. l Test: allows you to print a test - Dell 5330dn Workgroup | User's Guide - Page 32
proper access of "consumer" applications to these devices via the single I/O port. The Dell Printer driver package provides an appropriate port-sharing mechanism that is used by Dell printer and scanner drivers. The drivers address their devices via so-called ports. The current status of any port - Dell 5330dn Workgroup | User's Guide - Page 33
Dell LPR window, select the model name of your machine from the Printer list and click Properties. 4. Change the printer close the Properties window. 6. Click OK in the Dell LPR window to start printing. 7. The Printing window of files on the Dell printer device directly from the command line interface using - Dell 5330dn Workgroup | User's Guide - Page 34
click Open. 2. In the Dell LPR window, select your printer from the list and change the printer and print job properties. For details about the properties window, see "Printing a Document". 3. Click OK to start printing. Unix Printer driver packages and installation instructions are available on the - Dell 5330dn Workgroup | User's Guide - Page 35
OS 10.2 ~ 10.5, double-click the Dell 5330dn Installer OSX icon. 7. Enter the password and click OK. 8. Select destination and Continue. 9. Click Install. 10. After the installation is finished, click Quit. Uninstall the printer driver 1. Ensure that you connect your printer to the computer. Turn on - Dell 5330dn Workgroup | User's Guide - Page 36
DELL 5330dn Mono Laser Printer, and click OK. 4. When the setup is completed, your printer icon is created as a desktop printer. 5. Close Chooser. 6. When a message window appears telling you that you have changed your current printer, click OK. Mac OS 10.1 or higher 1. Follow the instructions - Dell 5330dn Workgroup | User's Guide - Page 37
Select does not work properly, select Dell in Print Using and your printer name in Model. For MAC OS 10.5, if Auto Select does not work properly, select Select a driver to use... and your printer name in Print Using. 6. Click Add. Your printer appears on the Printer List and is set as the default - Dell 5330dn Workgroup | User's Guide - Page 38
Direction option. To print a border around each page on the sheet, select the option you want from the Border drop-down list. 5. Click Print. The printer prints the selected number of pages on one side of each page. Duplex Printing You can print on both sides of the paper. Before printing - Dell 5330dn Workgroup | User's Guide - Page 39
install the Optional Output Bin 1, you can choose the exit bin for the printed document. Paper Type Ensure that Paper Type is set to Printer Default. If you load a different type of print material, select the corresponding paper type. Resolution You can select the printing resolution. The higher the - Dell 5330dn Workgroup | User's Guide - Page 40
paper, toner, and dust particles accumulate inside the printer. This buildup causes print quality problems, such as toner specks or smearing. Your printer has a cleaning mode that corrects and prevents these types of problems. CAUTION: Cleaning solvents containing alcohol or other strong substances - Dell 5330dn Workgroup | User's Guide - Page 41
cavity. CAUTION: While cleaning the inside of the printer, be careful not to touch the transfer roller located underneath the toner cartridge. Oil from your fingers can cause print quailty problems. 4. Gently swab the long strip of glass (Laser Scanning Unit) inside the top of the cartridge cavity - Dell 5330dn Workgroup | User's Guide - Page 42
on. Printing a cleaning sheet If you are experiencing blurred, faded, or smeared printouts, you can clear the problem by printing a cleaning sheet provided with your printer. You can print: l OPC cleaning sheet: cleans the OPC drum of the toner cartridge. l Fuser cleaning sheet: cleans the fuser - Dell 5330dn Workgroup | User's Guide - Page 43
the Remaining Toner You can check the level of toner left in the cartridge. If you are having print quality problems, this can help you determine if the problem is caused by low toner. 1. Press Menu ( ). 2. Press Scroll ( to 3. Press Scroll ( to 4. Press Scroll ( to ) to highlight Maintenance - Dell 5330dn Workgroup | User's Guide - Page 44
the cartridge into the printer opening. 5. Tabs on the sides of the cartridge and corresponding grooves within the printer guide the cartridge into the best results, use Dell toner cartridge. If you do not use Dell supplies, Dell does not guarantee print quality and printer reliability. To replace - Dell 5330dn Workgroup | User's Guide - Page 45
out. 7. Hold the toner cartridge by the handle and slowly insert the cartridge into the opening in the printer. 8. Tabs on the sides of the cartridge and corresponding grooves within the printer will guide the cartridge into the correct position until it locks into place completely. NOTE: Do not use - Dell 5330dn Workgroup | User's Guide - Page 46
4. Pull the rear door out of the printer. 5. Pull the duplex unit out of the printer. 6. Push both the levers of the fuser and downward both levers of the fuser. 7. Pull the Fuser unit straight out. - Dell 5330dn Workgroup | User's Guide - Page 47
the new Fuser unit from its bag. 9. Insert Fuser unit completely into the printer. If Fuser unit is not completely inserted, the printer will not operate. Make sure that both levers of the fuser are securely latched onto the printer. 10. Insert the duplex unit into the slot. 11. Put the rear door - Dell 5330dn Workgroup | User's Guide - Page 48
Web browser to launch the Dell Printer Configuration Web Tool and click the toner supplies link. 1. Double-click the Dell Toner Reorder Program icon on your desktop. OR 2. From the Start menu, click Programs DELL DELL Printers DELL 5330dn Mono Laser Printer Dell 5330dn Toner Reorder The Order Toner - Dell 5330dn Workgroup | User's Guide - Page 49
by phone, call the number that appears under the By Telephone heading. OR 3. If your printer is connected to a network, type the printer's IP address in your Web browser to launch the Dell Printer Configuration Web Tool and click the supplies link. NOTE: Refer to the following table to order - Dell 5330dn Workgroup | User's Guide - Page 50
Service please refer to the chapter, "Dell Printer Configuration Web tool." l SetIP Address: A utility program allowing you to select a network interface card and manually /64bits) l Netware OS: 5.x, 6.x (NDS, Bindery Mode), iPrint Support l Mac OS 9.x, 10.1~10.5 l Various Linux OS including Red Hat - Dell 5330dn Workgroup | User's Guide - Page 51
the printer, all supported network protocols are enabled when you power on the printer. If a network protocol is enabled, the printer may . Configuring TCP/IP l Static Addressing: TCP/IP address is assigned manually by the system administrator. l Dynamic Addressing BOOTP/DHCP(default): TCP/IP - Dell 5330dn Workgroup | User's Guide - Page 52
( ). 5. Press Scroll ( to ) to highlight Manual and press Select ( ). 6. The first available menu Dell 5330dn Mono Laser Printer in both wired and wireless network environments, you can install an optional wireless network card. For details of Wireless setup, please refer to "Quick Install Guide - Dell 5330dn Workgroup | User's Guide - Page 53
Options button and press Continue on the next dialog box. 5. Select Share this printer and type a name for the printer. 6. Click Additional Drivers and select the operating systems of all network clients printing to this printer. 7. Click OK. If you are missing files, you are prompted to insert the - Dell 5330dn Workgroup | User's Guide - Page 54
tab, click Print Test Page. Peer-to-Peer If you use the Peer-to-Peer method, the printer driver is fully installed on each client computer. Network clients retain control of driver modifications. The client computer handles the print job processing. 1. In Windows XP (default Start menu): a. Click - Dell 5330dn Workgroup | User's Guide - Page 55
Panel. b. Double-click Printers and Other Hardware. c. Click Printers and Faxes. In Windows XP (Classic Start menu): Click Start Settings Printers and Faxes. In (INCLUDING, BUT NOT LIMITED TO, PROCUREMENT OF SUBSTITUTE GOODS OR SERVICES; LOSS OF USE, DATA, OR PROFITS; OR BUSINESS INTERRUPTION) - Dell 5330dn Workgroup | User's Guide - Page 56
LIABLE FOR ANY DIRECT, INDIRECT, INCIDENTAL, SPECIAL, EXEMPLARY, OR CONSEQUENTIAL DAMAGES (INCLUDING, BUT NOT LIMITED TO, PROCUREMENT OF SUBSTITUTE GOODS OR SERVICES; LOSS OF USE, DATA, OR PROFITS; OR BUSINESS INTERRUPTION) HOWEVER CAUSED AND ON ANY THEORY OF LIABILITY, WHETHER IN CONTRACT, STRICT - Dell 5330dn Workgroup | User's Guide - Page 57
In-line Memory Module (DIMM). The Dell 5330dn Mono Laser Printer has 256 MB of memory. It can be expanded to 768 MB. NOTE: Your printer supports only Dell DIMMs. Order Dell DIMMs online at www.dell.com. 1. Power the printer off and unplug all cables from the printer. 2. Grasp the control board cover - Dell 5330dn Workgroup | User's Guide - Page 58
the Dell 5330dn Mono Laser Printer. 4. Right-click the printer icon and select Properties. 5. Click the Printer tab and select 768 from the Memory Size drop-down list in the Printer Memory section. 6. Click OK. Dell 5330dn Mono Laser Printer PS 1. Ensure the PostScript printer driver is installed - Dell 5330dn Workgroup | User's Guide - Page 59
store additional Fonts and forms. This card can be used to enable the printer to print barcodes and logos. Once the card is installed, the printer automatically detects the additional fonts in the card. Please contact Dell sales team in your region for the USB font card. 1. Remove the new - Dell 5330dn Workgroup | User's Guide - Page 60
optional tay. For information about loading paper in this tray, see "Loading Print Media". 6. Reconnect the power cord and cables and then power on the printer. When you print a document on paper loaded in the optional tray, you must configure the properties of the printer driver. - Dell 5330dn Workgroup | User's Guide - Page 61
of the PostScript printer driver. 1. Click the Widows Start button. 2. For Windows 2000, select Settings and then Printers. For Windows XP/2003, select Printers and Faxes. For Windows Vista, select Control Panel Hardware and Sound Printers. 3. Select Dell 5330dn Mono Laser Printer PS. 4. Right-click - Dell 5330dn Workgroup | User's Guide - Page 62
of the printer driver: 1. Click the Windows Start button. 2. For Windows NT 4.0/2000, select Settings and then Printers. For Windows XP/2003, select Printers and Faxes. For Windows Vista, select Control Panel Hardware and Sound Printers. 3. Select the Dell 5330dn Mono Laser Printer. 4. Right-click - Dell 5330dn Workgroup | User's Guide - Page 63
2. For Windows 2000, select Settings and then Printers. For Windows XP/2003, select Printers and Faxes. For Windows Vista, select Control Panel Hardware and Sound Printers. 3. Select Dell 5330dn Mono Laser Printer PS. 4. Right-click the printer icon and select Properties. 5. Click the Device - Dell 5330dn Workgroup | User's Guide - Page 64
, select Control Panel Hardware and Sound Printers. 3. Select the Dell 5330dn Mono Laser Printer. 4. Right-click the printer icon and select Properties. 5. Click the Printer tab, and check Optional Hard Disk Driver (HDD) 6. Click OK. Dell 5330dn Mono Laser Printer PS 1. Click the Widows Start button - Dell 5330dn Workgroup | User's Guide - Page 65
a job, and specifying the printing of a private job in the printer properties window. Once you have stored files in the hard disk, you highlight Day Light Saving and press Select ( ). 5. Press Scroll ( to ) to highlight Manual and press Select ( ). 6. Enter the correct Start date using Scroll ( to ) - Dell 5330dn Workgroup | User's Guide - Page 66
10 form files in the hard disk and have them printed with your document. First, you need to create a form file using the printer driver. 1. Press Menu ( ). 2. Press Scroll ( to ) to highlight Settings and press Select ( ). 3. Press Scroll ( to ) to highlight Form Menu and press Select ( ). 4. Press - Dell 5330dn Workgroup | User's Guide - Page 67
4. Locate the Output Expander alignment pins and insertion slots on the printer. Align the pins on the output expander with the slots on the printer and place the Output Expander on top. 5. Grasp the Output Expander stacker as shown. 6. Locate the slots on the Output Expander where the stacker will - Dell 5330dn Workgroup | User's Guide - Page 68
Expander stacker down. 10. Reconnect the power cord and cables to the printer and power on the printer. To use Output Expander when you print a document,, you must configure the properties of the printer driver. NOTE: When printing a document using the output expander, remember to configure the - Dell 5330dn Workgroup | User's Guide - Page 69
of the PostScript printer driver. 1. Click the Widows Start button. 2. For Windows 2000, select Settings and then Printers. For Windows XP/2003, select Printers and Faxes. For Windows Vista, select Control Panel Hardware and Sound Printers. 3. Select Dell 5330dn Mono Laser Printer PS. 4. Right-click - Dell 5330dn Workgroup | User's Guide - Page 70
Using the Multi-purpose Feeder" for detailed loading instructions. Paper Characteristics The following paper characteristics affect print edges. Excessive curl can cause paper feeding problems. Curl usually occurs after the paper passes through the printer, where it is exposed to high temperatures. - Dell 5330dn Workgroup | User's Guide - Page 71
stability resulting in fewer paper feeding problems and better print quality. Paper laser printers. Unacceptable Paper The following papers are not recommended for use with the printer Paper Proper paper loading helps prevent jams and ensures trouble-free printing. To help avoid jams or poor print - Dell 5330dn Workgroup | User's Guide - Page 72
Remember to change the paper size setting when using a source that does not support auto size sensing. l Do not remove trays while a job is printing if the preprinted letterhead you have chosen is acceptable for laser printers. Page orientation is important when printing on letterhead. Use - Dell 5330dn Workgroup | User's Guide - Page 73
large quantities. See "Using the Multi-purpose Feeder" for instructions on loading an envelope. When printing on envelopes: l To achieve the best possible print quality, use only high-quality envelopes that are designed for use in laser printers. l For best performance, use envelopes made from 75 - Dell 5330dn Workgroup | User's Guide - Page 74
guide instructions on loading an envelope. NOTE: A combination of high humidity (over 60%) and high printing temperatures may seal the envelopes. Labels Your printer can print on many labels designed for use with laser printers be removed on the leading and driver edge, and replaced with a problems - Dell 5330dn Workgroup | User's Guide - Page 75
guidelines for proper print media storage. These help avoid print media feeding problems and uneven print quality: l For best results, store print media in including the print media sizes available from the paper size menu and supported weights. NOTE: If you use a print media size not listed, - Dell 5330dn Workgroup | User's Guide - Page 76
: Paper Tray supports custom paper from driver's paper tab. Print Media Types and Weights Print Media Type Paper Xerographic or business paper Card stock maximum (long grain)*a Index Bristol Tag Cover Card stock maximum (grain short)*a Index Bristol Tag Cover Transparencies Laser printer - Dell 5330dn Workgroup | User's Guide - Page 77
rear door, open it. NOTE: If paper coming out of the output tray has problems, such as excessive curl, try printing to the rear door. NOTE: To avoid paper Bin Name Capacity Maximum Weight & Media Type Supported How Many Can Be Installed on the Printer? Rear output Tray 100 sheets of 75 g/m2 - Dell 5330dn Workgroup | User's Guide - Page 78
Expander (face down) You can increase the paper output capacity of your printer by installing an Output Expander. An Output Expander holds 600 sheets of plain paper. See "Installing an Output Expander." for installation instructions. NOTE: Paper with a smaller size of width of 3"(76.2mm) and length - Dell 5330dn Workgroup | User's Guide - Page 79
tray 1 or optional trays (both are loaded the same way), follow these instructions . 1. Pull open the paper tray and load paper with the print side be facing up with an uncurled edge at the front. If you experience problems with paper feed, turn the paper around. Note that the print quality is - Dell 5330dn Workgroup | User's Guide - Page 80
cause print-quality problems. 3. Load guides and adjust them to the width of the paper. Do not use force, or the paper will buckle resulting in a paper jam or skew. 5. After loading paper, set the paper type and size for the Multi-purpose Feeder. See "Setting the Paper Type". NOTE: The printer driver - Dell 5330dn Workgroup | User's Guide - Page 81
Squeeze the multi-purpose feeder width guides and adjust them to the width paper jams and print quality problems, load only print materials paper path. l Open rear door of printer when printing on transparencies. If not, the paper handling capacity of your printer, install a High Capacity Feeder. - Dell 5330dn Workgroup | User's Guide - Page 82
To load print media into the High Capacity Feeder, follow these instructions: 1. Open the High Capacity Feeder. 2. Squeeze the paper size guide and slide it to the desire paper size marked. 3. Flex the sheets back and forth to loosen them, and fan them out. Do not fold - Dell 5330dn Workgroup | User's Guide - Page 83
at the front. If you experience problems with paper feed, turn the paper guides are adjusted correctly. When the tray is closed, the operator panel shows the paper size selected. Standard and Optional trays support be the same size and type. The printer automatically links the trays: when one tray - Dell 5330dn Workgroup | User's Guide - Page 84
and there is no A4 paper in any of the input source, then the printer will print on Letter size paper, if available. When the substitute size is Configure MPF menu in the operator Panel. Bypass Mode In this mode, the printer pulls the paper from the Multi-purpose Feeder first unless it is closed or - Dell 5330dn Workgroup | User's Guide - Page 85
printer driver. When you install the Dell software, your printer automatically installs the PCL and PS printer drivers. See "Installing Dell Software for Local Printing". The drivers provided with your printer used. Refer to software application's User's Guide for the exact printing procedure. 1. - Dell 5330dn Workgroup | User's Guide - Page 86
Start button. 2. For Windows NT4.0/2000, select Settings and then Printers. For Windows XP/2003, select Printers and Faxes. For Windows Vista, select Control Panel and Hardware and Sound and Printers. 3. Double-click the Dell 5330dn Mono Laser Printer icon. 4. From the Document menu, click Cancel. - Dell 5330dn Workgroup | User's Guide - Page 87
printer driver you select and your operating system. For details about selecting a printer driver, see "Printing a Document". The User's Guide shows the Printing Preferences window of the printer driver and Printers. c. Point to the Dell 5330dn Mono Laser Printer. d. Right-click on the printer icon. - Dell 5330dn Workgroup | User's Guide - Page 88
first and then the paper tray. Ensure that Type is set to Printer Default. If you load a different type of print material, select 148.5mm) are automatically printed out in the Standard Bin. Allows you to automatically or manually scale your print job on a page. Choose from Same as input size, Fit to - Dell 5330dn Workgroup | User's Guide - Page 89
time it takes to print a document. l Download as Outline: When this option is selected, the driver will download any TrueType fonts used in your document but not already stored(resident) on your printer. If, after printing a document, you find that the fonts did not print correctly, choose Download - Dell 5330dn Workgroup | User's Guide - Page 90
as a form file (C:\FORMOVER\*.FOM). Once this option is selected, the printer driver requires the file name and destination path each time you print. If than two copies. The printer prints the first copy, then waits so that you can check the printing if there is any problem. After checking, you can - Dell 5330dn Workgroup | User's Guide - Page 91
select it from the Favorites drop-down list. To delete a favorite setting item, select it from the list and click Delete. To restore the printer driver's default settings, select Printer Default from the list. Using Help Your printer has a help screen that can be activated by the Help button in the - Dell 5330dn Workgroup | User's Guide - Page 92
1. To change the print settings from your software application, go to printer properties. 2. From the Paper tab, select Reduce/Enlarge on the document. 1. To change the print settings from your software application, go to printer properties. 2. From the Paper tab, select Fit to Page on the Output - Dell 5330dn Workgroup | User's Guide - Page 93
tab and select the paper source, size and type. 5. Click OK and print the document. Complete the poster by reconstructing the results. Printing Booklets This printer feature allows you to print your document on both sides of the paper and arranges the pages so that the paper can be folded in - Dell 5330dn Workgroup | User's Guide - Page 94
select the desired binding option. 4. Click the Paper tab and select the paper source, size and type. 5. Click OK and print the document. The printer prints on both sides of paper. Using Watermarks The Watermark option allows you to print text over an existing document. For example, you may want - Dell 5330dn Workgroup | User's Guide - Page 95
, select No Watermark on the Watermark drop-down list. Editing a Watermark 1. To change the print settings from your software application, go to printer properties. 2. Click the Other Options tab and click Edit in the Watermark section. The Edit Watermarks window appears. 3. Select the watermark you - Dell 5330dn Workgroup | User's Guide - Page 96
when printed as an overlay. If needed, save the file for later use. 2. To change the print settings from your software application, go to printer properties. 3. Click the Other Options tab and click Edit in the Overlay section. 4. In the Edit Overlays window, click Create Overlay. 5. In the Create - Dell 5330dn Workgroup | User's Guide - Page 97
will print with the overlay. 1. Create or open the document you want to print. 2. To change the print settings from your software application, go to printer properties. 3. Click the Other Options tab. 4. Select the overlay you want to print from the Overlay drop-down list box. 5. If the overlay file - Dell 5330dn Workgroup | User's Guide - Page 98
in Hard Disk are deleted only after they are printed or deleted by administrator. Printing a Confidential Job When you send a confidential job to the printer, you must enter a personal identification number (PIN) from the driver. The PIN must be four digits using the numbers 0-9. The job is held in - Dell 5330dn Workgroup | User's Guide - Page 99
it from the stored Jobs menu Stored Print If you send a Stored Print job, the printer does not print the job immediately. It stores the job in hard disk so you can without a PIN (Public) which you can choose from the driver. NOTE: Delayed and Stored Print are supported only with Hard disk options. - Dell 5330dn Workgroup | User's Guide - Page 100
NT 4.0 is supported only PCL 6 Driver. Installing Software in Windows Before you begin, ensure that your system meets the minimum requirements. NOTE: For Windows 2000/2003/XP, the system administrator should install Dell software. Supported Operating Systems l Windows NT 4.0*a(Service pack 6 or - Dell 5330dn Workgroup | User's Guide - Page 101
. NOTE: If the printer is not connected to your computer when you install the Drivers and Utilities CD, the No Printer Found screen appears. Follow the instructions to install the software. 4. Select Typical Installation to install the User's Guide and the printer drivers as the default settings - Dell 5330dn Workgroup | User's Guide - Page 102
the legacy IP address 192.0.0192 or local link address 169.254.xxx.xxx. To configure the IP address manually, refer to the Drivers and Utilities CD. Print the Configuration page of the printer to see the current network configuration and MAC address. You will need this information to configure the - Dell 5330dn Workgroup | User's Guide - Page 103
software on each network computer. You can install the Dell software on the network computers locally or remotely. NOTE: You need administrative access to install printer drivers on the network computers. 1. Ensure that the printer is connected to your network and powered on. All applications should - Dell 5330dn Workgroup | User's Guide - Page 104
using the Drivers and Utilities CD or the Windows uninstall option. NOTE: Close all programs before uninstalling software. Restart your computer after uninstalling software. 1. From the Start menu, select Programs DELL DELL Printers DELL 5330dn Mono Laser Printer Dell Printer Software Uninstall - Dell 5330dn Workgroup | User's Guide - Page 105
replacement toner cartridges online. See "Ordering Supplies". l User's Guide: Allows you to view the DELL 5330dn Mono Laser Printer User's Guide. Printer Settings Utility When you install the Dell software, the Printer Settings Utility is automatically installed. For information about installing the - Dell 5330dn Workgroup | User's Guide - Page 106
screen instructions to complete the firmware update. Dell Toner Re-order application To order replacement toner cartridges or supplies from Dell: 1. Double-click the Dell Toner Reorder Program icon on your desktop. OR Click Start Programs DELL DELL Printers DELL 5330dn Mono Laser Printer Dell 5330dn - Dell 5330dn Workgroup | User's Guide - Page 107
. 1. Connect the network cable to your machine. 2. Print the Configuration page of the printer to see the current network configuration and MAC address. 3. Click Start Programs DELL DELL Printers DELL 5330dn Mono Laser Printer Set IP Address. 4. Click in the SetIP Address window to open the TCP/IP - Dell 5330dn Workgroup | User's Guide - Page 108
Toner cartridge life*b Standard cartridge: 10,000 pages High-yield cartridge: 20,000 pages Printer dimension (W x D x H) Random Access Memory (RAM) Weight 16.3 x 18.7 x 14.8 in. (415 x 476 x 377 mm) Dell 5330dn Mono Laser Printer: 256 MB (Max. 768 MB) Net: 20.83 Kg (including toner cartridge), 18 - Dell 5330dn Workgroup | User's Guide - Page 109
Premature wear on the printer CAUTION: Using paper that does not meet these specifications may cause problems requiring repairs. These repairs are not covered by the Dell warranty or service agreements. NOTE: Some paper may meet all of the guidelines in this guide and still not produce satisfactory - Dell 5330dn Workgroup | User's Guide - Page 110
75 g/m2 bond (20 lb) paper for the multi-purpose feeder a. The printer supports a wide range of media sizes. b. Capacity may vary depending on print rear door. l Use long-grain paper. Jamming, damage to printer Problems with feeding Cutouts or perforations Ragged edges Do not use paper with - Dell 5330dn Workgroup | User's Guide - Page 111
or too humid. l The best way to store an opened ream of paper is to rewrap it tightly in its moisture-proof wrapping. If the printer environment is subject to extremes, unwrap only the amount of paper to be used during the day's operation to prevent unwanted moisture changes. - Dell 5330dn Workgroup | User's Guide - Page 112
Troubleshooting Clearing Jams in the Paper Tray Understanding Display Messages Solving Problems Clearing Jams in the Paper Tray When a paper jam occurs, Paper Jam appears on the display. Refer to the table below to locate and clear - Dell 5330dn Workgroup | User's Guide - Page 113
see "Around the toner cartridge". 3. Insert paper tray 1 into the printer until it snaps into place. Printing automatically resumes. Paper Feed Jam ( optional trays) 1. Pull optional tray open. 2. Remove the jammed paper from the printer. If you cannot see the paper in this area or the paper does not - Dell 5330dn Workgroup | User's Guide - Page 114
the cartridge to avoid touching this area. 2. Carefully lift up the feed guide. 3. Remove the jammed paper by gently pulling it straight out. If information, see "In the paper exit area". 4. Flip down the feed guide. 5. Reinsert the toner cartridge and close the top cover. Printing automatically - Dell 5330dn Workgroup | User's Guide - Page 115
In the Paper Exit Area 1. Open and close the top cover. The paper is automatically ejected from the printer. 2. Gently pull the paper out of the output tray. 3. If you cannot see the paper in this area or if there is any resistance removing - Dell 5330dn Workgroup | User's Guide - Page 116
to original position and insert the rear door connector in the printer. 10. Return the pressure levers to their original position and inserted correctly. Duplex jam 0 1. Pull the duplex unit out of the printer. 2. Locate the paper and remove it. 3. Insert the duplex unit into the slot. 4. Open - Dell 5330dn Workgroup | User's Guide - Page 117
procedures in "Loading Print Media in the Paper Tray". Ensure that the adjustable guides are correctly positioned. l Do not overload the paper tray. Ensure that the a problem in your printer system. Unplug the power cord and plug it back in. If the problem persists, please call for service. Close - Dell 5330dn Workgroup | User's Guide - Page 118
plug it back in. If the problem persists, please call for service. A problem has occurred in the LSU(Laser Scanning Unit). Unplug the power cord and plug it back in. If the problem persists, please call for service. There is a problem in the cooling fan of the printer. Open and then close the - Dell 5330dn Workgroup | User's Guide - Page 119
Printing Problems Condition Possible cause The printer does not The printer is not receiving power. print. The printer is not selected as the default printer. Suggested solutions Check the power cord connections. Check the power switch and the power source. Select DELL 5330dn Mono Laser Printer - Dell 5330dn Workgroup | User's Guide - Page 120
size in the printer driver settings matches the paper in the tray. The printer prints, The printer cable is service representative. Print the document by selecting Download as Bit Image in the Advanced Options window of the Graphic properties. Printing Quality Problems The inside of the printer - Dell 5330dn Workgroup | User's Guide - Page 121
the Toner Cartridge". l Parts of the printer may have toner on them. If the defects occur on the back of the page, the problem will likely correct itself after a few more pages. l The fusing assembly may be damaged. Contact a service representative. Background scatter Background scatter results - Dell 5330dn Workgroup | User's Guide - Page 122
". l Ensure the paper or other material is loaded correctly and the guides are not too tight or too loose against the paper stack. Curl "Replacing the Toner Cartridge". l If the problem persists, the printer may require repair. Contact a service representative. Curl If the printed paper is curled - Dell 5330dn Workgroup | User's Guide - Page 123
of the Device option to Installed. Common Linux Problems Condition The printer doesn't print. Suggested solutions l Ensure that the printer driver is installed in your system. Open Unified Driver Configurator and switch to the Printers tab in Printers configuration window to look at the list of - Dell 5330dn Workgroup | User's Guide - Page 124
The printer does not print a document from Acrobat Reader. You should change disappeared from the spooler in Mac OS 10.3.2. Update your Mac OS to OS 10.3.3. or higher. The printer does not print a document from Illustrator on IPP printing. Change the Data type option in the Adobe Illustrator - Dell 5330dn Workgroup | User's Guide - Page 125
supplies link on your Web browser. NOTE: The Dell Printer Configuration Web Tool is only available when the printer is connected to a network. To launch the Dell Printer Configuration Web Tool, type your network printer's IP address in your Web browser. If you do not know the IP address of your - Dell 5330dn Workgroup | User's Guide - Page 126
Keep track of printing trends such as paper usage and types of jobs being printed. Set Password Dell Printer Web configuration Tool (EWS) can be locked by setting a password. When any of the printer settings are changed using this tool, it will prompt for Username and Password. The Username is - Dell 5330dn Workgroup | User's Guide - Page 127
Wireless can be setup using the Dell Web configuration tool. Click on the Wireless link to change the settings. For details of Wireless setup, please refer to Quick Install Guide for the wireless network interface card. Online Help Click Help to visit the Dell website for printer troubleshooting.
-
 1
1 -
 2
2 -
 3
3 -
 4
4 -
 5
5 -
 6
6 -
 7
7 -
8
-
9
-
10
-
11
-
12
-
13
-
14
-
15
-
16
-
17
-
18
-
19
-
20
-
21
-
22
-
23
-
24
-
25
-
26
-
27
-
28
-
29
-
30
-
31
-
32
-
33
-
34
-
35
-
36
-
37
-
38
-
39
-
40
-
41
-
42
-
43
-
44
-
45
-
46
-
47
-
48
-
49
-
50
-
51
-
52
-
53
-
54
-
55
-
56
-
57
-
58
-
59
-
60
-
61
-
62
-
63
-
64
-
65
-
66
-
67
-
68
-
69
-
70
-
71
-
72
-
73
-
74
-
75
-
76
-
77
-
78
-
79
-
80
-
81
-
82
-
83
-
84
-
85
-
86
-
87
-
88
-
89
-
90
-
91
-
92
-
93
-
94
-
95
-
96
-
97
-
98
-
99
-
100
-
101
-
102
-
103
-
104
-
105
-
106
-
107
-
108
-
109
-
110
-
111
-
112
-
113
-
114
-
115
-
116
-
117
-
118
-
119
-
120
-
121
-
122
-
123
-
124
-
125
-
126
-
127
 |
 |
™
5330dn Mono Laser Printer User's Guide
Dell
™
5330dn Mono Laser Printer User's Guide
Click the links on the left for information on the features, options, and operation of your printer. For information on other documentation included with your
printer, see
"Finding Information"
.
To order replacement toner cartridges or supplies from Dell:
1.
Double-click the Dell Toner Reorder Program icon on your desktop. (Windows only)
OR
2.
Order Dell printer supplies at
www.dell.com/supplies
or by phone.
Contacting Dell
Information in this document is subject to change without notice.
2008
Dell
Inc. All rights reserved.
Reproduction in any manner whatsoever without the written permission of Dell Inc. is strictly forbidden.
Trademarks used in this text:
Dell
, the
DELL
logo and
Dell Toner Management System
are trademarks of Dell Inc.;
Microsoft, Windows,
and
Windows Vista
are
either trademarks or registered trademarks of Microsoft Corporation;
Macintosh, MacOS, EtherTalk
and
TrueType
are trademarks of Apple Inc., registered in the
NOTE:
If you do not have an active Internet connection, you can find contact information on your purchase invoice, packing slip, bill, or Dell product
catalog. Dell provides several online and telephone-based support and service options. Availability varies by country and product, and some services
may not be available in your area. To contact Dell for sales, technical support, or customer service issues:
1. Visit www.support.dell.com.
2. Verify your country or region in the choose A Country/Region drop-down menu at the bottom of the page.
3. Click Contact Us on the left side of the page.
4. Select the appropriate service or support link based on your need.
5. Choose the method of contacting Dell that is convenient for you.
NOTE:
A
NOTE
indicates important information that helps you make better use of your printerprinter.
NOTICE:
A
NOTICE
indicates either potential damage to hardware or loss of data and tells you how to avoid the problem.
CAUTION:
A CAUTION indicates a potential for property damage, personal injury, or death.
U.S. and other countries;
Linux
is a trademark or registered trademark of Linus Torvalds in the United States and other countries;
The Common UNIX Printing
System, CUPS,
and the
CUPS
logo are the trademarks of Easy Software Products;
ENERGY STAR
is a registered trademark of the U.S. Environmental Protection
Agency. As an ENERGY STAR Partner, Dell Inc. has determined that this product meets the ENERGY STAR guidelines for energy efficiency.
PCL is US registered trademark of Hewlett-Packard Company.
Sun
,
Sun
Microsystems
,
Solaris
, and the
Solaris
logo are trademarks or registered trademarks of Sun Microsystems, Inc. in the U.S. and other countries, and are
under license.
SUSE
is a registered trademark of Novell, Inc. in the United States and other countries.
Red Hat
is a registered trademark of Red Hat, Inc. in the United States and other countires.
Adobe and PhotoShop are registered trademarks of Adobe Systems Incorporated.
Other trademarks and trade names may be used in this document to refer to either the entities claiming the marks and names of their products. Dell Inc.
disclaims any proprietary interest in trademarks and trade names other than its own.