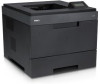
Dell 5330dn Workgroup User's Guide - Page 51
Printing a Network Information Setting Network Protocols, Configuring TCP/IP
 |
View all Dell 5330dn Workgroup manuals
Add to My Manuals
Save this manual to your list of manuals |
Page 51 highlights
Bonjour(Rendezvous), DDNS, WINS, TCP (Port 2000), LPR(Port 515), Raw(Port 9100), IPP Port Printing/Secure-IPP, SNMPv1/2/3, HTTP/HTTPs, Telnet, SMTP(E-mail Notification). Printing a Network Information Page The Network Information page shows how the network interface card on your printer is configured. The default settings are suitable for most applications. To print a network information page: 1. Press Menu ( ). 2. Press Scroll ( to 3. Press Scroll ( to ) to highlight Reports and press Select ( ). ) to highlight Network Settings and press Select ( ). Setting Network Protocols When you first install the printer, all supported network protocols are enabled when you power on the printer. If a network protocol is enabled, the printer may actively transmit on the network even when the protocol is not in use. This may slightly increase network traffic. To eliminate unnecessary traffic, disable unused protocols. 1. Press Menu ( ). 2. Press Scroll ( to ) to highlight Network I/O Ports and press Select ( ). 3. Press Scroll ( to ) until you see the desired protocol and press Select ( ). 4. If you selected Ethernet Speed, select a network speed. If you selected TCP/IP(IPv4) or TCP/IP(IPv6), assign a TCP/IP address. For details, see "Configuring TCP/IP". If you selected AppleTalk. a. Press Scroll ( to b. Press Scroll ( to ) to highlight Activate and press Select ( ). ) to change the setting to On (enable) or Off (disable). If you selected Wireless, assign a wireless network environment. For details, see "Configuring TCP/IP". NOTE: When you set AppleTalk, you must restart your machine to apply new settings. 5. Press Select ( ) to save the selection. Configuring TCP/IP l Static Addressing: TCP/IP address is assigned manually by the system administrator. l Dynamic Addressing BOOTP/DHCP(default): TCP/IP address is assigned automatically by a DHCP or BOOTP server on your network. Setting TCP/IP To enter the TCP/IP address from your printer's operator panel, take the following steps: 1. Press Menu ( ). 2. Press Scroll ( to 3. Press Scroll ( to ) to highlight Network I/O Ports and press Select ( ). ) to select the network protocol you want to use and press Select ( ). If you selected TCP/IP(IPv4): a. Press Scroll ( to b. Press Scroll ( to ) to highlight IPv4 Activate and press Select ( ). ) to change the setting to On (enable) or Off (disable). If you selected TCP/IP(IPv6): a. Press Scroll ( to ) to highlight IPv6 Activate and press Select ( ). b. Press Scroll ( to ) to change the setting to On (enable) or Off (disable). d. Press Cancel ( ) to return to Standby mode. Static Addressing
-
 1
1 -
2
-
3
-
4
-
5
-
6
-
7
-
8
-
9
-
10
-
11
-
12
-
13
-
14
-
15
-
16
-
17
-
18
-
19
-
20
-
21
-
22
-
23
-
24
-
25
-
26
-
27
-
28
-
29
-
30
-
31
-
32
-
33
-
34
-
35
-
36
-
37
-
38
-
39
-
40
-
41
-
42
-
43
-
44
-
45
-
 46
46 -
 47
47 -
 48
48 -
 49
49 -
 50
50 -
 51
51 -
 52
52 -
 53
53 -
 54
54 -
 55
55 -
 56
56 -
57
-
58
-
59
-
60
-
61
-
62
-
63
-
64
-
65
-
66
-
67
-
68
-
69
-
70
-
71
-
72
-
73
-
74
-
75
-
76
-
77
-
78
-
79
-
80
-
81
-
82
-
83
-
84
-
85
-
86
-
87
-
88
-
89
-
90
-
91
-
92
-
93
-
94
-
95
-
96
-
97
-
98
-
99
-
100
-
101
-
102
-
103
-
104
-
105
-
106
-
107
-
108
-
109
-
110
-
111
-
112
-
113
-
114
-
115
-
116
-
117
-
118
-
119
-
120
-
121
-
122
-
123
-
124
-
125
-
126
-
127
 |
 |