Dell 5330dn Workgroup User's Guide - Page 44
Replacing the Toner Cartridge
 |
View all Dell 5330dn Workgroup manuals
Add to My Manuals
Save this manual to your list of manuals |
Page 44 highlights
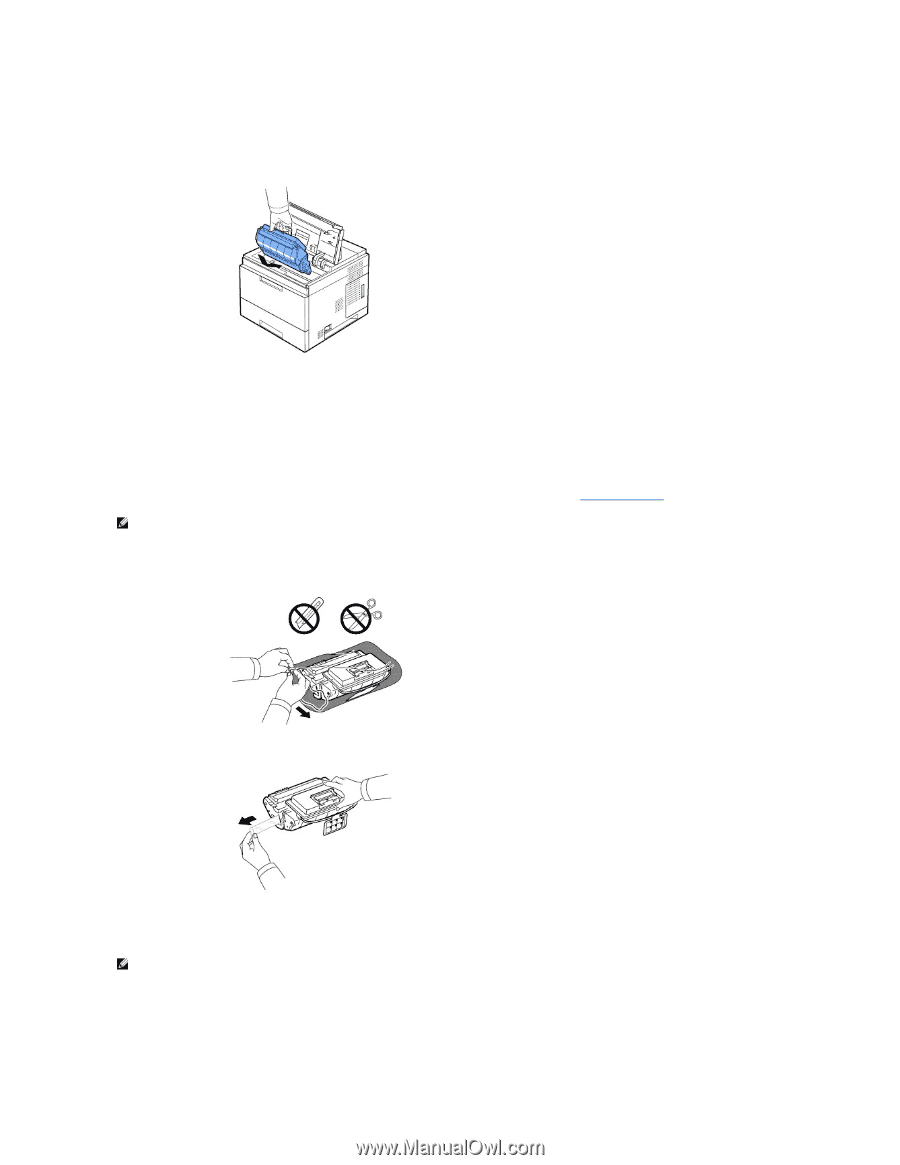
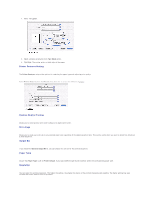
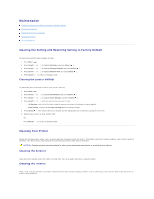
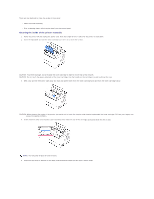
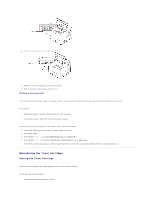
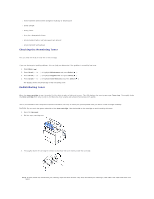
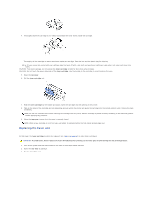
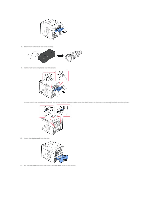
4. Hold the toner cartridge by the handle and slowly insert the cartridge into the printer opening. 5. Tabs on the sides of the cartridge and corresponding grooves within the printer guide the cartridge into the correct position until it locks into place completely. NOTE: Do not use excessive force when inserting the cartridge into the printer. Ensure cartridge is placed correctly according to the tabs and grooves before applying any pressure. 6. Close the top cover. Ensure that the cover is surely closed. Replacing the Toner Cartridge At this stage, the toner cartridge needs to be replaced. Order an extra toner cartridge to have on hand when the current cartridge no longer prints satisfactorily. See "Ordering Supplies" to order toner cartridges. NOTE: For best results, use Dell toner cartridge. If you do not use Dell supplies, Dell does not guarantee print quality and printer reliability. To replace the toner cartridge: 1. Remove the new toner cartridge from its bag. 2. Locate the sealing tape at the end of the toner cartridge. Carefully pull the tape completely out of the cartridge and discard it. NOTE: The sealing tape should be longer than 60 cm when correctly removed. NOTE: Holding the toner cartridge, pull the sealing tape straight to remove it from the cartridge. Be careful not to cut the tape. If this happens, you cannot use the toner cartridge. NOTE: Refer to the helpful pictures on the cartridge wrapping paper. 3. Remove the flexible plastic holder out of the toner cartridge.
-
 1
1 -
2
-
3
-
4
-
5
-
6
-
7
-
8
-
9
-
10
-
11
-
12
-
13
-
14
-
15
-
16
-
17
-
18
-
19
-
20
-
21
-
22
-
23
-
24
-
25
-
26
-
27
-
28
-
29
-
30
-
31
-
32
-
33
-
34
-
35
-
36
-
37
-
38
-
 39
39 -
 40
40 -
 41
41 -
 42
42 -
 43
43 -
 44
44 -
 45
45 -
 46
46 -
 47
47 -
 48
48 -
 49
49 -
50
-
51
-
52
-
53
-
54
-
55
-
56
-
57
-
58
-
59
-
60
-
61
-
62
-
63
-
64
-
65
-
66
-
67
-
68
-
69
-
70
-
71
-
72
-
73
-
74
-
75
-
76
-
77
-
78
-
79
-
80
-
81
-
82
-
83
-
84
-
85
-
86
-
87
-
88
-
89
-
90
-
91
-
92
-
93
-
94
-
95
-
96
-
97
-
98
-
99
-
100
-
101
-
102
-
103
-
104
-
105
-
106
-
107
-
108
-
109
-
110
-
111
-
112
-
113
-
114
-
115
-
116
-
117
-
118
-
119
-
120
-
121
-
122
-
123
-
124
-
125
-
126
-
127
 |
 |