Dell 5330dn Workgroup User's Guide - Page 27
root@localhost root]#cd /mnt/cdrom/Linux
 |
View all Dell 5330dn Workgroup manuals
Add to My Manuals
Save this manual to your list of manuals |
Page 27 highlights
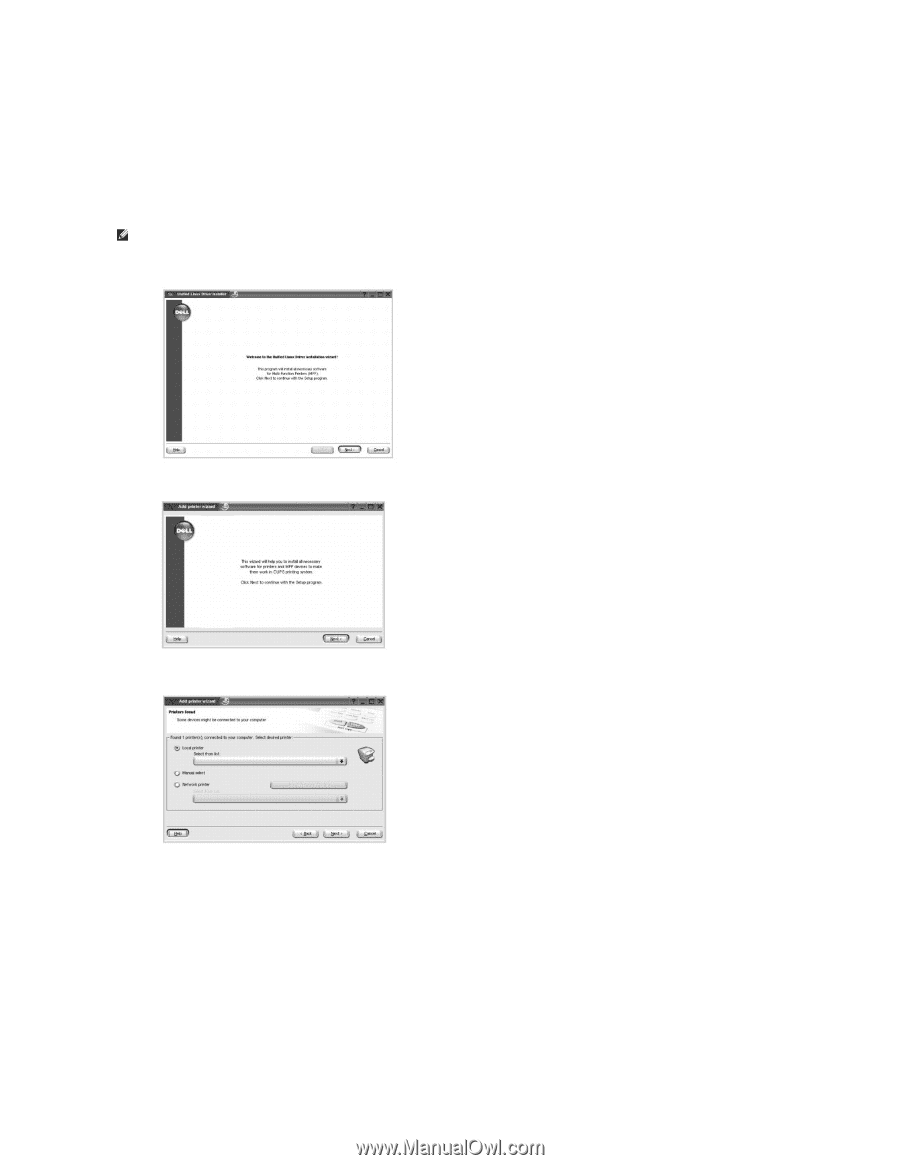
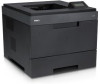
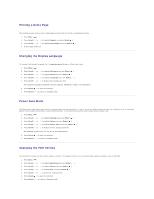
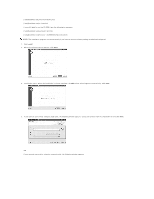
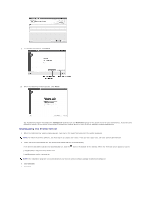
[root@localhost root]#cd /mnt/cdrom/Linux [root@localhost root]#./install.sh If you still failed to run the CD-ROM, type the following in sequence: [root@localhost root]#umount /dev/hdc [root@localhost root]#mount -t iso9660/dev/hdc/mnt/cdrom NOTE: The installation program runs automatically if you have an autorun software package installed and configured. 2. Click Install. 3. When the welcome screen appears, click Next. 4. Installation starts. When the installation is almost complete, the Add printer wizard appears automatically. Click Next. 5. If you connect your printer using the USB cable, the following window appears. Select your printer from the drop-down list and click Next. OR If you connect your printer using the network cable, the following window appears.
-
 1
1 -
2
-
3
-
4
-
5
-
6
-
7
-
8
-
9
-
10
-
11
-
12
-
13
-
14
-
15
-
16
-
17
-
18
-
19
-
20
-
21
-
 22
22 -
 23
23 -
 24
24 -
 25
25 -
 26
26 -
 27
27 -
 28
28 -
 29
29 -
 30
30 -
 31
31 -
 32
32 -
33
-
34
-
35
-
36
-
37
-
38
-
39
-
40
-
41
-
42
-
43
-
44
-
45
-
46
-
47
-
48
-
49
-
50
-
51
-
52
-
53
-
54
-
55
-
56
-
57
-
58
-
59
-
60
-
61
-
62
-
63
-
64
-
65
-
66
-
67
-
68
-
69
-
70
-
71
-
72
-
73
-
74
-
75
-
76
-
77
-
78
-
79
-
80
-
81
-
82
-
83
-
84
-
85
-
86
-
87
-
88
-
89
-
90
-
91
-
92
-
93
-
94
-
95
-
96
-
97
-
98
-
99
-
100
-
101
-
102
-
103
-
104
-
105
-
106
-
107
-
108
-
109
-
110
-
111
-
112
-
113
-
114
-
115
-
116
-
117
-
118
-
119
-
120
-
121
-
122
-
123
-
124
-
125
-
126
-
127
 |
 |