Epson Expression 800 User Setup Information - Page 37
Scanning Tips
 |
View all Epson Expression 800 manuals
Add to My Manuals
Save this manual to your list of manuals |
Page 37 highlights
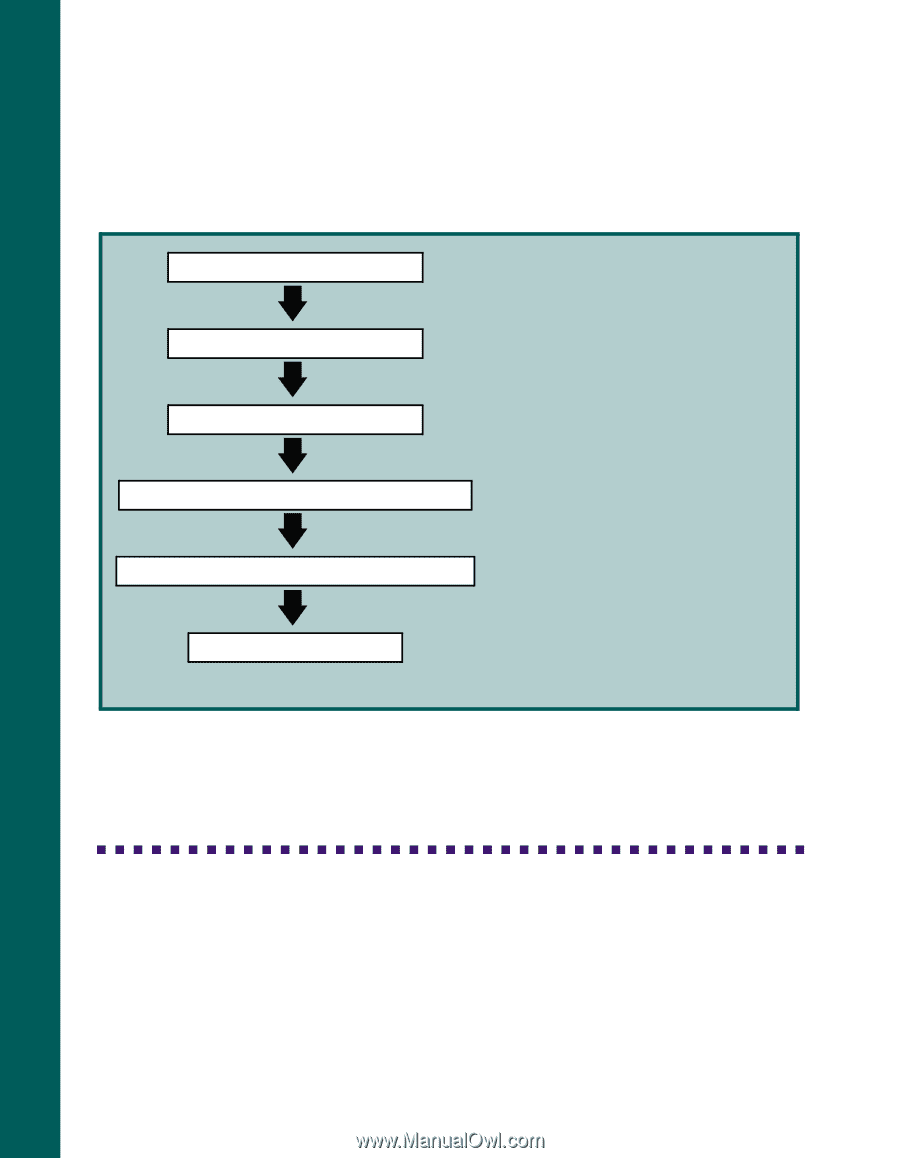
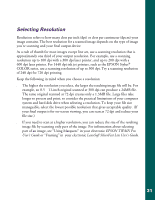
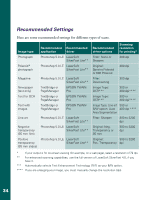
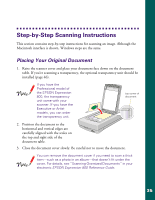
As with most projects, planning ahead can save you time. Scanning is a multi-step process, as shown in the following chart. Select an image to scan Open your host application Select your scanner source The type of image you're scanning determines what input setting you select in your software. This is the software application where you'll import your scanned image. This is the scanner driver you're using. Your scanner comes with EPSON TWAIN Pro and LaserSoft SilverFast Lite.* Determine what the final output will be How you're going to use your scanned image determines some of the settings you select. Select the correct settings for your scan You can scan part of your image, adjust colors, and scale your image. Scan your image Once you scan, your image appears in your application window for use in your document. *If you have the Artist or Professional model, your scanner also comes with the full version of LaserSoft SilverFast 4.0. Scanning Tips Getting the best scan possible depends on several factors, including the quality of your original and the resolution you select. The better your original is, the better your scan will be. While you can make some corrections in your scanning software, you'll need to do major photo retouching in a program such as Adobe Photoshop to correct or mask problems such as a coffee stain on the original image. 30
-
 1
1 -
2
-
3
-
4
-
5
-
6
-
7
-
8
-
9
-
10
-
11
-
12
-
13
-
14
-
15
-
16
-
17
-
18
-
19
-
20
-
21
-
22
-
23
-
24
-
25
-
26
-
27
-
28
-
29
-
30
-
31
-
 32
32 -
 33
33 -
 34
34 -
 35
35 -
 36
36 -
 37
37 -
 38
38 -
 39
39 -
 40
40 -
 41
41 -
 42
42 -
43
-
44
-
45
-
46
-
47
-
48
-
49
-
50
-
51
-
52
-
53
-
54
-
55
-
56
-
57
-
58
-
59
-
60
-
61
-
62
-
63
-
64
-
65
-
66
-
67
-
68
-
69
-
70
-
71
-
72
-
73
-
74
-
75
-
76
-
77
-
78
-
79
-
80
-
81
 |
 |