Epson Expression 800 User Setup Information - Page 44
The EPSON TWAIN Pro, In Windows, select - flatbed scanner
 |
View all Epson Expression 800 manuals
Add to My Manuals
Save this manual to your list of manuals |
Page 44 highlights
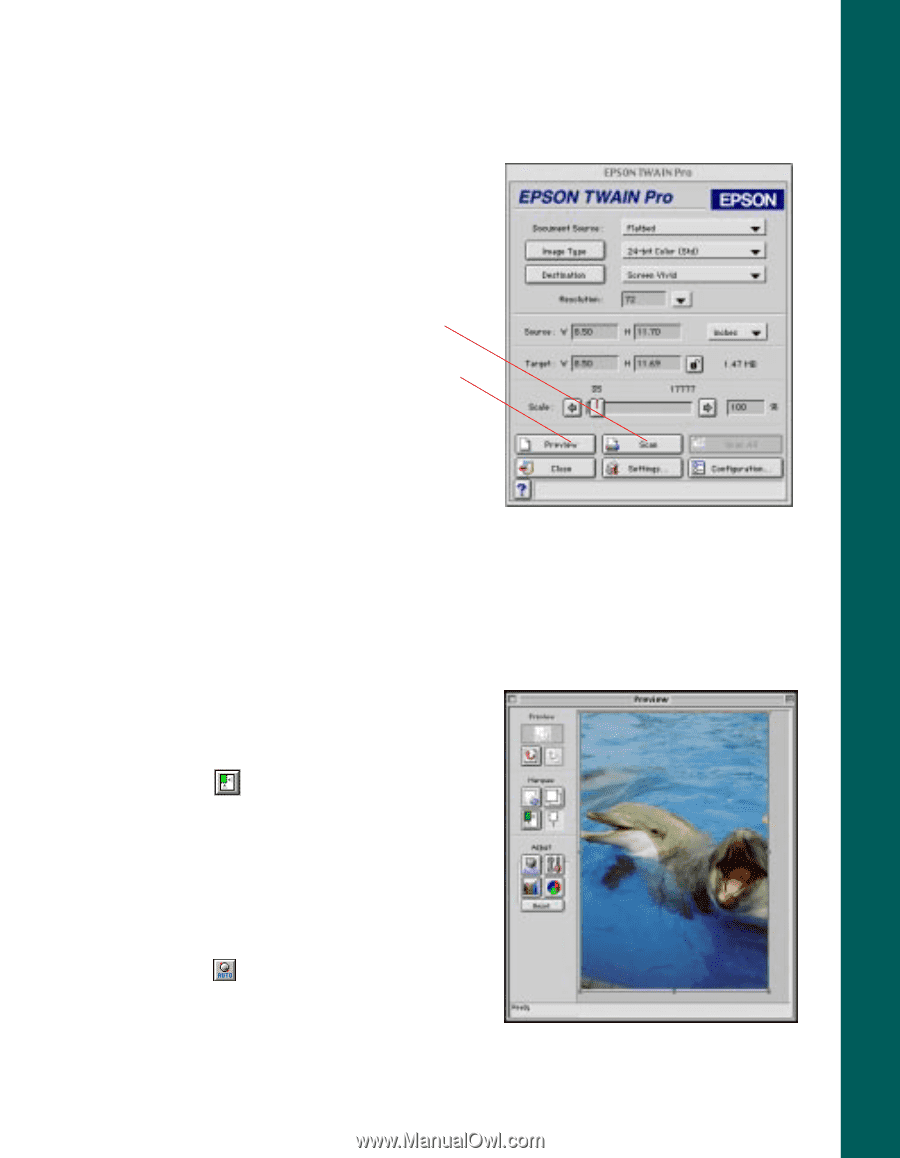
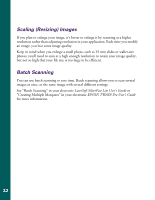
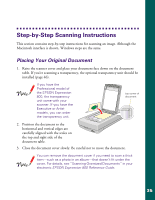
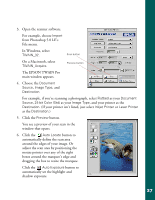
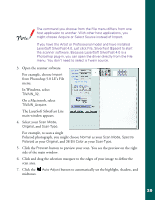
3. Open the scanner software. For example, choose Import from Photoshop 5.0 LE's File menu. In Windows, select TWAIN_32. Scan button On a Macintosh, select TWAIN_Acquire. Preview button The EPSON TWAIN Pro main window appears. 4. Choose the Document Source, Image Type, and Destination. For example, if you're scanning a photograph, select Flatbed as your Document Source, 24-bit Color (Std) as your Image Type, and your printer as the Destination. (If your printer isn't listed, just select Inkjet Printer or Laser Printer as the Destination.) 5. Click the Preview button. You see a preview of your scan in the window that opens. 6. Click the Auto Locate button to automatically define the scan area around the edges of your image. Or adjust the scan area by positioning the mouse pointer over any of the eight boxes around the marquee's edge and dragging the box to resize the marquee. Click the Auto Exposure button to automatically set the highlight and shadow exposure. 37
-
 1
1 -
2
-
3
-
4
-
5
-
6
-
7
-
8
-
9
-
10
-
11
-
12
-
13
-
14
-
15
-
16
-
17
-
18
-
19
-
20
-
21
-
22
-
23
-
24
-
25
-
26
-
27
-
28
-
29
-
30
-
31
-
32
-
33
-
34
-
35
-
36
-
37
-
38
-
 39
39 -
 40
40 -
 41
41 -
 42
42 -
 43
43 -
 44
44 -
 45
45 -
 46
46 -
 47
47 -
 48
48 -
 49
49 -
50
-
51
-
52
-
53
-
54
-
55
-
56
-
57
-
58
-
59
-
60
-
61
-
62
-
63
-
64
-
65
-
66
-
67
-
68
-
69
-
70
-
71
-
72
-
73
-
74
-
75
-
76
-
77
-
78
-
79
-
80
-
81
 |
 |