Epson Expression 800 User Setup Information - Page 59
Installing the Auto Document Feeder, located at the back of
 |
View all Epson Expression 800 manuals
Add to My Manuals
Save this manual to your list of manuals |
Page 59 highlights
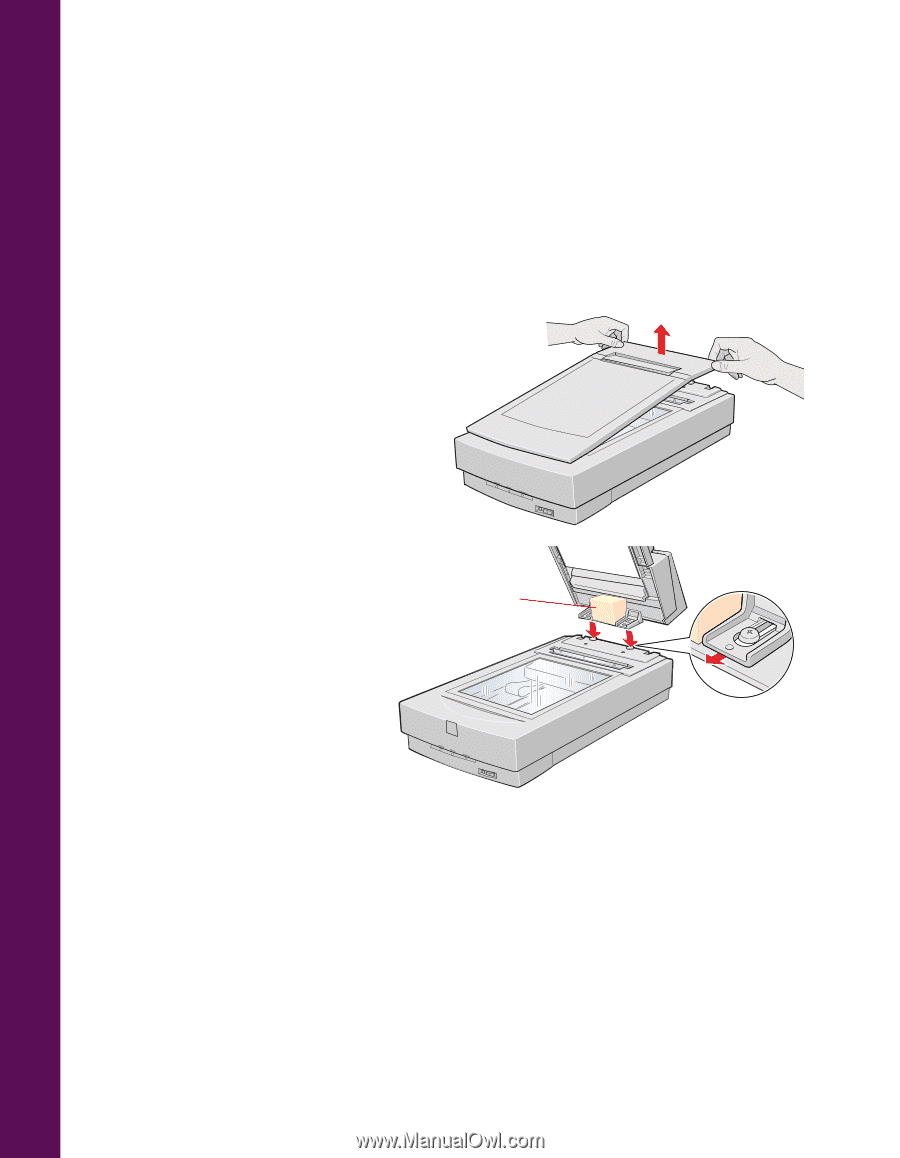
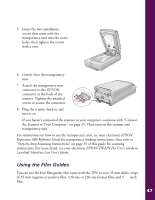
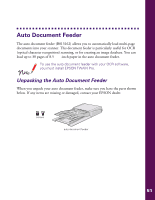
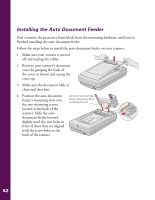
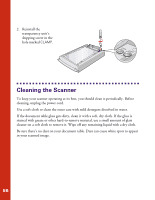
Installing the Auto Document Feeder Don't remove the protective foam block from the mounting hardware until you've finished installing the auto document feeder. Follow the steps below to install the auto document feeder on your scanner. 1. Make sure your scanner is turned off and unplug the cables. 2. Remove your scanner's document cover by grasping the back of the cover as shown and easing the cover up. 3. Make sure the document table is clean and dust free. 4. Position the auto document feeder's mounting slots over the two mounting screws located at the back of the scanner. Slide the auto document feeder forward slightly until the two holes in front of these slots are aligned with the screw holes at the back of the scanner. don't remove the foam block until you're done installing the unit 52
-
 1
1 -
2
-
3
-
4
-
5
-
6
-
7
-
8
-
9
-
10
-
11
-
12
-
13
-
14
-
15
-
16
-
17
-
18
-
19
-
20
-
21
-
22
-
23
-
24
-
25
-
26
-
27
-
28
-
29
-
30
-
31
-
32
-
33
-
34
-
35
-
36
-
37
-
38
-
39
-
40
-
41
-
42
-
43
-
44
-
45
-
46
-
47
-
48
-
49
-
50
-
51
-
52
-
53
-
 54
54 -
 55
55 -
 56
56 -
 57
57 -
 58
58 -
 59
59 -
 60
60 -
 61
61 -
 62
62 -
 63
63 -
 64
64 -
65
-
66
-
67
-
68
-
69
-
70
-
71
-
72
-
73
-
74
-
75
-
76
-
77
-
78
-
79
-
80
-
81
 |
 |