Epson LQ 1050 User Manual - Page 125
Setting the sheet feeder mode, Recommended paper, Before printing on envelopes
 |
View all Epson LQ 1050 manuals
Add to My Manuals
Save this manual to your list of manuals |
Page 125 highlights
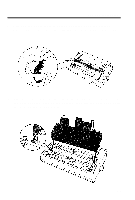
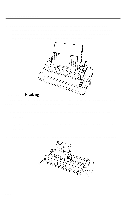
The Cut Sheet Feeder Setting the sheet feeder mode To allow your printer to use the cut sheet feeder you will need to set DIP switch 1-7 to on. If you need more information on how to do this, see the section on DIP switch setting in Chapter 3. To set the printer into the cut sheet feeder mode, you should do the following: l Turn the printer off l Set DIP switch 1-7 to the on position using a pointed object, such as the tip of a pencil. l Turn the printer back on. All changes of DIP switch settings should be made with the printer power turned off. The printer checks and recognizes new settings only at the time the power is turned on. Recommended paper Paper: For best results, use typewriter quality paper. If you plan to use paper with a glossy or textured surface, you should test it before regular use. Do not use multiplepart forms or labels. Envelopes: You can print on air mail, plain, or bond envelopes. Before printing on envelopes, you need to set the paper thickness lever according to the thickness of the envelope. For specific information on paper thickness settings, see the section on printing with special paper in Chapter 2. Printing past the edge of envelopes, multi-part forms or thicker than normal paper can damage the print head. When you print on anything thicker than normal paper, be absolutely sure that none of the printing is closer than 1/4 of an inch to the edges. 7-7
-
 1
1 -
2
-
3
-
4
-
5
-
6
-
7
-
8
-
9
-
10
-
11
-
12
-
13
-
14
-
15
-
16
-
17
-
18
-
19
-
20
-
21
-
22
-
23
-
24
-
25
-
26
-
27
-
28
-
29
-
30
-
31
-
32
-
33
-
34
-
35
-
36
-
37
-
38
-
39
-
40
-
41
-
42
-
43
-
44
-
45
-
46
-
47
-
48
-
49
-
50
-
51
-
52
-
53
-
54
-
55
-
56
-
57
-
58
-
59
-
60
-
61
-
62
-
63
-
64
-
65
-
66
-
67
-
68
-
69
-
70
-
71
-
72
-
73
-
74
-
75
-
76
-
77
-
78
-
79
-
80
-
81
-
82
-
83
-
84
-
85
-
86
-
87
-
88
-
89
-
90
-
91
-
92
-
93
-
94
-
95
-
96
-
97
-
98
-
99
-
100
-
101
-
102
-
103
-
104
-
105
-
106
-
107
-
108
-
109
-
110
-
111
-
112
-
113
-
114
-
115
-
116
-
117
-
118
-
119
-
 120
120 -
 121
121 -
 122
122 -
 123
123 -
 124
124 -
 125
125 -
 126
126 -
 127
127 -
 128
128 -
 129
129 -
 130
130 -
131
-
132
-
133
-
134
-
135
-
136
-
137
-
138
-
139
-
140
-
141
-
142
-
143
-
144
-
145
-
146
-
147
-
148
-
149
-
150
-
151
-
152
-
153
-
154
-
155
-
156
-
157
-
158
-
159
-
160
-
161
-
162
-
163
-
164
-
165
-
166
-
167
-
168
-
169
-
170
-
171
-
172
-
173
-
174
-
175
-
176
-
177
-
178
-
179
-
180
-
181
-
182
-
183
-
184
-
185
-
186
-
187
-
188
-
189
-
190
-
191
-
192
-
193
-
194
-
195
-
196
-
197
-
198
-
199
-
200
-
201
-
202
-
203
-
204
-
205
-
206
-
207
-
208
-
209
-
210
-
211
-
212
-
213
-
214
-
215
-
216
-
217
-
218
-
219
-
220
-
221
-
222
 |
 |
