HP Designjet 4500mfp HP Designjet 45XX mfp/45XX HD Scanner series - Quick Refe - Page 28
Scan to the network, Access files in the network folder
 |
View all HP Designjet 4500mfp manuals
Add to My Manuals
Save this manual to your list of manuals |
Page 28 highlights
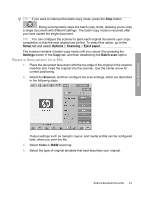
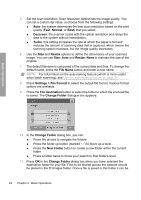
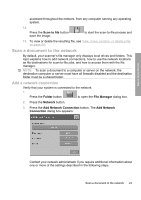
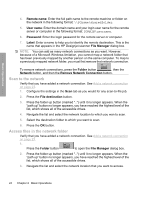
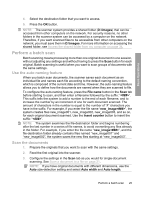
Basic Operations 4. Remote name: Enter the full path name to the remote machine or folder on the network in the following format: \\PCname\sharedfolder. 5. User name: Enter the domain name and your login user name for the remote server or computer in the following format: DOMAIN\username. 6. Password: Enter the login password for the remote server or computer. 7. Label: Enter a name to help you to identify the remote destination. This is the name that appears in the HP Designjet scanner File Manager dialog box. NOTE: You can add as many network connections as you want. However, because of a Microsoft Windows limitation, you cannot map a network folder that has been previously mapped by another person on the same computer. To map to a previously mapped network folder, you must first remove that network connection. To remove network connections, press the Folder button , then the Network button, and then the Remove Network Connection button. Scan to the network Verify that you have added a network connection. See Add a network connection on page 23. 1. Configure the settings in the Scan tab as you would for any scan-to-file job. 2. Press the File destination button. 3. Press the folder up button (marked "..") until it no longer appears. When the "path up" button no longer appears, you have reached the highest level of the list, which shows all of the accessible drives. 4. Navigate the list and select the network location to which you wan to scan. 5. Select the destination folder to which you want to scan. 6. Press the OK button. Access files in the network folder Verify that you have added a network connection. See Add a network connection on page 23. 1. Press the Folder button to open the File Manager dialog box. 2. Press the folder up button (marked "..") until it no longer appears. When the "path up" button no longer appears, you have reached the highest level of the list, which shows all of the accessible drives. 3. Navigate the list and select the network location that you want to access. 24 Chapter 2 Basic Operations
-
 1
1 -
2
-
3
-
4
-
5
-
6
-
7
-
8
-
9
-
10
-
11
-
12
-
13
-
14
-
15
-
16
-
17
-
18
-
19
-
20
-
21
-
22
-
 23
23 -
 24
24 -
 25
25 -
 26
26 -
 27
27 -
 28
28 -
 29
29 -
 30
30 -
 31
31 -
 32
32 -
 33
33 -
34
-
35
-
36
-
37
-
38
-
39
-
40
-
41
-
42
-
43
-
44
-
45
-
46
-
47
-
48
-
49
-
50
-
51
-
52
-
53
-
54
-
55
-
56
-
57
-
58
-
59
-
60
-
61
-
62
-
63
-
64
 |
 |