HP Designjet 4500mfp HP Designjet 45XX mfp/45XX HD Scanner series - Quick Refe - Page 37
Align left and align right
 |
View all HP Designjet 4500mfp manuals
Add to My Manuals
Save this manual to your list of manuals |
Page 37 highlights
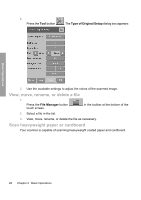
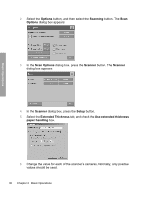
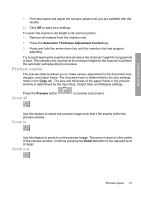
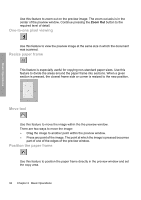
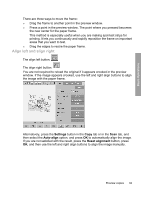
Basic Operations There are three ways to move the frame: ● Drag the frame to another point in the preview window. ● Press a point in the preview window. The point where you pressed becomes the new center for the paper frame. This method is especially useful when you are making spot-test strips for printing. It lets you continuously and rapidly reposition the frame on important areas that you want to test. ● Drag the edges to resize the paper frame. Align left and align right The align left button: The align right button: You are not required to reload the original if it appears crooked in the preview window. If the image appears crooked, use the left and right align buttons to align the image with the paper frame. Alternatively, press the Settings button in the Copy tab or in the Scan tab, and then select the Auto-align option, and press OK to automatically align the image. If you are not satisfied with the result, press the Reset alignment button, press OK, and then use the left and right align buttons to align the image manually. Preview copies 33
-
 1
1 -
2
-
3
-
4
-
5
-
6
-
7
-
8
-
9
-
10
-
11
-
12
-
13
-
14
-
15
-
16
-
17
-
18
-
19
-
20
-
21
-
22
-
23
-
24
-
25
-
26
-
27
-
28
-
29
-
30
-
31
-
 32
32 -
 33
33 -
 34
34 -
 35
35 -
 36
36 -
 37
37 -
 38
38 -
 39
39 -
 40
40 -
 41
41 -
 42
42 -
43
-
44
-
45
-
46
-
47
-
48
-
49
-
50
-
51
-
52
-
53
-
54
-
55
-
56
-
57
-
58
-
59
-
60
-
61
-
62
-
63
-
64
 |
 |