HP Designjet 4500mfp HP Designjet 45XX mfp/45XX HD Scanner series - Quick Refe - Page 35
Zoom all, Zoom in, Zoom out
 |
View all HP Designjet 4500mfp manuals
Add to My Manuals
Save this manual to your list of manuals |
Page 35 highlights
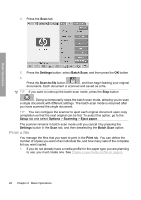
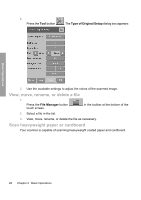
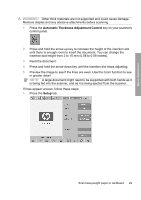
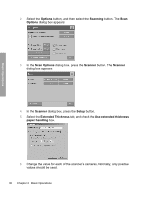
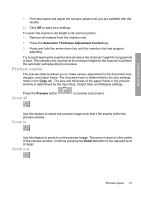
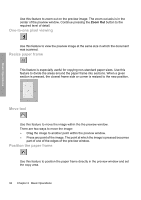
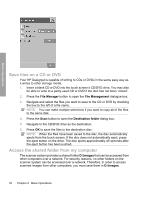
Basic Operations 7. Print test scans and adjust the camera values until you are satisfied with the results. 8. Click OK to save your settings. To return the insertion slot height to its normal position: 1. Remove all material from the insertion slot. 2. Press the Automatic Thickness Adjustment Control key. 3. Press and hold the arrow-down key until the insertion slot has stopped adjusting. Try to avoid leaving the insertion slot set above the minimum height for long periods of time. The insertion slot must be at its minimum height for the scanner to perform the automatic self-adjustment procedure. Preview copies The preview feature allows you to make various adjustment to the document size, margins, and paper frame. The document size is determined by the size settings made in the Copy tab. The size and thickness of the paper frame in the preview window is determined by the Input Size, Output Size, and Margins settings. Press the Preview button Zoom all to preview a document. Use this feature to resize the preview image such that it fits exactly within the preview window. Zoom in Use this feature to zoom in on the preview image. The zoom in axis is in the center of the preview window. Continue pressing the Zoom In button to the required level of detail. Zoom out Preview copies 31
-
 1
1 -
2
-
3
-
4
-
5
-
6
-
7
-
8
-
9
-
10
-
11
-
12
-
13
-
14
-
15
-
16
-
17
-
18
-
19
-
20
-
21
-
22
-
23
-
24
-
25
-
26
-
27
-
28
-
29
-
 30
30 -
 31
31 -
 32
32 -
 33
33 -
 34
34 -
 35
35 -
 36
36 -
 37
37 -
 38
38 -
 39
39 -
 40
40 -
41
-
42
-
43
-
44
-
45
-
46
-
47
-
48
-
49
-
50
-
51
-
52
-
53
-
54
-
55
-
56
-
57
-
58
-
59
-
60
-
61
-
62
-
63
-
64
 |
 |
