HP StorageWorks 1606 HP StorageWorks 8GB SAN Switch hardware reference guide ( - Page 51
Verifying the configuration, Backing up the configuration, switches in the fabric.
 |
View all HP StorageWorks 1606 manuals
Add to My Manuals
Save this manual to your list of manuals |
Page 51 highlights
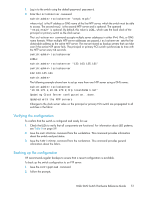
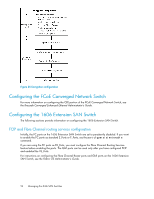
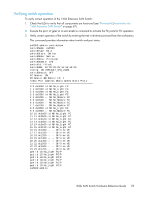
1. Log in to the switch using the default password: password. 2. Enter the tsclockserver command: switch:admin> tsclockserver "" where ntp1 is the IP address or DNS name of the first NTP server, which the switch must be able to access. The second ntp2 is the second NTP server and is optional. The operand "" is optional. By default, this value is LOCL, which uses the local clock of the principal or primary switch as the clock server. The tsclockserver command accepts multiple server addresses in either IPv4, IPv6, or DNS name formats. When multiple NTP server addresses are passed, tsclockserver sets the first obtainable address as the active NTP server. The rest are stored as backup servers that can take over if the active NTP server fails. The principal or primary FCS switch synchronizes its time with the NTP server every 64 seconds. switch:admin> tsclockserver LOCLx switch:admin> tsclockserver "132.163.135.131" switch:admin> tsclockserver 132.163.135.131 switch:admin> The following example shows how to set up more than one NTP server using a DNS name: switch:admin> tsclockserver "10.32.170.1;10.32.170.2;ntp.localdomain.net" Updating Clock Server configuration...done. Updated with the NTP servers Changes to the clock server value on the principal or primary FCS switch are propagated to all switches in the fabric. Verifying the configuration To confirm that the switch is configured and ready for use: 1. Check the LEDs to verify that all components are functional. For information about LED patterns, see Table 8 on page 59. 2. Issue the switchshow command from the workstation. This command provides information about the switch and port status. 3. Issue the fabricshow command from the workstation. This command provides general information about the fabric. Backing up the configuration HP recommends regular backups to ensure that a recent configuration is available. To back up the switch configuration to an FTP server: 1. Issue the configupload command. 2. Follow the prompts. 8-Gb SAN Switch Hardware Reference Guide 51
-
 1
1 -
2
-
3
-
4
-
5
-
6
-
7
-
8
-
9
-
10
-
11
-
12
-
13
-
14
-
15
-
16
-
17
-
18
-
19
-
20
-
21
-
22
-
23
-
24
-
25
-
26
-
27
-
28
-
29
-
30
-
31
-
32
-
33
-
34
-
35
-
36
-
37
-
38
-
39
-
40
-
41
-
42
-
43
-
44
-
45
-
 46
46 -
 47
47 -
 48
48 -
 49
49 -
 50
50 -
 51
51 -
 52
52 -
 53
53 -
 54
54 -
 55
55 -
 56
56 -
57
-
58
-
59
-
60
-
61
-
62
-
63
-
64
-
65
-
66
-
67
-
68
-
69
-
70
-
71
-
72
-
73
-
74
-
75
-
76
-
77
-
78
-
79
-
80
-
81
-
82
-
83
-
84
-
85
-
86
-
87
-
88
-
89
-
90
-
91
-
92
-
93
-
94
-
95
-
96
-
97
-
98
-
99
-
100
-
101
-
102
-
103
-
104
-
105
-
106
-
107
-
108
-
109
-
110
-
111
-
112
-
113
-
114
-
115
-
116
-
117
-
118
-
119
-
120
 |
 |