JVC GY-HM100U Instructions - Page 23
erting an SD Card
 |
UPC - 046838039522
View all JVC GY-HM100U manuals
Add to My Manuals
Save this manual to your list of manuals |
Page 23 highlights
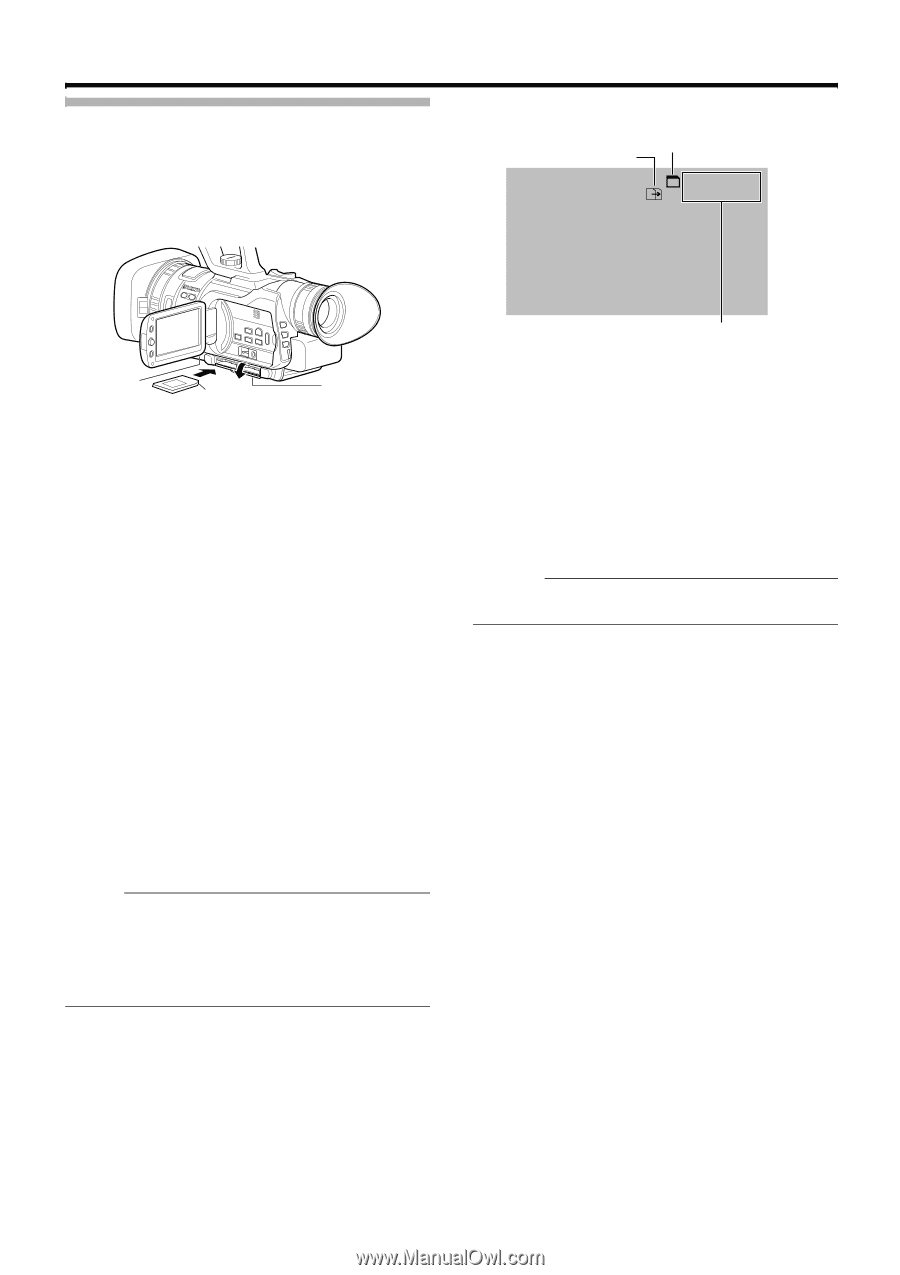
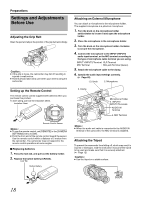
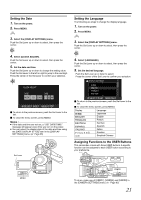
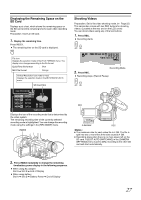
Inserting an SD Card This camcorder comes with two SD card slots. (Slot A and Slot B) Ⅵ SD cards to use ● See ASD CardsB on Page 7. ● SDXC cards are not supported. Automatic Slot Switch Display of selected slot with an SD card icon during shooting mode A [5h36m] B [5h36m] A/B Door Notched Corner Preparation: Turn off the power. 1 . Open the door. 2 . Insert an SD card with the notched corner first. 3 . Close the door. Ⅵ Selecting a card slot Press the A/B button. ● Doing so switches between Slot A and Slot B. ● When an SD card is inserted, the access lamp of the selected slot lights up. ● When data in the SD card is being accessed, the access lamp blinks. Ⅵ Switching between Slot A and Slot B automatically Set [SLOT AUTO SWITCHING] in the [CAMERA SETTINGS] menu to [ON]. (A Page 65) ● When the space on an SD card runs out during recording in the shooting mode, data is automatically recorded to the other SD card. ● When playback from an SD card ends in the playback mode, playback from the other SD card starts automatically. ● When the Automatic Slot Switch feature is turned [ON], an automatic slot switch icon appears on the screen. Memo : ● If the SD card to switch to cannot be read, slot switching will not be performed. ● When an SD card is inserted into the slot to switch to during recording, slot switching will not be performed as the SD card cannot be read. Stop the recording first and allow the SD card to be read. Video mode: Remaining time Still picture mode: Remaining number of shots Ⅵ Removing the SD card 1 . Open the door. 2 . Make sure the SD card to be removed is not being accessed (access lamp blinking). 3 . Push the SD card and remove it from the slot. 4 . Close the door. Caution : ● Do not touch the metal part of the SD card when inserting or removing the SD card. 23
-
 1
1 -
2
-
3
-
4
-
5
-
6
-
7
-
8
-
9
-
10
-
11
-
12
-
13
-
14
-
15
-
16
-
17
-
 18
18 -
 19
19 -
 20
20 -
 21
21 -
 22
22 -
 23
23 -
 24
24 -
 25
25 -
 26
26 -
 27
27 -
 28
28 -
29
-
30
-
31
-
32
-
33
-
34
-
35
-
36
-
37
-
38
-
39
-
40
-
41
-
42
-
43
-
44
-
45
-
46
-
47
-
48
-
49
-
50
-
51
-
52
-
53
-
54
-
55
-
56
-
57
-
58
-
59
-
60
-
61
-
62
-
63
-
64
-
65
-
66
-
67
-
68
-
69
-
70
-
71
-
72
-
73
-
74
-
75
-
76
 |
 |