JVC GY-HM100U Instructions - Page 5

Content - manual

Page 5 highlights

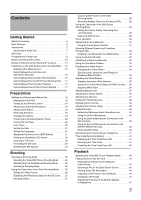
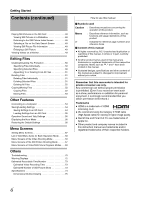
Contents Getting Started Safety Precautions 2 Main Features 4 Accessories 7 Attaching the Audio Unit 7 SD Cards 7 Precautions for Proper Use 8 Names of Parts and Functions 10 Names of Remote Control Parts and Functions 14 Indications on the LCD Screen and in the Viewfinder . . . 15 Displaying the Status Screen 15 Items Displayed During Video and Still Picture Shooting 16 Items Displayed During Video Shooting Only 16 Items Displayed During Still Picture Shooting Only . . . 17 Items Displayed During Video Playback 17 Items Displayed During Still Picture Playback 17 Preparations Settings and Adjustments Before Use 18 Adjusting the Grip Belt 18 Setting up the Remote Control 18 Attaching an External Microphone 18 Attaching the Tripod 18 Removing the Hood 19 Charging the Battery 19 Checking the Remaining Battery Power 20 Turning On the Power 20 Lens Cover 20 Setting the Date 21 Setting the Language 21 Assigning Functions to the USER Buttons 21 Viewing the Viewfinder/LCD Screen 22 Inserting an SD Card 23 Formatting the SD Card 24 Resetting the File Number 24 Shooting Selecting a Shooting Mode 25 Selecting the Video/Still Picture Shooting Mode . . . . . 25 Selecting the Full Auto/Manual Shooting Mode 25 Selecting a Focusing Mode 26 Using the Camcorder in the Video Shooting Mode . . . . . 26 Setting the Video Format 26 Displaying the Remaining Space on the SD Card . . . . 27 Shooting Videos 27 Capturing Still Pictures in the Video Shooting Mode 28 Recording Multiple Clips as a Continuous File . . . . . .28 Using the Camcorder in the Still Picture Shooting Mode 29 Setting the Picture Quality, Recording Size, and Sensitivity 29 Capturing Still Pictures 29 Zoom Operation 30 Adjusting the Focus Manually 31 Using the Focus Assist Function 31 Shooting Different Scenes and Conditions (Program AE 32 Enabling Lolux Mode with the USER Button 32 Using the Built-in ND Filter 32 Adjusting the Exposure Manually 33 Using the Tele Macro Feature 33 Displaying the Zebra Pattern 34 Displaying the Zebra Pattern 34 Specifying the Luminance Level Range for Displaying Zebra Pattern 34 Adjusting the White Balance 35 Adjusting Automatic White Balance 35 Using the Full Auto White Balance (FAW) Function . . .36 Adjusting White Paint 36 Adjusting Manual Gain 37 Adjusting the Shutter Speed 37 Adjusting the Aperture 37 Setting the Photometry Area 38 Displaying the Color Bar 39 Adjusting the Camera Image 39 Audio Recording 40 Setting the Reference Audio Recording Level 40 Using the Built-in Microphone 40 Using an External Microphone Connected to the MIC Terminal 40 Using an External Microphone Connected to the INPUT1/INPUT2 Terminal 40 Reducing Wind Noise 40 Monitoring Audio Sound Using a Headphone 41 Time Code Recording Setting 41 Displaying the Time Code/User's Bit 41 Recording the Time Code 41 Presetting the Time Code/User's Bit 42 Playback Selecting the Video/Still Picture Playback Mode 43 Playing Videos on the SD Card 43 Playing Back Videos from the Playback Index Screen 43 Selecting a File on the Date Search Screen 45 Viewing Video File Information 46 Capturing a Still Picture in the Still Mode 46 Enlarging a Still Image 47 Adjusting the Volume of the Built-In Speaker or Headphone 47 5

  • 1
  • 2
  • 3
  • 4
  • 5
  • 6
  • 7
  • 8
  • 9
  • 10
  • 11
  • 12
  • 13
  • 14
  • 15
  • 16
  • 17
  • 18
  • 19
  • 20
  • 21
  • 22
  • 23
  • 24
  • 25
  • 26
  • 27
  • 28
  • 29
  • 30
  • 31
  • 32
  • 33
  • 34
  • 35
  • 36
  • 37
  • 38
  • 39
  • 40
  • 41
  • 42
  • 43
  • 44
  • 45
  • 46
  • 47
  • 48
  • 49
  • 50
  • 51
  • 52
  • 53
  • 54
  • 55
  • 56
  • 57
  • 58
  • 59
  • 60
  • 61
  • 62
  • 63
  • 64
  • 65
  • 66
  • 67
  • 68
  • 69
  • 70
  • 71
  • 72
  • 73
  • 74
  • 75
  • 76

5
Getting Started
S
afety Precautions
. . . . . . . . . . . . . . . . . . . . . . . . . . . . . .2
Main Features . . . . . . . . . . . . . . . . . . . . . . . . . . . . . . . . . .4
Accessories . . . . . . . . . . . . . . . . . . . . . . . . . . . . . . . . . . . .7
Attaching the Audio Unit
. . . . . . . . . . . . . . . . . . . . . . . .7
S
D Cards . . . . . . . . . . . . . . . . . . . . . . . . . . . . . . . . . . . . . .7
Precautions for Proper Use . . . . . . . . . . . . . . . . . . . . . . . .8
Names of Parts and Functions
. . . . . . . . . . . . . . . . . . . .10
Names of Remote Control Parts and Functions
. . . . . . .14
Indications on the LCD
S
creen and in the Viewfinder . . . 15
Displaying the
S
tatus
S
creen . . . . . . . . . . . . . . . . . . . .15
Items Displayed During Video and
S
till Picture
S
hooting
. . . . . . . . . . . . . . . . . . . . . . . . . .16
Items Displayed During Video
S
hooting Only
. . . . . . .16
Items Displayed During
S
till Picture
S
hooting Only . . .17
Items Displayed During Video Play
b
ack
. . . . . . . . . . .17
Items Displayed During
S
till Picture Play
b
ack . . . . . . .17
Preparation
s
S
ettings and Adjustments Before Use . . . . . . . . . . . . . . .18
Adjusting the Grip Belt . . . . . . . . . . . . . . . . . . . . . . . . .18
S
etting up the Remote Control
. . . . . . . . . . . . . . . . . .18
Attaching an External Microphone . . . . . . . . . . . . . . . .18
Attaching the Tripod . . . . . . . . . . . . . . . . . . . . . . . . . . .18
Removing the Hood . . . . . . . . . . . . . . . . . . . . . . . . . . .19
Charging the Battery
. . . . . . . . . . . . . . . . . . . . . . . . . .19
Checking the Remaining Battery Power
. . . . . . . . . . .20
Turning On the Power
. . . . . . . . . . . . . . . . . . . . . . . . .20
Lens Cover . . . . . . . . . . . . . . . . . . . . . . . . . . . . . . . . . .20
S
etting the Date . . . . . . . . . . . . . . . . . . . . . . . . . . . . . .21
S
etting the Language . . . . . . . . . . . . . . . . . . . . . . . . . .21
Assigning Functions to the U
S
ER Buttons
. . . . . . . . .21
Viewing the Viewfinder/LCD
S
creen
. . . . . . . . . . . . . .22
Inserting an
S
D Card . . . . . . . . . . . . . . . . . . . . . . . . . .2
3
Formatting the
S
D Card . . . . . . . . . . . . . . . . . . . . . . . .24
Resetting the File Num
b
er . . . . . . . . . . . . . . . . . . . . . .24
Shooting
S
electing a
S
hooting Mode . . . . . . . . . . . . . . . . . . . . . . . 25
S
electing the Video/
S
till Picture
S
hooting Mode
. . . . .25
S
electing the Full Auto/Manual
S
hooting Mode . . . . . .25
S
electing a Focusing Mode
. . . . . . . . . . . . . . . . . . . . .26
Using the Camcorder in the Video
S
hooting Mode . . . . .26
S
etting the Video Format . . . . . . . . . . . . . . . . . . . . . . .26
Displaying the Remaining
S
pace on the
S
D Card . . . .27
S
hooting Videos . . . . . . . . . . . . . . . . . . . . . . . . . . . . . . 27
Capturing
S
till Pictures in the Video
S
hooting Mode . . . . . . . . . . . . . . . . . . . . . . . . . . . . . . .28
Recording Multiple Clips as a Continuous File
. . . . . .28
Using the Camcorder in the
S
till Picture
S
hooting Mode
. . . . . . . . . . . . . . . . . . . . . . . . . . . . . . . .29
S
etting the Picture Quality, Recording
S
ize,
and
S
ensitivity . . . . . . . . . . . . . . . . . . . . . . . . . . . . . . .29
Capturing
S
till Pictures . . . . . . . . . . . . . . . . . . . . . . . . .29
Zoom Operation
. . . . . . . . . . . . . . . . . . . . . . . . . . . . . . .
3
0
Adjusting the Focus Manually
. . . . . . . . . . . . . . . . . . . . .
3
1
Using the Focus Assist Function
. . . . . . . . . . . . . . . . .
3
1
S
hooting Different
S
cenes and Conditions
(Program AE) . . . . . . . . . . . . . . . . . . . . . . . . . . . . . . . . . .
3
2
Ena
b
ling Lolux Mode with the U
S
ER Button
. . . . . . . .
3
2
Using the Built-in ND Filter
. . . . . . . . . . . . . . . . . . . . . . .
3
2
Adjusting the Exposure Manually
. . . . . . . . . . . . . . . . . .
33
Using the Tele Macro Feature . . . . . . . . . . . . . . . . . . . . .
33
Displaying the Ze
b
ra Pattern . . . . . . . . . . . . . . . . . . . . . .
3
4
Displaying the Ze
b
ra Pattern
. . . . . . . . . . . . . . . . . . . .
3
4
S
pecifying the Luminance Level Range for
Displaying Ze
b
ra Pattern
. . . . . . . . . . . . . . . . . . . . . . .
3
4
Adjusting the White Balance . . . . . . . . . . . . . . . . . . . . . .
3
5
Adjusting Automatic White Balance . . . . . . . . . . . . . . .
3
5
Using the Full Auto White Balance (FAW) Function . . .
3
6
Adjusting White Paint . . . . . . . . . . . . . . . . . . . . . . . . . .
3
6
Adjusting Manual Gain
. . . . . . . . . . . . . . . . . . . . . . . . . .
3
7
Adjusting the
S
hutter
S
peed
. . . . . . . . . . . . . . . . . . . . . .
3
7
Adjusting the Aperture . . . . . . . . . . . . . . . . . . . . . . . . . . .
3
7
S
etting the Photometry Area . . . . . . . . . . . . . . . . . . . . . .
3
8
Displaying the Color Bar
. . . . . . . . . . . . . . . . . . . . . . . . .
3
9
Adjusting the Camera Image . . . . . . . . . . . . . . . . . . . . . .
3
9
Audio Recording
. . . . . . . . . . . . . . . . . . . . . . . . . . . . . . .40
S
etting the Reference Audio Recording Level . . . . . . .40
Using the Built-in Microphone
. . . . . . . . . . . . . . . . . . .40
Using an External Microphone Connected to the
MIC Terminal
. . . . . . . . . . . . . . . . . . . . . . . . . . . . . . . .40
Using an External Microphone Connected to the
INPUT1/INPUT2 Terminal
. . . . . . . . . . . . . . . . . . . . . .40
Reducing Wind Noise
. . . . . . . . . . . . . . . . . . . . . . . . .40
Monitoring Audio
S
ound Using a Headphone . . . . . . . . .41
Time Code Recording
S
etting . . . . . . . . . . . . . . . . . . . . .41
Displaying the Time Code/User
s Bit
. . . . . . . . . . . . . .41
Recording the Time Code . . . . . . . . . . . . . . . . . . . . . .41
Presetting the Time Code/User
s Bit
. . . . . . . . . . . . . .42
Playback
S
electing the Video/
S
till Picture Play
b
ack Mode . . . . . . .4
3
Playing Videos on the
S
D Card . . . . . . . . . . . . . . . . . . . .4
3
Playing Back Videos from the Play
b
ack
Index
S
creen
. . . . . . . . . . . . . . . . . . . . . . . . . . . . . . . .4
3
S
electing a File on the Date
S
earch
S
creen
. . . . . . . .45
Viewing Video File Information . . . . . . . . . . . . . . . . . . .46
Capturing a
S
till Picture in the
S
till Mode . . . . . . . . . . .46
Enlarging a
S
till Image . . . . . . . . . . . . . . . . . . . . . . . . .47
Adjusting the Volume of the Built-In
S
peaker
or Headphone
. . . . . . . . . . . . . . . . . . . . . . . . . . . . . . .47
Content
s