JVC GY-HM100U Instructions - Page 38
Setting the Photometry
 |
UPC - 046838039522
View all JVC GY-HM100U manuals
Add to My Manuals
Save this manual to your list of manuals |
Page 38 highlights
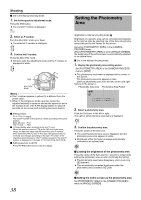
Shooting Ⅵ Set to the Manual shooting mode. 1 . Set to the aperture adjustment mode. Press the IRIS button. ● The current F-number is displayed. IRIS 2 . Select an F-number. Turn the ADJ./VOL. knob up or down. ● The selected F-number is displayed. 3 . Confirm the F-number. Press the ADJ./VOL. knob. ● Doing so exits the adjustment mode and the F-number is displayed in white. ADJ./VOL ADJ./VOL IRIS ADJ./VOL. Knob IRIS OPEN SHUTTER AE ʶ CLOSE ADJ./ VOL. PUSH ACCESS REC DC Memo : ● The F-number appears in yellow if it is different from the preset value. ● When in the still picture mode, aperture cannot be adjusted manually if exposure and shutter speed are set to the manual mode. (The A.PR display flashes for about 5 seconds on the screen and its setting becomes invalid.) Ⅵ Setting values F1.8 - F8.0 (14 steps) The open F-number of the aperture varies according to the zoom position. Wide (W) end : F1.8 Tele (T) end : F2.8 Ⅵ 1/3-step display when zooming to the tele (T) end When the aperture is set to F1.8 at the (W) end of the zoom range, the aperture value may fall below the open F-number when zoomed to the (T) end. In this case, the aperture value is not fixed, but changes according to the open F-number of the respective zoom positions. The F-number nearest to the open Fnumber is displayed in 1/3 steps. (F1.8, F2.0, F2.2, F2.5, F2.8) Ⅵ Setting aperture to AUTO Press the IRIS button twice to clear the display. Setting the Photometry Area Applicable to: Manual shooting mode M Brightness of a specific area can be corrected automatically to the optimal state by selecting one of the three photometry areas indicated by the frames on the screen. Set using [PHOTOMETRY AREA] in the [CAMERA PROCESS] menu. When [PHOTOMETRY AREA] is set to [WHOLE SCREEN], the brightness of the entire screen is automatically adjusted to an optimal level. Ⅵ Set to the Manual shooting mode. 1 . Display the photometry area setting screen. Set [PHOTOMETRY AREA] in the [CAMERA PROCESS] menu to [SPOT]. ● The photometry area frame is displayed at the center of the screen. The photometry area icon appears in blue. (Select a photometry area from the left, center, and right frames on the screen.) Photometry Area Icon Photometry Area Frame 2 . Select a photometry area. Push the Set Lever to the left or right. The right or left photometry area frame is displayed. 3 . Confirm the photometry area. Press the center of the Set Lever. ● The confirmed photometry area is displayed, and the photometry area icon appears in white. ● Brightness within the frame is always automatically corrected to an optimal level. Ⅵ Locking the brightness of the photometry area Press the center of the Set Lever for 1 second or longer while setting the photometry area or after confirming the setting. ● The photometry area frame disappears, and a Lock icon (L) appears. ● The automatically corrected brightness within the photometry area is locked. (AE Lock) 38 Ⅵ Setting the entire screen as the photometry area Set [PHOTOMETRY AREA] in the [CAMERA PROCESS] menu to [WHOLE SCREEN].
-
 1
1 -
2
-
3
-
4
-
5
-
6
-
7
-
8
-
9
-
10
-
11
-
12
-
13
-
14
-
15
-
16
-
17
-
18
-
19
-
20
-
21
-
22
-
23
-
24
-
25
-
26
-
27
-
28
-
29
-
30
-
31
-
32
-
 33
33 -
 34
34 -
 35
35 -
 36
36 -
 37
37 -
 38
38 -
 39
39 -
 40
40 -
 41
41 -
 42
42 -
 43
43 -
44
-
45
-
46
-
47
-
48
-
49
-
50
-
51
-
52
-
53
-
54
-
55
-
56
-
57
-
58
-
59
-
60
-
61
-
62
-
63
-
64
-
65
-
66
-
67
-
68
-
69
-
70
-
71
-
72
-
73
-
74
-
75
-
76
 |
 |
