JVC GY-HM100U Instructions - Page 39
playing the Color Bar, ting the Camera, Image - hdmi output
 |
UPC - 046838039522
View all JVC GY-HM100U manuals
Add to My Manuals
Save this manual to your list of manuals |
Page 39 highlights
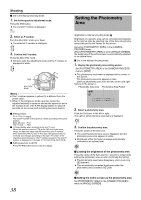
Displaying the Color Bar Adjusting the Camera Image Applicable to: Manual shooting mode M Ⅵ Set to the Manual shooting mode. Displays the color bar on the screen and starts recording in this state. (See below) There are two ways to display the color bar. Ⅵ Set [COLOR BAR] in the [CAMERA PROCESS] menu to [ON]. (A Page 61) Ⅵ Set [USER1], [USER2], or [USER3] in the [CAMERA SETTINGS] menu to [COLOR BAR], then press the corresponding USER button. Assignment of USER buttons: (A Page 21, 65) ● The color bar appears. Memo : ● Between the two methods above, setting via the USER button is given a higher priority. ● When in the Full Auto shooting mode, the color bar will not appear. Ⅵ Clearing the color bar display Set the [COLOR BAR] menu to [OFF]. Alternatively, press the USER button that is set as [COLOR BAR]. Ⅵ Recording the color bar When the [SYSTEM SELECT], [REC MODE] menu is as below, the color bar can be recorded. SYSTEM SELECT 1080-60/30 1080-50/25 720-60/30 720-50/25 REC MODE 1920/60i(HQ), 1920/30p(HQ) 1920/50i(HQ), 1920/25p(HQ) 1280/60p(HQ), 1280/60p(SP) 1280/50p(HQ), 1280/50p(SP) Ⅵ On-screen display on the external monitor If the [SYSTEM SELECT] menu is set to [720-**], the onscreen display will appear as usual when the color bar is output on the external monitors below. ([DISPLAY ON TV] setting in the [CONNECTION SETTINGS] menu is invalid.) ● A/V OUT terminal ● D1 (480i/576i) output of COMPONENT OUT terminal ● 480i/480p/576i/576p output of HDMI terminal Applicable to: Full Auto shooting mode A, Manual shooting mode M The picture quality of the camera can be set using the [CAMERA PROCESS] menu. Adjustment screens are displayed for the following items in the [CAMERA PROCESS] menu. As the adjustments are shown on the screen, you can adjust the values while checking the picture quality on the camera. Ⅵ DETAIL LEVEL Ⅵ DETAIL V/H BALANCE Ⅵ GAMMA LEVEL Ⅵ COLOR GAIN For details of the respective items, see the [CAMERA PROCESS] menu. (A Page 59) Example: DETAIL LEVEL Detail Icon 0 Slide Bar 1 . Adjust accordingly. Push the Set Lever to the left or right. ● Doing so moves the slide bar in the same direction. The detail level of the camera image changes according to the movement along the slide bar. 2 . Confirm the adjusted value. Press the center of the Set Lever. ● The menu screen closes. Memo : ● When the setting values of the [GAMMA], [COLOR MATRIX], and [KNEE] items in the [CAMERA PROCESS] menu are altered, the change is reflected instantly on the screen. (A Page 59) 39
-
 1
1 -
2
-
3
-
4
-
5
-
6
-
7
-
8
-
9
-
10
-
11
-
12
-
13
-
14
-
15
-
16
-
17
-
18
-
19
-
20
-
21
-
22
-
23
-
24
-
25
-
26
-
27
-
28
-
29
-
30
-
31
-
32
-
33
-
 34
34 -
 35
35 -
 36
36 -
 37
37 -
 38
38 -
 39
39 -
 40
40 -
 41
41 -
 42
42 -
 43
43 -
 44
44 -
45
-
46
-
47
-
48
-
49
-
50
-
51
-
52
-
53
-
54
-
55
-
56
-
57
-
58
-
59
-
60
-
61
-
62
-
63
-
64
-
65
-
66
-
67
-
68
-
69
-
70
-
71
-
72
-
73
-
74
-
75
-
76
 |
 |
