Kyocera C270N Operation Guide - Page 98
Resetting the Custom Paper Type, Selecting the Output Stack, >>Duplex path, Enable
 |
UPC - 632983011935
View all Kyocera C270N manuals
Add to My Manuals
Save this manual to your list of manuals |
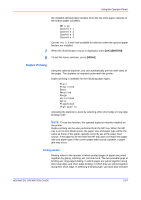
Page 98 highlights
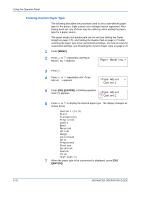
Using the Operator Panel 2 Press U or V repeatedly until >>Duplex path appears. >>Duplex path Enable 3 Press [OK] ([ENTER]). A blinking question mark (?) appears. >>Duplex path ? Enable 4 Select Enable or Disable using U or V. For details of the default setting for each paper type, see Paper Availability on page 1-2. 5 Press [OK] ([ENTER]). 6 Press [MENU]. The display returns to Ready. The custom paper type setting is completed. Resetting the Custom Paper Type 1 Press [MENU]. 2 Press U or V repeatedly until Paper Handling > appears. Paper Handling > 3 Press Z. 4 Press U or V repeatedly until >Reset Type Adjust appears. >Reset Type Adjust 5 To reset all custom paper types, press [OK] ([ENTER]). A question mark (?) appears. >Reset Type Adjust ? 6 Press [OK] ([ENTER]). All customized paper types will be reset to the default. The display returns to Ready. Selecting the Output Stack The Stack Select menu on the operator panel allows you to select either the face-down tray or the face-up tray option for the output stack. 1 Press [MENU]. 2-72 ADVANCED OPERATION GUIDE
-
 1
1 -
2
-
3
-
4
-
5
-
6
-
7
-
8
-
9
-
10
-
11
-
12
-
13
-
14
-
15
-
16
-
17
-
18
-
19
-
20
-
21
-
22
-
23
-
24
-
25
-
26
-
27
-
28
-
29
-
30
-
31
-
32
-
33
-
34
-
35
-
36
-
37
-
38
-
39
-
40
-
41
-
42
-
43
-
44
-
45
-
46
-
47
-
48
-
49
-
50
-
51
-
52
-
53
-
54
-
55
-
56
-
57
-
58
-
59
-
60
-
61
-
62
-
63
-
64
-
65
-
66
-
67
-
68
-
69
-
70
-
71
-
72
-
73
-
74
-
75
-
76
-
77
-
78
-
79
-
80
-
81
-
82
-
83
-
84
-
85
-
86
-
87
-
88
-
89
-
90
-
91
-
92
-
 93
93 -
 94
94 -
 95
95 -
 96
96 -
 97
97 -
 98
98 -
 99
99 -
 100
100 -
 101
101 -
 102
102 -
 103
103 -
104
-
105
-
106
-
107
-
108
-
109
-
110
-
111
-
112
-
113
-
114
-
115
-
116
-
117
-
118
-
119
-
120
-
121
-
122
-
123
-
124
-
125
-
126
-
127
-
128
-
129
-
130
-
131
-
132
-
133
-
134
-
135
-
136
-
137
-
138
-
139
-
140
-
141
-
142
-
143
-
144
-
145
-
146
-
147
-
148
-
149
-
150
 |
 |