Kyocera TASKalfa 3501i 3501i/4501i/5501i Printer Driver User Guide - Page 19
Selecting a PDL in Printing Preferences, Settings List, PCL XL Settings
 |
View all Kyocera TASKalfa 3501i manuals
Add to My Manuals
Save this manual to your list of manuals |
Page 19 highlights
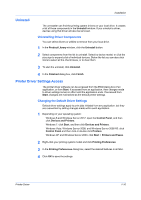
Driver Overview The printing system image displays any attached devices. Source and Destination selections are highlighted in green. For some models, the hard disk icon appears when a job storage option is selected in the Job tab. The page image is updated based on page selections made in the Quick Print tab, Basic tab, Layout tab, and Finishing tab. The color image illustrates color settings for color models. For black and white models or color models with Black selected, the image illustrates grayscale settings. The current page description language (PDL) is displayed in all of the images. You can change the PDL temporarily from any Printing Preferences tab to enable driver features. Selecting a PDL in Printing Preferences You can change the PDL from any Printing Preferences tab to enable driver features. This method of changing the PDL is temporary and reverts to the PDL set in Device Settings when the driver closes. You can also change the PDL in Device Settings > PDL. See PDL topics for details. This method makes the PDL setting permanent, regardless of whether the driver is opened or closed. 1 For a temporary setting, at the bottom of the overview image area click the button that displays the current PDL setting. 2 In the PDL Settings dialog box, select the desired page description language from the Select PDL list. 3 You can select the GDI compatible mode option to improve the output quality of graphics created by your application. 4 Click Settings when the PDL is set to KPDL or PDF, or for some models, PCL XL. If you select PCL XL, you can click Settings to open the PCL XL Settings dialog box and select Skip printing blank pages, Enable smart duplex printing, and Disable auto media type switching. If you select KPDL, you can click Settings to open the KPDL Settings dialog box and select Allow data passthrough and Enable smart duplex printing. Note that if you select Allow data passthrough, EMF spooling is unavailable in the Advanced tab. If you select PDF, you can click Settings to open the PDF Settings dialog box. 5 Click OK in the PDL Settings dialog box. Settings List The tree view in the lower part of each tab displays current settings for most driver features. You can scroll down to view features for all driver tabs. As each option is selected, the current selection is displayed in the tree view. You can click the minus (-) or plus (+) signs to hide or show details. Printer Driver 2-2
-
 1
1 -
2
-
3
-
4
-
5
-
6
-
7
-
8
-
9
-
10
-
11
-
12
-
13
-
 14
14 -
 15
15 -
 16
16 -
 17
17 -
 18
18 -
 19
19 -
 20
20 -
 21
21 -
 22
22 -
 23
23 -
 24
24 -
25
-
26
-
27
-
28
-
29
-
30
-
31
-
32
-
33
-
34
-
35
-
36
-
37
-
38
-
39
-
40
-
41
-
42
-
43
-
44
-
45
-
46
-
47
-
48
-
49
-
50
-
51
-
52
-
53
-
54
-
55
-
56
-
57
-
58
-
59
-
60
-
61
-
62
-
63
-
64
-
65
-
66
-
67
-
68
-
69
-
70
-
71
-
72
-
73
-
74
-
75
-
76
-
77
-
78
-
79
-
80
-
81
-
82
-
83
-
84
-
85
-
86
-
87
-
88
-
89
-
90
-
91
-
92
-
93
-
94
-
95
-
96
-
97
-
98
-
99
-
100
-
101
-
102
-
103
-
104
-
105
-
106
-
107
-
108
-
109
-
110
-
111
-
112
-
113
 |
 |
