Lexmark E238 Service Manual - Page 133
Heavy background, Partial blank image/white spots (no repeating pattern), PC Kit not a FRU
 |
View all Lexmark E238 manuals
Add to My Manuals
Save this manual to your list of manuals |
Page 133 highlights
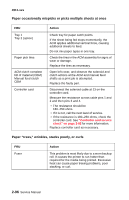
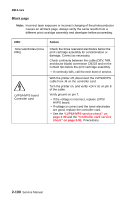
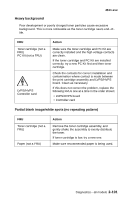
4511-xxx Heavy background Poor development or poorly charged toner particles cause excessive background. This is more noticeable as the toner cartridge nears end-of- life. FRU Toner cartridge (not a FRU) PC Kit (not a FRU) LVPS/HVPS Controller card Action Make sure the toner cartridge and PC Kit are correctly installed and the high voltage contacts are clean. If the toner cartridge and PC Kit are installed correctly, try a new PC Kit first and then toner cartridge. Check the contacts for correct installation and contamination where contact is made between the print cartridge assembly and LVPS/HVPS board. Clean as necessary. If this does not correct the problem, replace the following FRUs one at a time in the order shown: • LVPS/HVPS board • Controller card Partial blank image/white spots (no repeating pattern) FRU Toner cartridge (not a FRU) Paper (not a FRU) Action Remove the toner cartridge assembly, and gently shake the assembly to evenly distribute the toner. If toner cartridge is low, try a new one. Make sure recommended paper is being used. Diagnostics-all models 2-101
-
 1
1 -
2
-
3
-
4
-
5
-
6
-
7
-
8
-
9
-
10
-
11
-
12
-
13
-
14
-
15
-
16
-
17
-
18
-
19
-
20
-
21
-
22
-
23
-
24
-
25
-
26
-
27
-
28
-
29
-
30
-
31
-
32
-
33
-
34
-
35
-
36
-
37
-
38
-
39
-
40
-
41
-
42
-
43
-
44
-
45
-
46
-
47
-
48
-
49
-
50
-
51
-
52
-
53
-
54
-
55
-
56
-
57
-
58
-
59
-
60
-
61
-
62
-
63
-
64
-
65
-
66
-
67
-
68
-
69
-
70
-
71
-
72
-
73
-
74
-
75
-
76
-
77
-
78
-
79
-
80
-
81
-
82
-
83
-
84
-
85
-
86
-
87
-
88
-
89
-
90
-
91
-
92
-
93
-
94
-
95
-
96
-
97
-
98
-
99
-
100
-
101
-
102
-
103
-
104
-
105
-
106
-
107
-
108
-
109
-
110
-
111
-
112
-
113
-
114
-
115
-
116
-
117
-
118
-
119
-
120
-
121
-
122
-
123
-
124
-
125
-
126
-
127
-
 128
128 -
 129
129 -
 130
130 -
 131
131 -
 132
132 -
 133
133 -
 134
134 -
 135
135 -
 136
136 -
 137
137 -
 138
138 -
139
-
140
-
141
-
142
-
143
-
144
-
145
-
146
-
147
-
148
-
149
-
150
-
151
-
152
-
153
-
154
-
155
-
156
-
157
-
158
-
159
-
160
-
161
-
162
-
163
-
164
-
165
-
166
-
167
-
168
-
169
-
170
-
171
-
172
-
173
-
174
-
175
-
176
-
177
-
178
-
179
-
180
-
181
-
182
-
183
-
184
-
185
-
186
-
187
-
188
-
189
-
190
-
191
-
192
-
193
-
194
-
195
-
196
-
197
-
198
-
199
-
200
-
201
-
202
-
203
-
204
-
205
-
206
-
207
-
208
-
209
-
210
-
211
-
212
-
213
-
214
-
215
-
216
-
217
-
218
-
219
-
220
-
221
-
222
-
223
-
224
-
225
-
226
-
227
-
228
-
229
-
230
-
231
-
232
-
233
-
234
-
235
-
236
-
237
-
238
-
239
-
240
-
241
-
242
-
243
-
244
-
245
-
246
-
247
-
248
-
249
-
250
-
251
-
252
-
253
-
254
-
255
-
256
-
257
-
258
-
259
 |
 |
