Lexmark X204N User's Guide
Lexmark X204N - X B/W Laser Manual
 |
UPC - 734646157643
View all Lexmark X204N manuals
Add to My Manuals
Save this manual to your list of manuals |
Lexmark X204N manual content summary:
- Lexmark X204N | User's Guide - Page 1
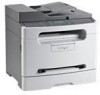
Lexmark X203n and X204n Series User's Guide March 2009 Machine type(s): 7011 Model(s): 200, 215 www.lexmark.com - Lexmark X204N | User's Guide - Page 2
10 Selecting a location for the printer...11 Printer configurations...12 Basic functions of the scanner...14 Understanding the ADF and scanner glass...15 Understanding the printer control panel...16 Additional printer setup 20 Attaching cables...20 Installing printer software...20 Verifying printer - Lexmark X204N | User's Guide - Page 3
forms and letterhead...38 Using recycled paper and other office papers ...39 Storing paper...39 Supported paper sizes, types, and weights...40 Paper types and weights supported by the printer ...40 Paper sizes supported by the printer settings...52 Copying from one size to another...52 Contents 3 - Lexmark X204N | User's Guide - Page 4
an e-mail using the address book ...60 Canceling an e-mail...60 Faxing 61 Getting the printer ready to fax...61 Initial fax setup...61 Choosing a fax connection...62 Connecting to an analog telephone line ...63 Connecting to a DSL service ...63 Connecting to a PBX or ISDN system...64 Connecting to - Lexmark X204N | User's Guide - Page 5
a fax...79 Scanning to a computer 81 Scanning to a computer...81 Understanding scan profile options...82 Improving scan quality...83 Using the Scan Center software...84 Understanding the Scan Center features...84 Understanding printer menus 85 Menus list...85 Paper menu...85 Default Source - Lexmark X204N | User's Guide - Page 6
supplies...117 Ordering toner cartridges...117 Ordering a photoconductor kit ...117 Replacing supplies...118 Replacing the toner cartridge ...118 Replacing the photoconductor kit ...119 Moving the printer to another location...122 Shipping the printer...123 Administrative support 124 Finding - Lexmark X204N | User's Guide - Page 7
may not have printed...129 54 Standard network software error...129 54 Network software error...129 56 Standard USB port disabled...129 84 PC Kit life warning...129 84 Replace PC Kit...129 88.yy Cartridge is low ...129 200-250 paper jam ...129 290-294 paper jams ...130 840.01 Scanner Disabled - Lexmark X204N | User's Guide - Page 8
image quality ...145 Cannot scan from a computer ...145 Cannot create a Scan Profile ...146 Solving fax problems...146 Caller ID is not shown...146 Cannot send or receive a fax...146 Can send but not receive faxes...148 Can receive but not send faxes...148 Received fax has poor print quality...149 - Lexmark X204N | User's Guide - Page 9
user documentation, to a professional service person. CAUTION-SHOCK HAZARD: To avoid the risk of electric shock when cleaning the exterior of the printer, unplug the power cord from the wall outlet and disconnect all cables from the printer before proceeding. CAUTION-SHOCK HAZARD: Do not use the fax - Lexmark X204N | User's Guide - Page 10
maintaining the printer • Troubleshooting and solving problems Help using the printer software Find it here Setup documentation-The setup documentation came with the printer and is also available on the Lexmark Web site at www.lexmark.com/publications/. User's Guide-The User's Guide is available - Lexmark X204N | User's Guide - Page 11
looking for? The latest supplemental information, updates, and technical support: • Documentation • Driver downloads • Live chat support • E-mail support • Telephone support Warranty information Find it here Lexmark Support Web site-support.lexmark.com Note: Select your region, and then select your - Lexmark X204N | User's Guide - Page 12
in.) 2 Right Side 31 cm (12 in.) 3 Front 41 cm (16 in.) 4 Rear 15 cm (6 in.) 5 Top 31 cm (12 in.) 1@!. 4 GHI 2 ABC 5 JKL 3 DEF 7 PQRS 8 TUV 6 MNO * 9 WXYZ 0 # 3 2 4 Printer configurations Basic model The following illustration shows the printer front with its basic features or - Lexmark X204N | User's Guide - Page 13
7 6 1@!. 4 GHI 2 ABC 5 JKL 3 DEF 7 PQRS 8 TUV 6 MNO * 9 WXYZ 0 # 1 2 5 1 Printer control panel 2 Standard exit bin 3 Paper stop 4 Manual feeder 5 Paper tray (250 sheets) 6 Front door 7 Front door release button Configured model The following illustration shows the fully configured - Lexmark X204N | User's Guide - Page 14
Feeder (ADF) 2 Printer control panel 3 Standard exit bin 4 Paper stop 5 Manual feeder 6 Paper tray (250 sheets) 7 Front door 8 Front door release button 4 5 6 Basic functions of the scanner The scanner provides copy, fax, and scan-to-network capability. Note: Fax is supported on selected models - Lexmark X204N | User's Guide - Page 15
20 lb) plain paper in the ADF input tray. • Scan sizes from 139.7 mm x 210 mm (5.5 x 8.3 in.) to 215.9 x 355.6 mm (8.5 x 14 in.). • Scan documents with mixed page sizes (letter and legal). • Scan used to scan or copy single glass in the upper left corner. • Scan or copy documents from 114.3 x 139.7 - Lexmark X204N | User's Guide - Page 16
as status and error messages. Access the administration menus; start, stop, or cancel a print job. 3 Keypad area Enter numbers, letters, or symbols on the display. Access the Address Book or change the default fax settings on printer models that support fax. 1 Copy 2 Scan/Email 3 Fax Options - Lexmark X204N | User's Guide - Page 17
printing options as well as status and error messages 3 Stop/Cancel • Stops printing • Exits a menu and returns to Ready 4 Start Starts a copy, scan, or fax job 5 Right arrow Scrolls right 6 Select Accepts menu selections and settings 7 Left arrow Scrolls left Learning about the printer 17 - Lexmark X204N | User's Guide - Page 18
4 3 Description Press to take the line off-hook (like picking up a telephone receiver) when faxing. Press a second time to hang up the line. Note: Fax mode is not available on selected printer models. 2 Keypad Enter numbers, letters, or symbols on the display. 1@!. 2 ABC 3 DEF 4 5 JKL 6 MNO - Lexmark X204N | User's Guide - Page 19
button to redial a fax number. • The button functions only within the Fax menu or with fax functions. When outside of the Fax menu, fax function, or home screen, pressing the Redial/Pause button causes an error beep. Note: Fax mode is not available on selected printer models. Learning about the - Lexmark X204N | User's Guide - Page 20
socket Installing printer software A printer driver is software that lets the computer communicate with the printer. The printer software is typically installed during the initial printer setup. If you need to install the software after setup, follow these instructions: For Windows users 1 Close all - Lexmark X204N | User's Guide - Page 21
5 Follow the instructions on the screen. Using the World Wide Web 1 Go to the Lexmark Web site at www.lexmark.com. 2 From the Drivers & Downloads menu, click Driver Finder. 3 Select your printer, and then select your operating system. 4 Download the driver and install the printer software. Verifying - Lexmark X204N | User's Guide - Page 22
a wired network. These instructions apply to Ethernet connections. Before you install the printer on a wired network, make sure that: • You have completed the initial setup of the printer. • The printer is connected to your network with the appropriate type of cable. For Windows users 1 Insert the - Lexmark X204N | User's Guide - Page 23
a different subnet than the printer. 4 Install the drivers and add the printer. a Install a PPD file user password, and then click OK. All the necessary software is installed on the computer. 9 Click Restart when installation is complete. b Add the printer: • For IP printing: In Mac OS X version 10 - Lexmark X204N | User's Guide - Page 24
you can quickly save paper and energy using one printer setting, see "Using Eco-Mode". Using recycled paper As an environmentally conscious company, Lexmark supports the use of recycled office paper produced specifically for use in laser printers. For more information on recycled papers that work - Lexmark X204N | User's Guide - Page 25
when a scan job is started. Paper Turn off print log features. Energy/Paper Use all the settings associated with Energy mode and Paper mode. Off Use factory default settings for all settings associated with Eco-Mode. This setting supports the performance specifications for your printer. To - Lexmark X204N | User's Guide - Page 26
and then select your country from the list. 3 Follow the instructions on the computer screen. Recycling Lexmark packaging Lexmark continually strives to minimize packaging. Less packaging helps to ensure that Lexmark printers are transported in the most efficient and environmentally sensitive manner - Lexmark X204N | User's Guide - Page 27
. You can also: 1 Visit our Web site at www.lexmark.com/recycle. 2 From the Toner Cartridges section, select your country from the list. 3 Follow the instructions on the computer screen. Reducing printer noise Use Quiet Mode to reduce the printer noise. Note: See the table for the multiple settings - Lexmark X204N | User's Guide - Page 28
4 Press the arrow buttons until Quiet Mode appears, and then press . 5 Select the setting you want, and then press . Submitting changes appears. Minimizing your printer's environmental impact 28 - Lexmark X204N | User's Guide - Page 29
a user-defined setting that lets you print on paper sizes that are not preset in the printer menus. Set the Paper Size for the Manual Feeder : The smallest supported Universal size is 76 x 127 mm (3 x 5 in.); the largest is 216 x 356 mm (8.5 x 14 in.). Paper that weighs at least 75 g/m2 (20 lb) is - Lexmark X204N | User's Guide - Page 30
) allows the printer to support the size, including support for standard features such as duplex printing and printing multiple pages on one sheet. Note: Select Portrait Height to adjust the paper height setting or Paper Width to adjust the paper width setting, or adjust both. Instructions to adjust - Lexmark X204N | User's Guide - Page 31
. 1 Pull the paper tray completely out. 1@!. 4 GHI 2 ABC 5 JKL 3 DEF 7 PQRS 8 TUV 6 MNO * 9 WXYZ 0 # 2 Squeeze the width guide tabs on the right guide as shown, and slide the width guides to the sides of the tray. The width guides move in unison. 1 2 Loading paper and specialty media 31 - Lexmark X204N | User's Guide - Page 32
the paper size. Use the size indicators on the bottom of the tray to help position the guide. If you are loading a longer size of paper, then squeeze the length guide tab and slide the length guide backward to the correct position for the paper size. The tray extends backward as shown. Loading - Lexmark X204N | User's Guide - Page 33
toward the back of the tray as shown with the recommended print side facedown. Note: The maximum fill line on the side of the width guide indicates the maximum height for loading paper. Do not overload the tray. Load letterhead with the print side facedown and the top edge of the - Lexmark X204N | User's Guide - Page 34
feeder The manual feeder can feed only one sheet of paper at a time. You can use the manual feeder to quickly print on paper types or sizes that are not currently loaded in the tray. 1 Insert the paper faceup into the center of the manual feeder. 2 Adjust the paper guides to the paper width. Loading - Lexmark X204N | User's Guide - Page 35
3 Push the paper further into the manual feeder until the printer pulls it in. Warning-Potential Damage: Do not force the paper into the feeder. Forcing the paper causes jams. 1@!. 4 GHI 2 ABC 5 JKL 3 DEF 7 PQRS 8 TUV 6 - Lexmark X204N | User's Guide - Page 36
Labels2 Paper tray 250 sheets 50 sheets Manual feeder 1 sheet 1 sheet Transparencies 50 1 Envelopes X 1 1 Based on 75 g/m2 (20 lb) paper 2 Single-sided paper labels designed for laser printers are supported for occasional use: no more than 20 pages of labels a month. Vinyl, pharmacy, and - Lexmark X204N | User's Guide - Page 37
manual feeder can automatically feed paper weights up to 163 g/m2 (43 lb bond) grain long. For best performance, use 75 g/m2 (20 problems. Curl can occur after the paper passes through the printer, problems. Smoothness Paper smoothness directly affects print quality. If paper is too rough, toner - Lexmark X204N | User's Guide - Page 38
in fewer paper feeding problems and better print quality part forms or documents Selecting paper Using appropriate paper prevents jams and helps ensure trouble-free inks that are not affected by the resin in toner. Inks that are oxidation-set or oil-based generally meet these requirements; latex inks - Lexmark X204N | User's Guide - Page 39
Lexmark supports the use of recycled office paper produced specifically for use in laser (electrophotographic) printers. In 1998, Lexmark feeding problems in any laser printer (for example, if the paper curls excessively under normal printing conditions). Paper that weighs at least 75 g/m2 (20 lb) - Lexmark X204N | User's Guide - Page 40
) Manual feeder (1 sheet) ADF (30 sheets)1 Letterhead Colored Paper Card stock X X Glossy paper X X X Paper labels2 X Transparencies Envelopes X X 1 Available on selected models. 2 Single-sided paper labels designed for laser printers are supported for occasional use: no more than 20 - Lexmark X204N | User's Guide - Page 41
Manual feeder (1 sheet) 210 x 297 mm (8.3 x 11.7 in.) A52 148 x 210 mm (5.8 x 8.3 in.) Executive 184 x 267 mm (7.3 x 10.5 in.) Folio 216 x 330 mm (8.5 x 13 in.) JIS B52 182 x 257 mm (7.2 x 10 2 Grain long only. 3 Supports only sizes for which the paper guide tabs can be adjusted to lightly - Lexmark X204N | User's Guide - Page 42
" on page 132 and "Storing paper" on page 39. Printing a document 1 From the printer control panel Paper menu, set the Paper Type and Paper Size to match the loaded paper. 2 Send the print job: For Windows users a With a document open, click File ΠPrint. b Click Properties, Preferences, Options, or - Lexmark X204N | User's Guide - Page 43
large quantities. When printing on transparencies: • Feed transparencies from the standard 250-sheet tray or the manual feeder. • Use transparencies designed specifically for laser printers. Check with the manufacturer or vendor to ensure transparencies are able to withstand temperatures up to 190 - Lexmark X204N | User's Guide - Page 44
and Lexmark part number 12A5010 for A4-size transparencies. Tips on using envelopes Print samples on the envelopes being considered for use before buying large quantities. When printing on envelopes: • Load envelopes from the manual feeder. • Use envelopes designed specifically for laser printers - Lexmark X204N | User's Guide - Page 45
or manual feeder. Do not use labels in the ADF. • Use labels designed specifically for laser printers. also contaminate the printer and the cartridge with adhesive, and could void the printer and cartridge warranties. • Do cause jams or other paper handling problems. • Check with the manufacturer - Lexmark X204N | User's Guide - Page 46
do one of the following: For Windows users In Windows Vista: 1 Click . 2 Click Control Panel. 3 Click Hardware and Sound. 4 Click Printers. 5 Double-click the printer icon. 6 Select the job to cancel. 7 From the keyboard, press Delete. In Windows XP: 1 Click Start. 2 From Printers and Faxes, double - Lexmark X204N | User's Guide - Page 47
Select a job to cancel. 3 From the keyboard, press Delete. For Macintosh users In Mac OS X version 10.5: 1 From the Apple menu, choose System Preferences. 2 Click Print & Fax, and then double-click the printer icon. 3 From the printer window, select the job to cancel. 4 From the icon bar at the top - Lexmark X204N | User's Guide - Page 48
clippings) into the ADF. Place these items on the scanner glass. 2 If you are loading a document into the ADF, then adjust the paper guides. 3 From the printer control panel, press . 4 If you placed the document on the scanner glass and have additional pages to copy, then place the next page on - Lexmark X204N | User's Guide - Page 49
control panel, press the Copy button, or use the keypad to enter the number of copies. 3 Change the copy settings as needed. 4 From the printer control panel, press . 5 Place the next document on the scanner glass, and then press 1 on the keypad. Otherwise, press 2 on the keypad. 6 Press to return - Lexmark X204N | User's Guide - Page 50
Submitting Changes... appears. 7 Use the printer control panel buttons to change other copy settings as needed. 8 Press repeatedly until Ready appears. 9 Press the Copy button. 10 Use the keypad to select the number of copies you want. 11 Press . 12 If you want to scan another photo, place it on the - Lexmark X204N | User's Guide - Page 51
If you are loading a document into the ADF, then adjust the paper guides. 3 From the printer control panel, press the Copy button. 4 From the Copy area, . 7 Press . 8 Change the copy settings as needed. 9 Press . 10 If you placed the document on the scanner glass and have additional pages to copy - Lexmark X204N | User's Guide - Page 52
one printer will scale the size automatically. 9 Press . 10 Change the copy settings as needed. 11 Press . 12 of the original document size. The factory default setting for Scale is Auto[100%]. If into the ADF, then adjust the paper guides. 3 From the printer control panel, press the Copy button. 4 - Lexmark X204N | User's Guide - Page 53
loading a document into the ADF, then adjust the paper guides. 3 From the printer control panel, press the Copy button. 4 Press the , press 2 on the keypad. 10 Press to return to Ready. Adjusting copy quality 1 From the printer control panel, press . 2 Press default copy quality setting. Copying 53 - Lexmark X204N | User's Guide - Page 54
the paper guides. 3 From the printer control panel, press the Copy button. 4 Press the Options button. 5 Press the arrow buttons until Collate appears, and then press . 6 Press the arrow buttons until On [1,2,1,2,1,2] or Off [1,1,1,2,2,2] appears, and then press to select one - Lexmark X204N | User's Guide - Page 55
original documents that you want copied to the same side of one sheet, then select 4 on 1 Portrait, and then press document into the ADF, then adjust the paper guides. 3 From the printer control panel, press . 4 If you placed forms, and documents that contain only text or fine line art. Copying 55 - Lexmark X204N | User's Guide - Page 56
Question Tip When should I use Text/Photo mode? • Use Text/Photo mode when copying an original document that contains a mixture of text and graphics. • Text/Photo mode is recommended for magazine articles, business graphics, and brochures. When should I use Photograph mode? Use Photograph mode - Lexmark X204N | User's Guide - Page 57
photos), transparencies, photo paper, or thin media (such as magazine clippings). You can use the printer to e-mail scanned documents to one or more recipients. There are three ways to send and e-mail from the printer. You can type the e-mail address, use a shortcut number, or use the address book - Lexmark X204N | User's Guide - Page 58
you are loading a document into the ADF, then adjust the paper guides. 3 From the printer control panel, press the Scan/Email button. Scan to E-mail appears. 4 Press . Search appears. Note: If there are no entries in the address book, then Manual Entry appears. 5 Press to search the address book, or - Lexmark X204N | User's Guide - Page 59
Start To Begin appears. d Press . Manually entering an e-mail address After selecting Manual on the printer control panel, To appears on the first into the ADF, then adjust the paper guides. 3 From the printer control panel, press the Scan/Email button. Scan to E-mail appears. 4 Press . Search - Lexmark X204N | User's Guide - Page 60
loading a document into the ADF, then adjust the paper guides. 3 From the printer control panel, press the Scan/Email button. Scan to E-mail appears. 4 Press . Search appears. Note: If there are no entries in the address book, then Manual Entry appears. 5 Press to search the address book. 6 Press - Lexmark X204N | User's Guide - Page 61
: If you do not have a TCP/IP environment, then you must use the printer control panel to enter your fax setup information. Using the printer control panel for fax setup When the printer is turned on for the first time or if the printer has been off for an extended time, a series of start-up screens - Lexmark X204N | User's Guide - Page 62
faxes. a Press the button on the numeric keypad that corresponds with the number or letter you want. The first time you press the button, the number for that button appears. When you press the button again, one 3 When Station Number appears, enter the printer fax number. a Press the button on the - Lexmark X204N | User's Guide - Page 63
. Connecting to a DSL service If you subscribe to a DSL service, then contact the DSL provider to obtain a DSL filter and telephone cord, and then follow these steps to connect the equipment: 1 Connect one end of the telephone cable that came with the printer to the printer LINE port . 2 Connect - Lexmark X204N | User's Guide - Page 64
distinguishing between fax and voice calls. The default printer settings enable the printer to receive faxes using all the ring patterns. If you want to use only one ring pattern to receive faxes, you must disable the other ring patterns. If you subscribe to a distinctive ring service, follow these - Lexmark X204N | User's Guide - Page 65
you disable all the distinctive ring patterns, then the printer will not receive faxes. Connecting the printer and a telephone or answering machine to the same telephone line 1 Connect one end of the telephone cable that came with the printer to the printer LINE port . 2 Connect the other end of the - Lexmark X204N | User's Guide - Page 66
Use one of the following methods: Answering machine Answering machine and telephone Telephone or a telephone with an integrated answering machine Faxing 66 - Lexmark X204N | User's Guide - Page 67
. 1 Connect one end of the telephone cable that came with the printer to the printer LINE port . Note: There is a special RJ-11 plug installed in the printer EXT port . Do not remove this plug. It is necessary for the proper operation of the fax function and connected telephones. 2 Connect the - Lexmark X204N | User's Guide - Page 68
Use one of the following methods: Answering machine Telephone Faxing 68 - Lexmark X204N | User's Guide - Page 69
port . Do not remove this plug. It is necessary for the proper operation of the fax function and connected telephones. 1 Connect one end of the telephone cable that came with the printer to the printer LINE port . 2 Connect the other end of the telephone cable to the adapter. Note: Your telephone - Lexmark X204N | User's Guide - Page 70
3 Connect the adapter into the N slot of an active analog telephone wall jack. 4 If you would like to use the same line for both fax and telephone communication, then connect a second telephone line (not provided) between the telephone and the F slot of an active analog telephone wall jack. 5 If you - Lexmark X204N | User's Guide - Page 71
to a computer with a modem Connect the printer to a computer with a modem to send faxes from the software program. Note: Setup steps may vary depending on your country or region. 1 Connect one end of the telephone cable that came with the printer to the printer LINE port . 2 Connect the other end - Lexmark X204N | User's Guide - Page 72
Connect an additional telephone cord (not provided) from the computer modem to the printer EXT port . Setting the outgoing fax name and number To have the designated fax name and fax number printed on outgoing faxes: 1 Type the printer IP address into the address field of your Web browser. Note: If - Lexmark X204N | User's Guide - Page 73
guides. 3 From the printer control panel, press the Fax button. 4 Enter the fax number, and then press . Notes: • To cause a two- or three-second pause in a fax desk. This gives you the flexibility of faxing documents directly from software programs. For Windows users 1 With a file open, click File - Lexmark X204N | User's Guide - Page 74
OS X version 10.5 users The steps for sending a fax from the computer vary depending on your operating system. For specific instructions using other Macintosh OS versions, see your Mac OS Help. 1 With a document open, choose File > Print. 2 From the Printer pop-up menu, choose your printer. Note: In - Lexmark X204N | User's Guide - Page 75
IP address of the printer, then print a network setup page and locate the IP address in the TCP/IP section. 2 Click Settings. 3 Click Manage Shortcuts. Note: A password may be required. If you do not have an ID and password, get one from your system support person. 4 Click Fax Shortcut Setup. 5 Type - Lexmark X204N | User's Guide - Page 76
Note: If the address book feature is not enabled, contact your system support person. 1 Load an original document faceup, short edge first into the a document into the ADF, then adjust the paper guides. 3 From the printer control panel, press the Fax button. To: appears on the first line, and the - Lexmark X204N | User's Guide - Page 77
these items on the scanner glass. 2 If you are loading a document into the ADF, then adjust the paper guides. 3 From the printer control panel, press the Fax button. 4 Enter the fax number using the keypad. 5 Press the Options button. 6 Press the arrow buttons until Darkness appears, and then press - Lexmark X204N | User's Guide - Page 78
This option lets you choose the size of the documents you are going to fax. Content This option tells the printer the original document type. Content affects the quality and size of your scan to fax. • Text-Emphasizes sharp, black, high-resolution text against a clean, white background • Text/Photo - Lexmark X204N | User's Guide - Page 79
amount of time required for the scan and increases the quality of the fax output. • Standard-Suitable for most faxing photos printed on a laser printer or taken from a magazine or newspaper. Forwarding a fax This option lets you print and forward received faxes to a fax number. 1 Type the printer - Lexmark X204N | User's Guide - Page 80
7 Click inside the Forward to Shortcut box, and then enter the shortcut number where you want the fax forwarded. Note: The shortcut number must be a valid shortcut number for the setting that was selected in the "Forward to" box. 8 Click Submit. Faxing 80 - Lexmark X204N | User's Guide - Page 81
directly connected to the printer for you to receive Scan to PC images. You can scan the document back to the computer over the network by creating a scan profile on the computer and then downloading the profile to the printer. Scanning to a computer 1 Type the printer IP address into the address - Lexmark X204N | User's Guide - Page 82
editing) • Presentation/Article • Drawing/Sketch • Last Used Scan Options Default Content Tell the printer the original document type. Choose from Text, Mixed, or when scanning photos printed on a laser printer or taken from a magazine or newspaper. Darkness Adjust how light or dark your scanned - Lexmark X204N | User's Guide - Page 83
original document is simplex (printed on one side) or duplex (printed on both sides). This lets the scanner know what needs to be scanned for inclusion in the document. Note: Duplex may not be available on all printer models. Orientation Tell the printer whether the original document is in portrait - Lexmark X204N | User's Guide - Page 84
used for other scan jobs. The following features are available: • Scan and send images to your computer • Convert scanned images to text • Preview the scanned image and adjust the brightness and contrast • Make larger scans without losing detail • Scan two-sided documents Scanning to a computer 84 - Lexmark X204N | User's Guide - Page 85
Copy Settings Fax Settings Print Settings Utilities Menu Set Date/Time * Depending on the printer setup, this menu item appears as Standard Network or Network . Paper menu Default Source menu Menu item Default Source Tray 1 Manual Paper Manual Env Description Sets a default paper source - Lexmark X204N | User's Guide - Page 86
: Letter is the US factory default setting. A4 is the international factory default setting. Lets you specify the size of the envelope being manually loaded Note: 10 Envelope is the US factory default setting. DL Envelope is the international factory default setting. Understanding printer menus 86 - Lexmark X204N | User's Guide - Page 87
, a user-defined name will appear instead of Custom Type . Lets you specify the type of paper being manually loaded Note: Plain Paper is the factory default setting. Lets you specify the type of envelope being manually loaded Note: Envelope is the factory default setting. Understanding printer - Lexmark X204N | User's Guide - Page 88
Type, the Select Texture feature lets you set the texture for that type of media. Notes: • Normal is the factory default setting for most items. • Rough is the factory default setting for Bond. • When Rough Texture is the setting selected for Select Type, Rough is the only Select Texture setting - Lexmark X204N | User's Guide - Page 89
Description Name a Custom Type , and this user-defined name displays instead of Custom Type . Notes: • The Custom Name must be limited to 16 characters. • Paper is the factory default setting for the Custom Type. • The custom media type must be supported by the selected tray or feeder in order - Lexmark X204N | User's Guide - Page 90
also be the Recycled paper type in other menus. Notes: • Paper is the factory default setting. • The Recycled type must be supported by the selected tray or feeder in order for you to print from that source. Custom Scan Sizes menu Menu item ID Card Width 1-8.50 inches (25-216 mm) Height 1-14 - Lexmark X204N | User's Guide - Page 91
setting for Orientation. • Off is the factory default setting for 2 scans/side. Universal Setup menu These menu items are used to specify the height, width, and feed direction of the Universal Paper Size. The Universal Paper Size is a user-defined paper size. It is listed with the other paper - Lexmark X204N | User's Guide - Page 92
can be increased in 1-mm increments. Specifies the feed direction Notes: • Short Edge is the factory default setting. • Long Edge appears only if the longest edge is shorter than the maximum length supported in the tray. Reports menu Reports menu Note: When you select a menu item from the Reports - Lexmark X204N | User's Guide - Page 93
including the printer serial number and model name. The report contains text and UPC barcodes that can be scanned into an Off is the factory default setting. Off resets the printer to its factory default settings. • The Energy setting minimizes the power used by the printer. Performance may be - Lexmark X204N | User's Guide - Page 94
item Quiet Mode Off On Run Initial setup Yes No Paper Sizes U.S. Metric Scan to PC Port Range Date Format MM-DD-YYYY DD-MM-YYYY YYYY-MM-DD Time Format 12 hour A.M./P.M. 24 hour clock Alarms Alarm Control Cartridge Alarm Timeouts Power Saver Disabled 1-240 Timeouts Screen Timeout 15-300 - Lexmark X204N | User's Guide - Page 95
default setting. Do Not Restore keeps the user-defined settings. • Restore returns all printer settings to the factory default settings except Network/Ports menu settings. All downloads pictures. This setting increases the time it takes to scan, but emphasizes a reproduction of the full dynamic range - Lexmark X204N | User's Guide - Page 96
Collate On Off Original Size Letter Legal Executive Folio Statement Universal ID Card Custom Scan Size 4 x 6 in. 3 x 5 in. Business Card A4 A5 Oficio (Mexico) JIS B5 Paper Source Tray Manual Feeder Darkness -4 to +4 Number of Copies 1-999 Background Removal -4 to +4 Contrast 0-5 Best for content - Lexmark X204N | User's Guide - Page 97
number. • Touch # 0 on the numeric keypad to go directly to the Manual Fax function. Specifies whether the printer may cancel fax jobs Note: If Cancel Faxes is not enabled, it will not appear as an option. Allow is the factory default setting. Specifies the type of caller ID being used Note: This - Lexmark X204N | User's Guide - Page 98
Note: 3 minutes is the factory default setting. Enables switchboard blind dialing without a dial tone Note: No is the factory default setting. Enables Error Correction Mode for fax jobs Note: Yes is the factory default setting. Lets you send faxes by scanning at the printer Note: On is the factory - Lexmark X204N | User's Guide - Page 99
Detail -4 to +4 Scan edge to edge On Off Sharpness 1-5 Fax Receive Settings Menu item Enable Fax Receive On Off Rings to Answer 1-25 Auto Answer Yes No Manual Answer Code 1-9 Description Allows driver to fax jobs to be sent by the printer Note: Yes is the factory default setting. Specifies the - Lexmark X204N | User's Guide - Page 100
job Note: Print log is the factory default setting. Enables printing of a receive error log following a receive error Note: Print Never is the factory default setting. Enables automatic printing of fax logs Note: On is the factory default setting. Specifies whether printed logs display the dialed - Lexmark X204N | User's Guide - Page 101
fax speaker Note: On is the factory default setting. Distinctive Ring Settings Menu item Single Ring On Off Double Ring On Off Description Answers calls with a one-ring pattern Note: On is the factory default default printer language is PCL Emulation. • Setting a printer language as the default - Lexmark X204N | User's Guide - Page 102
printed on one side of a sheet of paper Notes: • The number selected is the number of page images that will print per side • Off is the factory default setting. Specifies how the page images appear on the physical page Note: Horizontal is the factory default setting. Understanding printer menus 102 - Lexmark X204N | User's Guide - Page 103
2400 Image Q Pixel Boost Off Fonts Horizontally Vertically Both Directions Toner Darkness 1-10 Enhance Fine Lines On Off Description Specifies the orientation of a multiple-page sheet Notes: • Auto is the factory default setting. The printer chooses between portrait and landscape. • Long Edge uses - Lexmark X204N | User's Guide - Page 104
page containing the PostScript error Note: Off is the factory default setting. Description Specifies the set of fonts available Notes: • Resident is the factory default setting. It shows the factory default set of fonts downloaded into RAM. • Download appears only if downloaded fonts exist. It shows - Lexmark X204N | User's Guide - Page 105
to print on A4-size paper Notes: • 198 mm is the factory default setting. • The 203 mm setting sets the width of the page to allow the printing of eighty 10-pitch characters. Specifies whether the printer automatically performs a carriage return (CR) after a line feed (LF) control command Note - Lexmark X204N | User's Guide - Page 106
communication following the conventions defined by the NPA protocol Notes: • Auto is the factory default setting. • Changing this setting from the printer control panel and then exiting the menus causes the printer to restart. The menu selection is updated. Network Buffer Auto 3K to - Lexmark X204N | User's Guide - Page 107
setting. • A setting value of 0 disables the timeout. • If a value of 1-9 is selected, then the setting is saved as 10. Allows the printer to print a banner page Note: Off is the factory default setting. TCP/IP menu Use the following menu items to view or set the TCP/IP information. Note: This menu - Lexmark X204N | User's Guide - Page 108
view or change the current TCP/IP Address Note: Manually setting the IP address sets the Enable DHCP and Enable BOOTP and Enable RARP to Off on systems that support BOOTP and RARP. Lets you view or change the Enables IPv6 in the printer Note: On is the factory default setting. Specifies whether the - Lexmark X204N | User's Guide - Page 109
to automatically switch to PCL emulation when a print job received through a USB port requires it, regardless of the default printer language Notes: • On is the factory default setting. • When the Off setting is used, the printer does not examine incoming data. • When the Off setting is used, the - Lexmark X204N | User's Guide - Page 110
the printer to run the setup wizard Notes: • Yes is the factory default setting. • After completing the setup wizard by selecting Done at the Country select screen, the default becomes No. Specifies the time zone for the fax Note: * indicates that this value does not have pre-programmed Daylight - Lexmark X204N | User's Guide - Page 111
the time zone for the fax Note: * indicates that this value does not have pre-programmed Daylight Savings Time Start and End times. Observe DST On Off Accommodates Daylight Savings Time changes Note: On is the factory default setting. Enable NTP On Off Lets the printer clock synchronize with the - Lexmark X204N | User's Guide - Page 112
, unplug the power cord from the wall outlet and disconnect all cables to the printer before proceeding. 2 Remove all paper from the printer. 3 Dampen a clean, lint-free cloth with water. Warning-Potential Damage: Do not use household cleaners or detergents, as they may damage the finish of the - Lexmark X204N | User's Guide - Page 113
Cleaning the scanner glass If you encounter print quality problems, such as streaks on copied or scanned images, clean the areas shown. 1 Slightly dampen a soft, lint-free cloth or paper towel with water. 2 Open the scanner cover. 1 3 1@!. 4 GHI 7 PQRS 2 ABC 5 JKL 3 DEF 8 TUV 6 MNO * 9 WXYZ - Lexmark X204N | User's Guide - Page 114
Cleaning the ADF separator rollers After you have copied over 5,000 pages using the ADF, or if streaks are appearing, clean the ADF separator rollers. 1 Open the ADF cover. 2 Unlock the separator roll. 3 Remove the separator roll. Maintaining the printer 114 - Lexmark X204N | User's Guide - Page 115
4 Use a clean, lint-free cloth dampened with water to wipe the separator roller. 5 Reinstall the separator roll. 6 Lock the separator roll. Maintaining the printer 115 - Lexmark X204N | User's Guide - Page 116
water to wipe the other separator roller while gently rotating it. 8 Close the ADF cover. Storing supplies Choose a cool, clean storage area for the printer supplies. Store supplies right side up in their original packing until you are ready to use them. Do not expose supplies to: • Direct sunlight - Lexmark X204N | User's Guide - Page 117
name Toner cartridge Regular cartridge X203A21G Lexmark Return Program Cartridge X203A11G Ordering a photoconductor kit When 84 PC Kit Life Warning appears on the display, the photoconductor kit is near its end of life. Order a photoconductor kit so that one is available when 84 Replace PC Kit - Lexmark X204N | User's Guide - Page 118
To replace the toner cartridge: 1 Open the front door by pressing the button on the left side of the printer and lowering the door. 1@!. 4 GHI 2 ABC 5 JKL 3 DEF 7 PQRS 8 TUV 6 MNO * 9 WXYZ 0 # 2 Press the button on the base of the photoconductor kit, and then pull the toner cartridge out - Lexmark X204N | User's Guide - Page 119
The cartridge clicks into place when correctly installed. 1@!. 4 GHI 2 ABC 5 JKL 3 DEF 7 PQRS 8 TUV 6 MNO * 9 WXYZ 0 # 6 Close the front door. Replacing the photoconductor kit The printer automatically notifies you before the photoconductor kit reaches a page maximum by showing 84 PC Kit - Lexmark X204N | User's Guide - Page 120
JKL 3 DEF 7 PQRS 8 TUV 6 MNO * 9 WXYZ 0 # 2 Pull the photoconductor kit and toner cartridge out of the printer as a unit by pulling on the toner cartridge handle. Note: The photoconductor kit and toner cartridge form a unit. 1@!. 4 GHI 2 ABC 5 JKL 3 DEF 7 PQRS 8 TUV 6 MNO * 9 WXYZ - Lexmark X204N | User's Guide - Page 121
on the base of the photoconductor kit. Pull the toner cartridge up and out using the handle. 1 2 4 Unpack the new photoconductor kit. Be careful not to touch the photoconductor drum. Warning-Potential Damage: When replacing the photoconductor kit, do not leave the kit exposed to direct light for an - Lexmark X204N | User's Guide - Page 122
the counter, see the instruction sheet that came with the new photoconductor kit. Warning-Potential Damage: Resetting the photoconductor counter without replacing the photoconductor may damage your printer and void your warranty. 8 Close the front door. Moving the printer to another location Warning - Lexmark X204N | User's Guide - Page 123
moved to another location by following these precautions: • Any cart used to move the printer must be able to support its weight and have a large enough surface to support the full footprint of the printer. • Keep the printer in an upright position. • Avoid severe jarring movements. Shipping the - Lexmark X204N | User's Guide - Page 124
covers basic administrative support tasks. For more advanced system support tasks, see the Networking Guide on the Software and Documentation CD and the Embedded Web Server Administrator's Guide on the Lexmark Web site at www.lexmark.com. Using the Embedded Web Server If the printer is installed on - Lexmark X204N | User's Guide - Page 125
Server, you can view paper tray settings, the level of toner in the print cartridge, the percentage of life remaining in the maintenance kit, and capacity measurements of certain printer parts. To view the device status: 1 Type the printer IP address in the address field of your Web browser. Note - Lexmark X204N | User's Guide - Page 126
self test failed. Turn the printer off, wait about 10 seconds, and then turn the printer back on. If Performing Self Test and Ready do not appear, turn the printer off and contact Customer Support. Partial document or photo print, copies, or scans These are possible solutions. Try one or more of the - Lexmark X204N | User's Guide - Page 127
Do not turn the printer power off while Programming System Code appears on the display. Cartridge is low Try one or more of the following: • Replace the toner cartridge, and then press to clear the message and continue printing. • Press to clear the message and continue printing. Troubleshooting 127 - Lexmark X204N | User's Guide - Page 128
Invalid refill, change toner cartridge The printer has detected an invalid, refilled toner cartridge. Remove the toner cartridge, and then install a new one. 32 Replace unsupported cartridge Remove the toner cartridge, and then install a supported one. 34 Short paper The printer paper size setting - Lexmark X204N | User's Guide - Page 129
is near exhaustion. Try one or more of the following: • Replace the photoconductor kit. • Press to clear the message and continue printing. 84 Replace PC Kit The photoconductor kit is exhausted. Install a new photoconductor kit. 88.yy Cartridge is low Replace the toner cartridge, and then press - Lexmark X204N | User's Guide - Page 130
290-294 paper jams 1 Remove all original documents from the ADF. 2 Open the ADF cover. 3 Unlock the separator roll. 4 Remove the separator roll. 5 Remove the jammed paper. Troubleshooting 130 - Lexmark X204N | User's Guide - Page 131
6 Reinstall the separator roll. 7 Lock the separator roll. 8 Close the ADF cover. Troubleshooting 131 - Lexmark X204N | User's Guide - Page 132
JKL 3 DEF 8 TUV 6 MNO * 9 WXYZ 0 # 10 Press . 840.01 Scanner Disabled This message indicates that the scanner has been disabled by the system support person. 840.02 Scanner Auto Disabled This message indicates that the printer identified a problem with the scanner and automatically disabled - Lexmark X204N | User's Guide - Page 133
the paper tray while the printer is printing. Load it prior to printing, or wait for a prompt to load it. • Do not load too much paper. Make sure the stack height does not exceed the indicated maximum height. • Make sure the guides in the paper tray or the manual feeder are properly positioned - Lexmark X204N | User's Guide - Page 134
jam 1 Remove the tray from the printer. 1@!. 4 GHI 2 ABC 5 JKL 3 DEF 7 PQRS 8 TUV 6 MNO * 9 WXYZ 0 # 2 Remove the jam if you see it here. 1@!. 4 GHI 2 ABC 5 JKL 3 DEF 7 PQRS 8 TUV 6 MNO * 9 WXYZ 0 # 3 If you do not see it, see "201 paper jam" on page 135. Troubleshooting 134 - Lexmark X204N | User's Guide - Page 135
toner cartridge. 1@!. 4 GHI 2 ABC 5 JKL 3 DEF 7 PQRS 8 TUV 6 MNO * 9 WXYZ 0 # 2 Lift the flap at the front of the printer, and remove any jammed sheets. 3 Align and insert the photoconductor kit and toner cartridge. 4 Close the front door. 5 Insert the tray. 6 Press . Troubleshooting - Lexmark X204N | User's Guide - Page 136
allow the surface to cool before touching. 1 Open the front door, and then remove the photoconductor kit and toner cartridge. 1@!. 4 GHI 2 ABC 5 JKL 3 DEF 7 PQRS 8 TUV 6 MNO * 9 WXYZ 0 # 2 Lift the flap at the front of the printer, and then remove any jammed sheets. Troubleshooting 136 - Lexmark X204N | User's Guide - Page 137
3 Open the rear door. 4 Remove the jam. 5 Close the rear door. 6 Align and insert the photoconductor kit and toner cartridge. 7 Close the front door. 8 Press . Troubleshooting 137 - Lexmark X204N | User's Guide - Page 138
241 paper jam 1 Remove the tray from the printer. 1@!. 4 GHI 2 ABC 5 JKL 3 DEF 7 PQRS 8 TUV 6 MNO * 9 WXYZ 0 # 2 Remove the jam. 3 Insert the tray. 4 Press . Troubleshooting 138 - Lexmark X204N | User's Guide - Page 139
If it is visible, then gently pull the jammed sheet from the front of the manual feeder. If the sheet is not visible, then complete the following steps: 1 Remove the photoconductor kit and toner cartridge. 1@!. 4 GHI 2 ABC 5 JKL 3 DEF 7 PQRS 8 TUV 6 MNO * 9 WXYZ 0 # Troubleshooting 139 - Lexmark X204N | User's Guide - Page 140
, and then remove any jammed sheets. 3 Align and insert the photoconductor kit and toner cartridge. 4 Press . Solving printing problems Jobs do not print These are possible solutions. Try one or more of the following: MAKE SURE THE PRINTER IS READY TO PRINT Make sure Ready or Power Saver appears on - Lexmark X204N | User's Guide - Page 141
collate These are possible solutions. Try one or more of the following: MAKE SURE COLLATE IS SET TO ON From Print Properties or the printer control panel Finishing menu, set Collate to On. Note: Setting Collate to Off in the software overrides the setting in the Finishing menu. Troubleshooting 141 - Lexmark X204N | User's Guide - Page 142
problems Copier does not respond These are possible solutions. Try one or more of the following: CHECK THE DISPLAY FOR ERROR MESSAGES Clear any error messages. CHECK THE POWER Make sure the printer is • Checkerboard pattern • Distorted graphics or pictures • Missing characters Troubleshooting 142 - Lexmark X204N | User's Guide - Page 143
page 150. CHECK THE DISPLAY FOR ERROR MESSAGES Clear any error messages. THE TONER MAY BE LOW When 88 Cartridge is low appears or when the print becomes faded, replace the toner cartridge. THE SCANNER GLASS MAY BE DIRTY Clean the scanner glass with a clean, lint-free cloth dampened with water. For - Lexmark X204N | User's Guide - Page 144
on. This often fixes the problem with the scanner. Scan was not successful These are possible solutions. Try one or more of the following: CHECK THE CABLE CONNECTIONS Make sure the network or USB cable is securely connected to the computer and the printer. AN ERROR MAY HAVE OCCURRED IN THE PROGRAM - Lexmark X204N | User's Guide - Page 145
facedown on the scanner glass in the upper left corner. Cannot scan from a computer These are possible solutions. Try one or more of the following: CHECK THE DISPLAY FOR ERROR MESSAGES Clear any error messages. CHECK THE POWER Make sure the printer is plugged in, the power is on, and Ready appears - Lexmark X204N | User's Guide - Page 146
Windows XP, then the Windows XP personal firewall must be disabled before you can use Scan to PC profiles. Solving fax problems Caller ID is not shown Contact your telecommunications company to verify that your telephone line is subscribed to the caller ID service. If your region supports multiple - Lexmark X204N | User's Guide - Page 147
company may disrupt fax transmissions. To enable both Voice Mail and the printer to answer calls, you may want to consider adding a second telephone line for the printer. THE PRINTER MEMORY MAY BE FULL 1 Dial the fax number. 2 Scan the original document one page at a time. Troubleshooting 147 - Lexmark X204N | User's Guide - Page 148
Submit. THE TONER MAY BE LOW 88 Cartridge low appears when the toner is low. Can receive but not send faxes These are possible solutions. Try one or more of the following: MAKE SURE THE PRINTER IS IN FAX MODE From the printer control panel, press the Fax button to put the printer in Fax mode. MAKE - Lexmark X204N | User's Guide - Page 149
. • Increase the fax scan resolution, if possible. THE TONER MAY BE LOW When 88 Cartridge low appears or when you experience faded print, replace the cartridge. MAKE SURE THE FAX TRANSMISSION SPEED IS NOT SET TOO HIGH Decrease the incoming fax transmission speed: 1 Type the printer IP address into - Lexmark X204N | User's Guide - Page 150
may help you solve print quality problems. If these suggestions still do not correct the problem, then contact Customer Support. You may have a printer part that requires adjustment or replacement. Isolating print quality problems To help isolate print quality problems, print the print quality test - Lexmark X204N | User's Guide - Page 151
toner cartridge and photoconductor kit. THE TONER MAY BE LOW When 88 Cartridge low appears, order a new toner cartridge. If the problem continues, the printer may need to be serviced. For more information, contact Customer Support. Characters have jagged or uneven edges If you are using downloaded - Lexmark X204N | User's Guide - Page 152
. • For Windows users, change the setting from Print Properties. • For Macintosh users, change the setting from the Print dialog. Ghost images ABCDE ABCDE ABCDE These are possible solutions. Try one or more of the following: THE PHOTOCONDUCTOR KIT IS DEFECTIVE Replace the photoconductor kit. CHECK - Lexmark X204N | User's Guide - Page 153
setting: • For Windows users, specify the type from Print Properties. • For Macintosh users, specify the type from the Print dialog. THE PAPER HAS ABSORBED MOISTURE DUE TO HIGH HUMIDITY • Load paper from a fresh package. • Store paper in its original wrapper until you use it. Troubleshooting 153 - Lexmark X204N | User's Guide - Page 154
from the Paper menu. 2 Before sending the job to print, specify the correct type setting: • For Windows users, specify the type from Print Properties. • For Macintosh users, specify the type from the Print dialog. THE TONER CARTRIDGE MAY BE DEFECTIVE Replace the toner cartridge. Troubleshooting 154 - Lexmark X204N | User's Guide - Page 155
: • For Windows users, specify the type from Print Properties. • For Macintosh users, specify the type from the Print dialog. THE TONER MAY BE LOW When 88 Cartridge is low appears, replace the toner cartridge. THE TONER CARTRIDGE MAY BE DEFECTIVE Replace the toner cartridge. Troubleshooting 155 - Lexmark X204N | User's Guide - Page 156
to redistribute the toner, and then reinstall it. THE TONER CARTRIDGE MAY BE DEFECTIVE OR LOW ON TONER Replace the used toner cartridge with a new one. CLEAN THE ADF AND SCANNER GLASS If you are using the ADF and vertical black or white lines appear, then clean the ADF glass. Troubleshooting 156 - Lexmark X204N | User's Guide - Page 157
From Print Properties, the Print dialog, or the printer control panel, select another paper source for the job. THE TONER CARTRIDGE MAY BE DEFECTIVE Replace the toner cartridge. MAKE SURE THE PAPER PATH IS CLEAR Paper could be caught between the photoconductor kit and the fuser. Check the paper path - Lexmark X204N | User's Guide - Page 158
Replace the toner cartridge. THERE IS TONER IN THE PAPER PATH Contact Customer Support. Toner rubs off These are possible solutions. Try one or more of the following: CHECK THE PAPER TYPE SETTING Make sure the paper type setting matches the paper loaded in the tray: 1 From the printer control - Lexmark X204N | User's Guide - Page 159
one or more of the following: THE TONER CARTRIDGE MAY BE DEFECTIVE Replace the toner cartridge. THERE IS TONER IN THE PAPER PATH Contact Customer Support. Transparency print quality is poor Try one or more of the following: CHECK THE TRANSPARENCIES Use only transparencies recommended by the printer - Lexmark X204N | User's Guide - Page 160
one or more of the following: CHECK THE NETWORK CONNECTIONS Make sure the printer and Support When you call Customer Support, describe the problem you are experiencing, the message on the display, and the troubleshooting steps you have already taken to find a solution. You need to know your printer - Lexmark X204N | User's Guide - Page 161
in conjunction with other products, programs, or services, except those expressly designated by the manufacturer, are the user's responsibility. For Lexmark technical support, visit support.lexmark.com. For information on supplies and downloads, visit www.lexmark.com. If you don't have access to - Lexmark X204N | User's Guide - Page 162
Lexmark International, Inc., registered in the United States and/or other countries. PCL® is a registered trademark of the Hewlett-Packard Company. PCL is Hewlett-Packard Company's designation of a set of printer with the instructions, may user is encouraged to try to correct the interference by one - Lexmark X204N | User's Guide - Page 163
information statement should be directed to: Director of Lexmark Technology & Services Lexmark International, Inc. 740 West New Circle Road Lexington , dBA Printing 51 dBA Scanning 52 dBA, 49dBA Copying 52 dBA Ready 26 dBA Values are subject to change. See www.lexmark.com for current values. - Lexmark X204N | User's Guide - Page 164
in the wavelength of 655-675 nanometers. The laser system and printer are designed so there is never any human access to laser radiation above a Class I level during normal operation, user maintenance, or prescribed service condition. Laser advisory label A laser notice label may be affixed to this - Lexmark X204N | User's Guide - Page 165
scanning hard-copy documents. 460 W Ready The product is waiting for a print job. 70 W Power Saver The product is in energy-saving mode. 10 to change. See www.lexmark.com for current values. Power time, called the Power Saver Timeout. Factory default Power Saver Timeout for this product (in - Lexmark X204N | User's Guide - Page 166
service, remove all print cartridges, programs, data, and removable storage media (unless directed otherwise by Lexmark). For further explanation of your warranty alternatives and the nearest Lexmark authorized servicer in your area contact Lexmark on the World Wide Web at www.lexmark.com/support - Lexmark X204N | User's Guide - Page 167
-free operation of any product or the durability or longevity of prints produced by any product. Warranty service does not include repair of failures caused by: -Modification or unauthorized attachments -Accidents, misuse, abuse or use inconsistent with Lexmark user's guides, manuals, instructions - Lexmark X204N | User's Guide - Page 168
, you agree to: (1) use only genuine Lexmark toner cartridges and developer components with this printer except as otherwise provided below, and (2) pass this license/agreement to any subsequent user of this printer. The patented Lexmark toner cartridges and developer components inside are licensed - Lexmark X204N | User's Guide - Page 169
on the date the Software Program is delivered to the original end-user. This limited warranty applies only to Software Program media purchased new from Lexmark or an Authorized Lexmark Reseller or Distributor. Lexmark will replace the Software Program should it be determined that the media does not - Lexmark X204N | User's Guide - Page 170
users to the number specified in your agreement with Lexmark. You may not separate the components of the Software Program for use on more than one computer whether in the form of a discrete agreement, shrink-wrap license, or electronic license terms at the time of download or installation. Use - Lexmark X204N | User's Guide - Page 171
affiliates, and agents may collect and use information you provide in relation to support services performed with respect to the Software Program and requested by you. Lexmark agrees not to use this information in a form that personally identifies you except to the extent necessary to provide such - Lexmark X204N | User's Guide - Page 172
signed by the Director of Manufacturing and Technical Support, Lexmark International, Inc., S.A., Boigny, France. This such as facsimile. Notice to users of the US telephone network your telephone company. This equipment uses the RJ-11C Universal Service Order Code (USOC) jack. A plug and jack used - Lexmark X204N | User's Guide - Page 173
, the telephone company may request that you disconnect the equipment until the problem is resolved. This equipment contains no user serviceable parts. For repair and warranty information, contact Lexmark International, Inc. See the previous paragraph for contact information. Connection to party - Lexmark X204N | User's Guide - Page 174
User Instructions. The grant of a telepermit for any item of terminal equipment indicates only that Telecom has accepted that the item complies with minimum conditions for connection to its network. It indicates no endorsement of the product by Telecom, nor does it provide any sort of warranty - Lexmark X204N | User's Guide - Page 175
one call attempt and the beginning of another. Using this product in Switzerland This product requires a Swiss billing tone filter (Lexmark Lexmark poiché gli impulsi remoti sono presenti su tutte le linee analogiche in Svizzera. Notice to Users and Technical Support, Lexmark International, S. - Lexmark X204N | User's Guide - Page 176
is applicable if your printer has a wireless other regulatory agencies. A minimum separation of 20 cm (8 inches) must be maintained between the other regulatory agencies. Notice to users in Brazil Este equipamento opera em service, this device is intended to be operated indoors and away from windows - Lexmark X204N | User's Guide - Page 177
toute interférence radio au service faisant l'objet d'une licence, Canada. Taiwan NCC RF notice statement Notice to users in the European Union Products bearing the CE mark is available from the Director of Manufacturing and Technical Support, Lexmark International, S. A., Boigny, France. Refer to the - Lexmark X204N | User's Guide - Page 178
is available from the Director of Manufacturing and Technical Support, Lexmark International, S. A., Boigny, France. Refer to the table at the end of the Notices section for further compliance information. Česky Společnost Lexmark International, Inc. tímto prohlašuje, že výrobek tento výrobek je - Lexmark X204N | User's Guide - Page 179
, Inc. izjavlja, da je ta izdelek v skladu z bistvenimi zahtevami in ostalimi relevantnimi določili direktive 1999/5/ES. Svenska Härmed intygar Lexmark International, Inc. att denna produkt står i överensstämmelse med de väsentliga egenskapskrav och övriga relevanta bestämmelser som framgår av - Lexmark X204N | User's Guide - Page 180
software error 129 56 Standard USB port disabled 129 84 PC Kit life warning 129 84 Replace PC Kit 129 840.01 Scanner Disabled 132 840.02 Scanner Auto Disabled 132 88.yy Cartridge is low 129 Symbols "scan to computer" screen options 82 A address book, e-mail setting up 57 address book, fax using - Lexmark X204N | User's Guide - Page 181
, 172, 176 features Scan Center 84 finding information 10 publications 10 Web site 10 Finishing menu 102 font sample list printing 46 forwarding faxes 79 G green settings Eco-Mode 25 Power Saver 26 Quiet Mode 27 Index 181 I information, finding 10 installing printer software 20 Invalid Engine Code - Lexmark X204N | User's Guide - Page 182
occur 142 printer basic model 12 configurations 12 minimum clearances 11 moving 122 selecting a location 11 shipping 123 printer control panel factory defaults, restoring 125 printer messages 200-250 paper jam 129 30 Invalid refill, change toner cartridge 128 31.yy Replace defective or missing - Lexmark X204N | User's Guide - Page 183
26 Lexmark products 26 toner cartridges 27 WEEE statement 163 reducing a copy 52 reducing noise 27 replacing photoconductor kit 119 toner cartridge 118 reports viewing 124 Reports menu 92 resolution, fax changing 77 S safety information 9 Scan Center features 84 scan quality, improving 83 scan to - Lexmark X204N | User's Guide - Page 184
off 158 toner specks 159 troubleshooting, scan cannot create a Scan Profile 146 cannot scan from a computer 145 scan was not successful 144 scanner unit does not close 142 scanning takes too long or freezes the computer 144 U Universal Paper Size 91 setting 29 Universal Setup menu 91 USB port 20
-
 1
1 -
 2
2 -
 3
3 -
 4
4 -
 5
5 -
 6
6 -
 7
7 -
8
-
9
-
10
-
11
-
12
-
13
-
14
-
15
-
16
-
17
-
18
-
19
-
20
-
21
-
22
-
23
-
24
-
25
-
26
-
27
-
28
-
29
-
30
-
31
-
32
-
33
-
34
-
35
-
36
-
37
-
38
-
39
-
40
-
41
-
42
-
43
-
44
-
45
-
46
-
47
-
48
-
49
-
50
-
51
-
52
-
53
-
54
-
55
-
56
-
57
-
58
-
59
-
60
-
61
-
62
-
63
-
64
-
65
-
66
-
67
-
68
-
69
-
70
-
71
-
72
-
73
-
74
-
75
-
76
-
77
-
78
-
79
-
80
-
81
-
82
-
83
-
84
-
85
-
86
-
87
-
88
-
89
-
90
-
91
-
92
-
93
-
94
-
95
-
96
-
97
-
98
-
99
-
100
-
101
-
102
-
103
-
104
-
105
-
106
-
107
-
108
-
109
-
110
-
111
-
112
-
113
-
114
-
115
-
116
-
117
-
118
-
119
-
120
-
121
-
122
-
123
-
124
-
125
-
126
-
127
-
128
-
129
-
130
-
131
-
132
-
133
-
134
-
135
-
136
-
137
-
138
-
139
-
140
-
141
-
142
-
143
-
144
-
145
-
146
-
147
-
148
-
149
-
150
-
151
-
152
-
153
-
154
-
155
-
156
-
157
-
158
-
159
-
160
-
161
-
162
-
163
-
164
-
165
-
166
-
167
-
168
-
169
-
170
-
171
-
172
-
173
-
174
-
175
-
176
-
177
-
178
-
179
-
180
-
181
-
182
-
183
-
184
 |
 |

Lexmark X203n and X204n
Series
User's Guide
March 2009
www.lexmark.com
Machine type(s):
7011
Model(s):
200, 215