Lexmark X204N User's Guide - Page 20
Additional printer setup, Attaching cables, Installing printer software, For Windows users - usb driver
 |
UPC - 734646157643
View all Lexmark X204N manuals
Add to My Manuals
Save this manual to your list of manuals |
Page 20 highlights
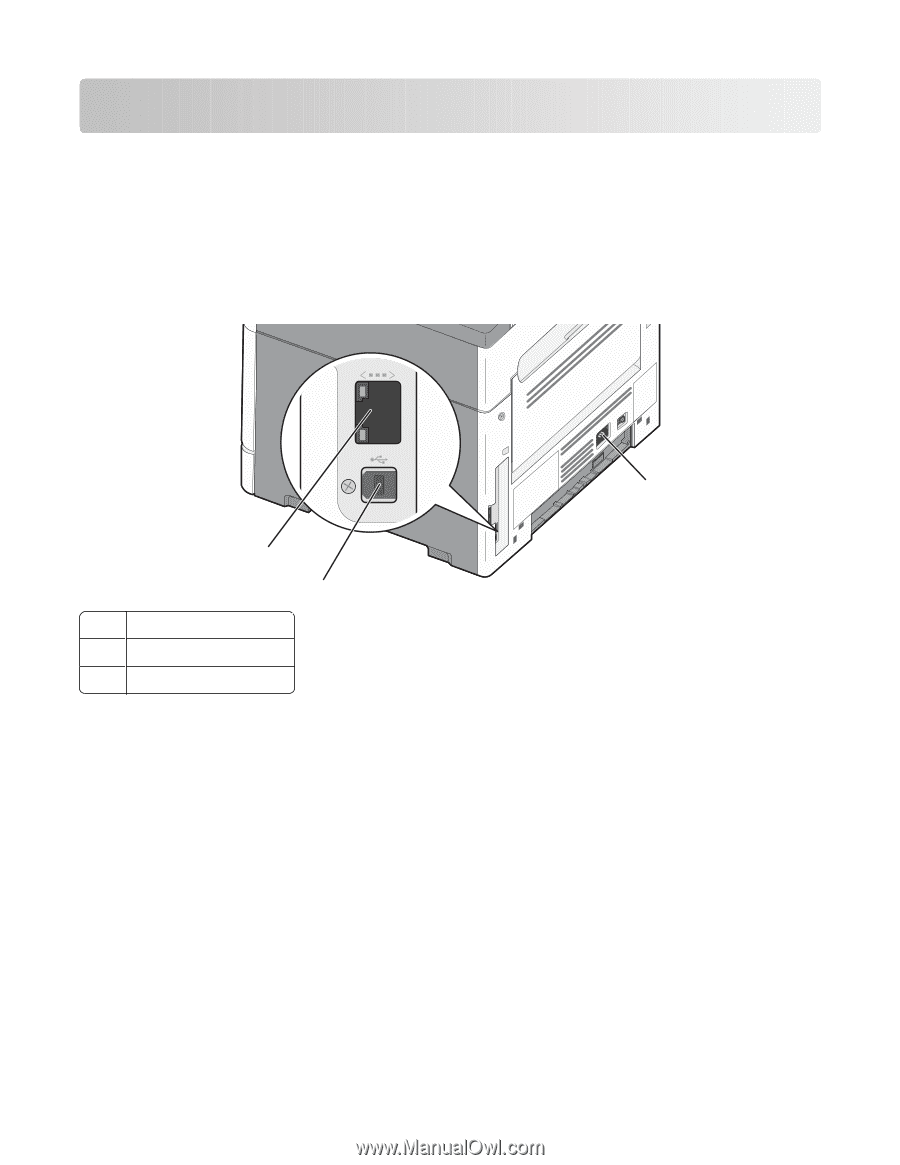
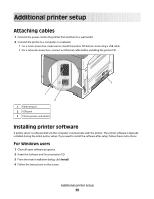
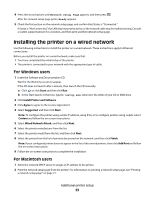
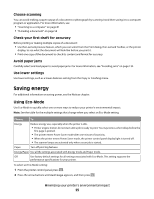
Additional printer setup Attaching cables 1 Connect the power cord to the printer first and then to a wall outlet. 2 Connect the printer to a computer or a network. • For a local connection, make sure to install the printer CD before connecting a USB cable. • For a network connection, connect an Ethernet cable before installing the printer CD. 3 1 2 1 Ethernet port 2 USB port 3 Printer power cord socket Installing printer software A printer driver is software that lets the computer communicate with the printer. The printer software is typically installed during the initial printer setup. If you need to install the software after setup, follow these instructions: For Windows users 1 Close all open software programs. 2 Insert the Software and Documentation CD. 3 From the main installation dialog, click Install. 4 Follow the instructions on the screen. Additional printer setup 20
-
 1
1 -
2
-
3
-
4
-
5
-
6
-
7
-
8
-
9
-
10
-
11
-
12
-
13
-
14
-
 15
15 -
 16
16 -
 17
17 -
 18
18 -
 19
19 -
 20
20 -
 21
21 -
 22
22 -
 23
23 -
 24
24 -
 25
25 -
26
-
27
-
28
-
29
-
30
-
31
-
32
-
33
-
34
-
35
-
36
-
37
-
38
-
39
-
40
-
41
-
42
-
43
-
44
-
45
-
46
-
47
-
48
-
49
-
50
-
51
-
52
-
53
-
54
-
55
-
56
-
57
-
58
-
59
-
60
-
61
-
62
-
63
-
64
-
65
-
66
-
67
-
68
-
69
-
70
-
71
-
72
-
73
-
74
-
75
-
76
-
77
-
78
-
79
-
80
-
81
-
82
-
83
-
84
-
85
-
86
-
87
-
88
-
89
-
90
-
91
-
92
-
93
-
94
-
95
-
96
-
97
-
98
-
99
-
100
-
101
-
102
-
103
-
104
-
105
-
106
-
107
-
108
-
109
-
110
-
111
-
112
-
113
-
114
-
115
-
116
-
117
-
118
-
119
-
120
-
121
-
122
-
123
-
124
-
125
-
126
-
127
-
128
-
129
-
130
-
131
-
132
-
133
-
134
-
135
-
136
-
137
-
138
-
139
-
140
-
141
-
142
-
143
-
144
-
145
-
146
-
147
-
148
-
149
-
150
-
151
-
152
-
153
-
154
-
155
-
156
-
157
-
158
-
159
-
160
-
161
-
162
-
163
-
164
-
165
-
166
-
167
-
168
-
169
-
170
-
171
-
172
-
173
-
174
-
175
-
176
-
177
-
178
-
179
-
180
-
181
-
182
-
183
-
184
 |
 |