Samsung SCH-R261 User Manual (user Manual) (ver.1.0) (English(north America)) - Page 43
Pause Dial from Contacts, Edit an Existing Email Address, Options, Sec Pause
 |
View all Samsung SCH-R261 manuals
Add to My Manuals
Save this manual to your list of manuals |
Page 43 highlights
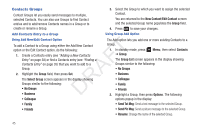
To add pauses to a Contacts entry number, do the following: Pause Dial from Contacts 1. Find the Contacts entry associated with the number you want to include one or more pauses. (For more information, refer to "Finding a Contacts Entry" on page 35.) 1. If you stored the number using 2-second pause(s), simply find the Contacts entry, highlight the number, and press . (For more information, refer to "Finding a Contacts Entry" on page 35.) 2. Select and edit the desired number. (For more information, 2. If you stored the number using Wait(s), find and dial the refer to "Editing a Contacts Entry" on page 39.) number from Contacts and wait for the appropriate prompt 3. 4. 5. Press Options. The following pause options appear in the display: • 2-Sec Pause: A 2-second pause after which dialing resumes. T • Wait: A hard pause (waits for input from you). Select the pause option of your choice to add it to the F number sequence. When you're finished entering information, press to DRA store the number to Contacts. from the dialed number. 3. Press to resume dialing the number. Edit an Existing Email Address 1. Find the Contacts entry you want to edit. (For more information, refer to "Finding a Contacts Entry" on page 35.) 2. Highlight the desired Contacts entry, then press Edit. The Edit Contact screen appears in the display. 3. Highlight the Email field. 4. Use the keypad to edit the Email address. (For more information, refer to "Entering Text" on page 31.) 5. Press to save your changes. Understanding Your Contacts 40
-
 1
1 -
2
-
3
-
4
-
5
-
6
-
7
-
8
-
9
-
10
-
11
-
12
-
13
-
14
-
15
-
16
-
17
-
18
-
19
-
20
-
21
-
22
-
23
-
24
-
25
-
26
-
27
-
28
-
29
-
30
-
31
-
32
-
33
-
34
-
35
-
36
-
37
-
 38
38 -
 39
39 -
 40
40 -
 41
41 -
 42
42 -
 43
43 -
 44
44 -
 45
45 -
 46
46 -
 47
47 -
 48
48 -
49
-
50
-
51
-
52
-
53
-
54
-
55
-
56
-
57
-
58
-
59
-
60
-
61
-
62
-
63
-
64
-
65
-
66
-
67
-
68
-
69
-
70
-
71
-
72
-
73
-
74
-
75
-
76
-
77
-
78
-
79
-
80
-
81
-
82
-
83
-
84
-
85
-
86
-
87
-
88
-
89
-
90
-
91
-
92
-
93
-
94
-
95
-
96
-
97
-
98
-
99
-
100
-
101
-
102
-
103
-
104
-
105
-
106
-
107
-
108
-
109
-
110
-
111
-
112
-
113
-
114
-
115
-
116
-
117
-
118
-
119
-
120
-
121
-
122
-
123
-
124
-
125
-
126
-
127
-
128
-
129
-
130
-
131
-
132
-
133
-
134
-
135
-
136
-
137
-
138
-
139
-
140
-
141
-
142
-
143
-
144
-
145
-
146
-
147
-
148
-
149
-
150
-
151
 |
 |
