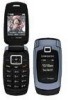
Samsung SCH U340 User Manual (ENGLISH) - Page 11
Low battery indicator, Setting Up Your Voice Mail, Listen to voice mail
 |
UPC - 635753463200
View all Samsung SCH U340 manuals
Add to My Manuals
Save this manual to your list of manuals |
Page 11 highlights
2. Insert the smaller end of the Travel Adapter into the charger/accessory connector at the bottom end of your phone. Setting Up Your Voice Mail Note: With the phone turned OFF, a discharged battery recharges fully in approximately 4 hours. Low battery indicator The battery indicator ( ) in the upper-right corner of the display indicates power level. Monitor the battery strength and ensure your battery is adequately charged. • Three bars ( ) indicate a full charge. • An empty battery icon ( ) indicates a near empty battery. • A blinking empty battery icon ( ) and a tone sounding indicate you have two to three minutes before the battery is too low to operate the phone. If you continue to use your phone without charging its battery, the phone shuts down. Setting Up Your Voice Mail Voice mail allows callers to leave voice messages, which can be retrieved any time. Note: Once your voice mail account has been set up, you can use the Voice Mail folder (under the Message menu) to view details of voice messages in your voice mail box. 1. In idle mode, press and hold the @ key or dial your own mobile number to dial voice mail. 2. Follow the prompts in the new user tutorial to setup your mail box. Listen to voice mail 1. In idle mode, press and hold the @ key or dial your own mobile number to dial voice mail. 2. After connecting, you are prompted to enter your password. Getting Started 11
-
 1
1 -
2
-
3
-
4
-
5
-
 6
6 -
 7
7 -
 8
8 -
 9
9 -
 10
10 -
 11
11 -
 12
12 -
 13
13 -
 14
14 -
 15
15 -
 16
16 -
17
-
18
-
19
-
20
-
21
-
22
-
23
-
24
-
25
-
26
-
27
-
28
-
29
-
30
-
31
-
32
-
33
-
34
-
35
-
36
-
37
-
38
-
39
-
40
-
41
-
42
-
43
-
44
-
45
-
46
-
47
-
48
-
49
-
50
-
51
-
52
-
53
-
54
-
55
-
56
-
57
-
58
-
59
-
60
-
61
-
62
-
63
-
64
-
65
-
66
-
67
-
68
-
69
-
70
-
71
-
72
-
73
-
74
-
75
-
76
-
77
-
78
-
79
-
80
-
81
-
82
-
83
-
84
-
85
-
86
-
87
-
88
-
89
-
90
-
91
-
92
-
93
-
94
-
95
-
96
-
97
-
98
-
99
-
100
-
101
-
102
-
103
-
104
-
105
-
106
-
107
-
108
-
109
-
110
-
111
-
112
-
113
-
114
-
115
-
116
-
117
-
118
-
119
-
120
-
121
-
122
-
123
-
124
-
125
-
126
-
127
-
128
-
129
-
130
-
131
-
132
-
133
-
134
-
135
-
136
-
137
-
138
-
139
-
140
-
141
-
142
-
143
-
144
-
145
-
146
-
147
-
148
-
149
-
150
-
151
-
152
-
153
-
154
-
155
-
156
-
157
-
158
-
159
-
160
-
161
-
162
-
163
-
164
-
165
-
166
 |
 |
