Seagate Mirra Personal Server User Guide (Windows) - Page 118
Stopping Synchronization, Managing Shared Folders, Sharing Tasks, Sharing a Folder
 |
View all Seagate Mirra Personal Server manuals
Add to My Manuals
Save this manual to your list of manuals |
Page 118 highlights
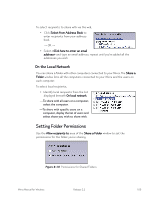
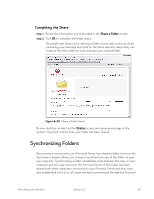
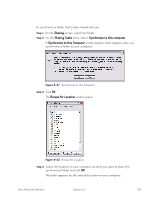
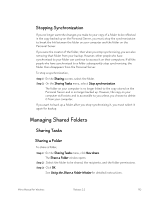
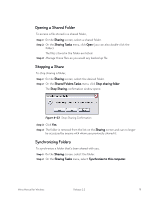
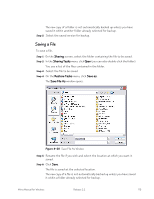
Stopping Synchronization If you no longer want the changes you make to your copy of a folder to be reflected in the copy backed up on the Personal Server, you must stop the synchronization to break the link between the folder on your computer and the folder on the Personal Server. If you were the creator of the folder, then when you stop synchronizing, you are also removing that folder from your backup. However, other people who have synchronized to your folder can continue to access it on their computers. If all the people who have synchronized to a folder subsequently stop synchronizing, the folder then disappears from the Personal Server. To stop a synchronization, Step 1: On the Sharing screen, select the folder. Step 2: On the Sharing Tasks menu, select Stop synchronization. The folder on your computer is no longer linked to the copy stored on the Personal Server and is no longer backed up. However, the copy on your computer still exists and is accessible to you unless you choose to delete it from your computer. If you want to back up a folder after you stop synchronizing it, you must select it again for backup. Managing Shared Folders Sharing Tasks Sharing a Folder To share a folder, Step 1: On the Sharing Tasks menu, click New share. The Share a Folder window opens. Step 2: Select the folder to be shared, the recipients, and the folder permissions. Step 3: Click OK. See Using the Share a Folder Window for detailed instructions. Mirra Manual for Windows Release 2.2 110
-
 1
1 -
2
-
3
-
4
-
5
-
6
-
7
-
8
-
9
-
10
-
11
-
12
-
13
-
14
-
15
-
16
-
17
-
18
-
19
-
20
-
21
-
22
-
23
-
24
-
25
-
26
-
27
-
28
-
29
-
30
-
31
-
32
-
33
-
34
-
35
-
36
-
37
-
38
-
39
-
40
-
41
-
42
-
43
-
44
-
45
-
46
-
47
-
48
-
49
-
50
-
51
-
52
-
53
-
54
-
55
-
56
-
57
-
58
-
59
-
60
-
61
-
62
-
63
-
64
-
65
-
66
-
67
-
68
-
69
-
70
-
71
-
72
-
73
-
74
-
75
-
76
-
77
-
78
-
79
-
80
-
81
-
82
-
83
-
84
-
85
-
86
-
87
-
88
-
89
-
90
-
91
-
92
-
93
-
94
-
95
-
96
-
97
-
98
-
99
-
100
-
101
-
102
-
103
-
104
-
105
-
106
-
107
-
108
-
109
-
110
-
111
-
112
-
 113
113 -
 114
114 -
 115
115 -
 116
116 -
 117
117 -
 118
118 -
 119
119 -
 120
120 -
 121
121 -
 122
122 -
 123
123 -
124
-
125
-
126
-
127
-
128
-
129
-
130
-
131
-
132
-
133
-
134
-
135
-
136
-
137
-
138
-
139
-
140
-
141
-
142
-
143
-
144
-
145
-
146
-
147
-
148
-
149
 |
 |
