Seagate Mirra Personal Server User Guide (Windows) - Page 121
Selecting Recipients to, Share With,
 |
View all Seagate Mirra Personal Server manuals
Add to My Manuals
Save this manual to your list of manuals |
Page 121 highlights
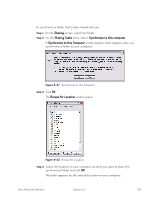
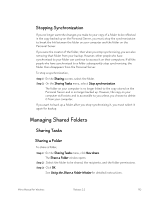
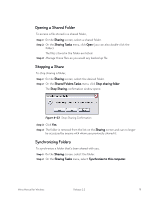
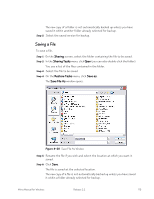
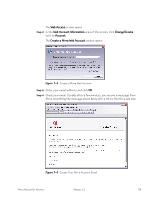
The Share a Folder window opens: Figure 6~25 Share a Folder Window Displayed are the people with whom this folder is being shared and the permissions you've set for this folder. Step 2: To remove a name from the list of recipients to share with, click the box preceding the name to deselect it. A popup window confirms the removal of this recipient: Figure 6~26 Remove Recipient Confirmation Step 3: To add a name to the list of recipients to share with, add the name from your Address Book, enter it in the field beneath By email address, or select it from the list beneath On local network. (See Selecting Recipients to Share With for complete instructions.) Mirra Manual for Windows Release 2.2 113
-
 1
1 -
2
-
3
-
4
-
5
-
6
-
7
-
8
-
9
-
10
-
11
-
12
-
13
-
14
-
15
-
16
-
17
-
18
-
19
-
20
-
21
-
22
-
23
-
24
-
25
-
26
-
27
-
28
-
29
-
30
-
31
-
32
-
33
-
34
-
35
-
36
-
37
-
38
-
39
-
40
-
41
-
42
-
43
-
44
-
45
-
46
-
47
-
48
-
49
-
50
-
51
-
52
-
53
-
54
-
55
-
56
-
57
-
58
-
59
-
60
-
61
-
62
-
63
-
64
-
65
-
66
-
67
-
68
-
69
-
70
-
71
-
72
-
73
-
74
-
75
-
76
-
77
-
78
-
79
-
80
-
81
-
82
-
83
-
84
-
85
-
86
-
87
-
88
-
89
-
90
-
91
-
92
-
93
-
94
-
95
-
96
-
97
-
98
-
99
-
100
-
101
-
102
-
103
-
104
-
105
-
106
-
107
-
108
-
109
-
110
-
111
-
112
-
113
-
114
-
115
-
 116
116 -
 117
117 -
 118
118 -
 119
119 -
 120
120 -
 121
121 -
 122
122 -
 123
123 -
 124
124 -
 125
125 -
 126
126 -
127
-
128
-
129
-
130
-
131
-
132
-
133
-
134
-
135
-
136
-
137
-
138
-
139
-
140
-
141
-
142
-
143
-
144
-
145
-
146
-
147
-
148
-
149
 |
 |

Mirra Manual for Windows
Release 2.2
113
The
Share a Folder
window opens:
Figure 6~25
Share a Folder Window
Displayed are the people with whom this folder is being shared and the
permissions you’ve set for this folder.
Step 2:
To remove a name from the list of recipients to share with, click the box
preceding the name to deselect it.
A popup window confirms the removal of this recipient:
Figure 6~26
Remove Recipient Confirmation
Step 3:
To add a name to the list of recipients to share with, add the name from
your Address Book, enter it in the field beneath
By email address
, or select
it from the list beneath
On local network
. (See
Selecting Recipients to
Share With
for complete instructions.)