Seagate Mirra Personal Server User Guide (Windows) - Page 20
software requires, If necessary, you can change the destination drive or remove files to make - review
 |
View all Seagate Mirra Personal Server manuals
Add to My Manuals
Save this manual to your list of manuals |
Page 20 highlights
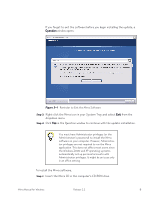
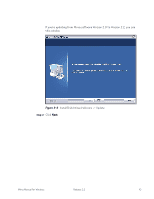
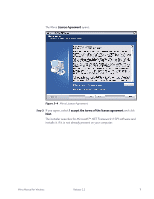
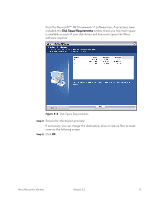
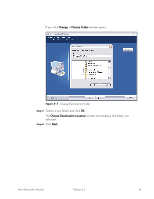
Once the Microsoft™ .NET Framework 1.1 software has, if necessary, been installed, the Disk Space Requirements window shows you how much space is available on each of your disk drives and how much space the Mirra software requires: Figure 3~5 Disk Space Requirements Step 4: Review the information provided. If necessary, you can change the destination drive or remove files to make room on the following screen. Step 5: Click OK. Mirra Manual for Windows Release 2.2 12
-
 1
1 -
2
-
3
-
4
-
5
-
6
-
7
-
8
-
9
-
10
-
11
-
12
-
13
-
14
-
 15
15 -
 16
16 -
 17
17 -
 18
18 -
 19
19 -
 20
20 -
 21
21 -
 22
22 -
 23
23 -
 24
24 -
 25
25 -
26
-
27
-
28
-
29
-
30
-
31
-
32
-
33
-
34
-
35
-
36
-
37
-
38
-
39
-
40
-
41
-
42
-
43
-
44
-
45
-
46
-
47
-
48
-
49
-
50
-
51
-
52
-
53
-
54
-
55
-
56
-
57
-
58
-
59
-
60
-
61
-
62
-
63
-
64
-
65
-
66
-
67
-
68
-
69
-
70
-
71
-
72
-
73
-
74
-
75
-
76
-
77
-
78
-
79
-
80
-
81
-
82
-
83
-
84
-
85
-
86
-
87
-
88
-
89
-
90
-
91
-
92
-
93
-
94
-
95
-
96
-
97
-
98
-
99
-
100
-
101
-
102
-
103
-
104
-
105
-
106
-
107
-
108
-
109
-
110
-
111
-
112
-
113
-
114
-
115
-
116
-
117
-
118
-
119
-
120
-
121
-
122
-
123
-
124
-
125
-
126
-
127
-
128
-
129
-
130
-
131
-
132
-
133
-
134
-
135
-
136
-
137
-
138
-
139
-
140
-
141
-
142
-
143
-
144
-
145
-
146
-
147
-
148
-
149
 |
 |

Mirra Manual for Windows
Release 2.2
12
Once the Microsoft™ .NET Framework 1.1 software has, if necessary, been
installed, the
Disk Space Requirements
window shows you how much space
is available on each of your disk drives and how much space the Mirra
software requires:
Figure 3~5
Disk Space Requirements
Step 4:
Review the information provided.
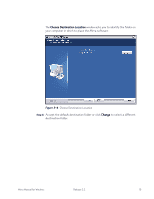
If necessary, you can change the destination drive or remove files to make
room on the following screen.
Step 5:
Click
OK
.