Seagate Mirra Personal Server User Guide (Windows) - Page 85
Selecting Folders for Backup,
 |
View all Seagate Mirra Personal Server manuals
Add to My Manuals
Save this manual to your list of manuals |
Page 85 highlights
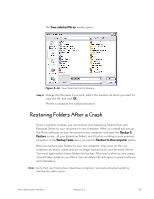
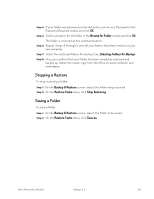
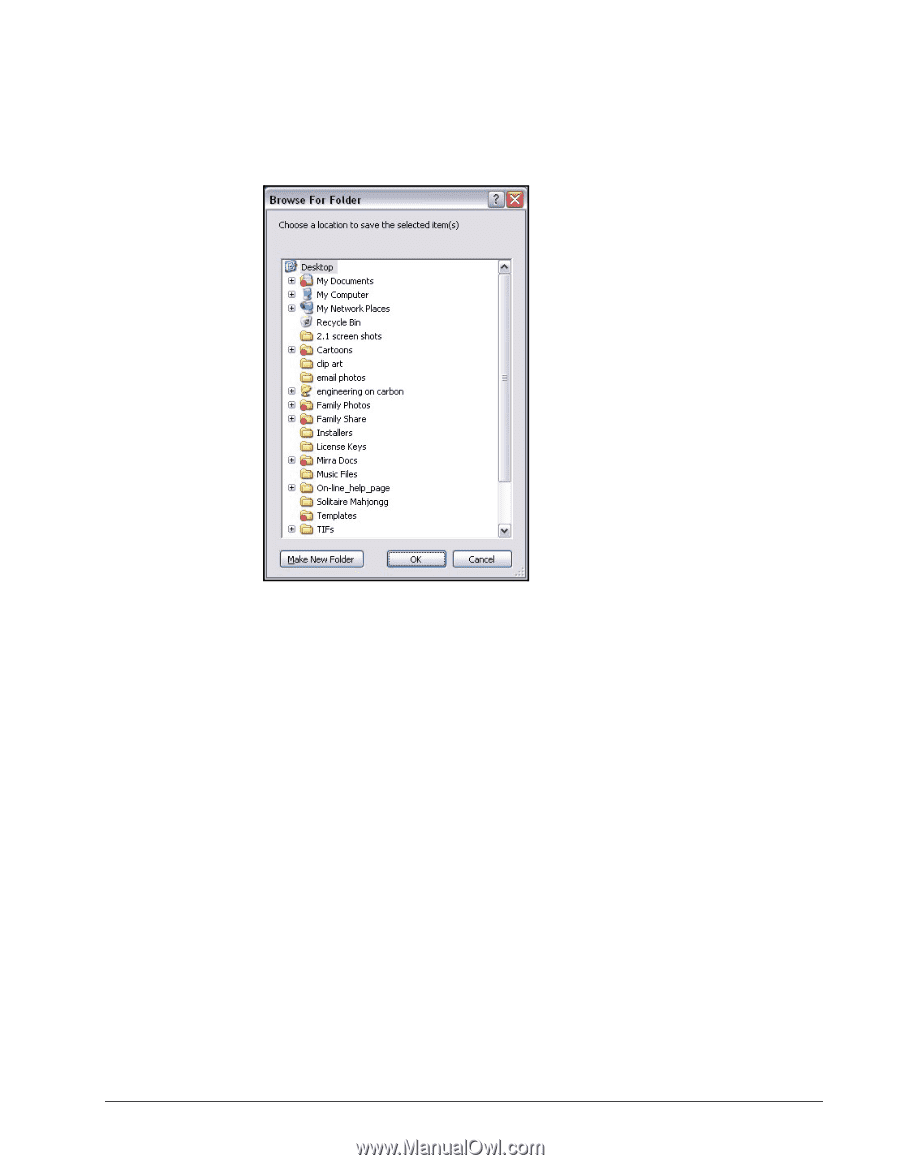
A Browse for Folder window opens: Figure 5~18 Browse for Folder Step 5: Select a location for the folder and click OK. The folder is restored at the selected location. Step 6: Repeat Steps 3 through 5 until all your folders have been restore on your new computer. Step 7: Select the restored folders for backup (see Selecting Folders for Backup). Step 8: Once you confirm that each folder has been completely restored and backed up, delete the static copy from your Mirra to avoid confusion and redundancy. Mirra Manual for Windows Release 2.2 77
-
 1
1 -
2
-
3
-
4
-
5
-
6
-
7
-
8
-
9
-
10
-
11
-
12
-
13
-
14
-
15
-
16
-
17
-
18
-
19
-
20
-
21
-
22
-
23
-
24
-
25
-
26
-
27
-
28
-
29
-
30
-
31
-
32
-
33
-
34
-
35
-
36
-
37
-
38
-
39
-
40
-
41
-
42
-
43
-
44
-
45
-
46
-
47
-
48
-
49
-
50
-
51
-
52
-
53
-
54
-
55
-
56
-
57
-
58
-
59
-
60
-
61
-
62
-
63
-
64
-
65
-
66
-
67
-
68
-
69
-
70
-
71
-
72
-
73
-
74
-
75
-
76
-
77
-
78
-
79
-
 80
80 -
 81
81 -
 82
82 -
 83
83 -
 84
84 -
 85
85 -
 86
86 -
 87
87 -
 88
88 -
 89
89 -
 90
90 -
91
-
92
-
93
-
94
-
95
-
96
-
97
-
98
-
99
-
100
-
101
-
102
-
103
-
104
-
105
-
106
-
107
-
108
-
109
-
110
-
111
-
112
-
113
-
114
-
115
-
116
-
117
-
118
-
119
-
120
-
121
-
122
-
123
-
124
-
125
-
126
-
127
-
128
-
129
-
130
-
131
-
132
-
133
-
134
-
135
-
136
-
137
-
138
-
139
-
140
-
141
-
142
-
143
-
144
-
145
-
146
-
147
-
148
-
149
 |
 |
Mirra Manual for Windows
Release 2.2
77
A
Browse for Folder
window opens:
Figure 5~18
Browse for Folder
Step 5:
Select a location for the folder and click
OK
.
The folder is restored at the selected location.
Step 6:
Repeat Steps 3 through 5 until all your folders have been restore on your
new computer.
Step 7:
Select the restored folders for backup (see
Selecting Folders for Backup
).
Step 8:
Once you confirm that each folder has been completely restored and
backed up, delete the static copy from your Mirra to avoid confusion and
redundancy.