Belkin F5D7632-4_V3000 User Manual - Page 28
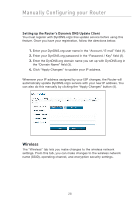
Wireless
 |
View all Belkin F5D7632-4_V3000 manuals
Add to My Manuals
Save this manual to your list of manuals |
Page 28 highlights
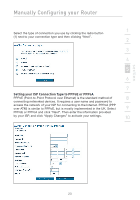
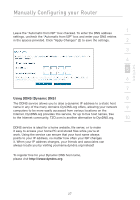
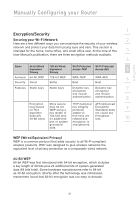
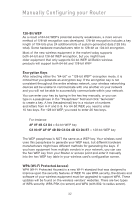
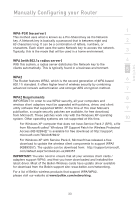
Manually Configuring your Router Setting up the Router's Dynamic DNS Update Client You must register with DynDNS.org's free update service before using this feature. Once you have your registration, follow the directions below. 1. Enter your DynDNS.org user name in the "Account / E-mail" field (1). 2. Enter your DynDNS.org password in the "Password / Key" field (2). 3. Enter the DynDNS.org domain name you set up with DynDNS.org in the "Domain Name" field (3). 4. Click "Apply Changes" to update your IP address. Whenever your IP address assigned by your ISP changes, the Router will automatically update DynDNS.org's servers with your new IP address. You can also do this manually by clicking the "Apply Changes" button (4). Wireless The "Wireless" tab lets you make changes to the wireless network settings. From this tab, you can make changes to the wireless network name (SSID), operating channel, and encryption security settings. 28
-
 1
1 -
2
-
3
-
4
-
5
-
6
-
7
-
8
-
9
-
10
-
11
-
12
-
13
-
14
-
15
-
16
-
17
-
18
-
19
-
20
-
21
-
22
-
 23
23 -
 24
24 -
 25
25 -
 26
26 -
 27
27 -
 28
28 -
 29
29 -
 30
30 -
 31
31 -
 32
32 -
 33
33 -
34
-
35
-
36
-
37
-
38
-
39
-
40
-
41
-
42
-
43
-
44
-
45
-
46
-
47
-
48
-
49
-
50
-
51
-
52
-
53
-
54
-
55
-
56
-
57
-
58
-
59
-
60
-
61
-
62
-
63
-
64
-
65
-
66
-
67
-
68
-
69
-
70
-
71
-
72
-
73
-
74
-
75
-
76
-
77
-
78
-
79
-
80
-
81
-
82
-
83
-
84
-
85
-
86
-
87
-
88
-
89
-
90
-
91
-
92
-
93
-
94
-
95
-
96
-
97
-
98
-
99
-
100
-
101
-
102
-
103
-
104
-
105
-
106
-
107
-
108
 |
 |
