Belkin F5D7632-4_V3000 User Manual - Page 40
Connecting your Computer to a Wireless Network that, Requires WPA-PSK no server
 |
View all Belkin F5D7632-4_V3000 manuals
Add to My Manuals
Save this manual to your list of manuals |
Page 40 highlights
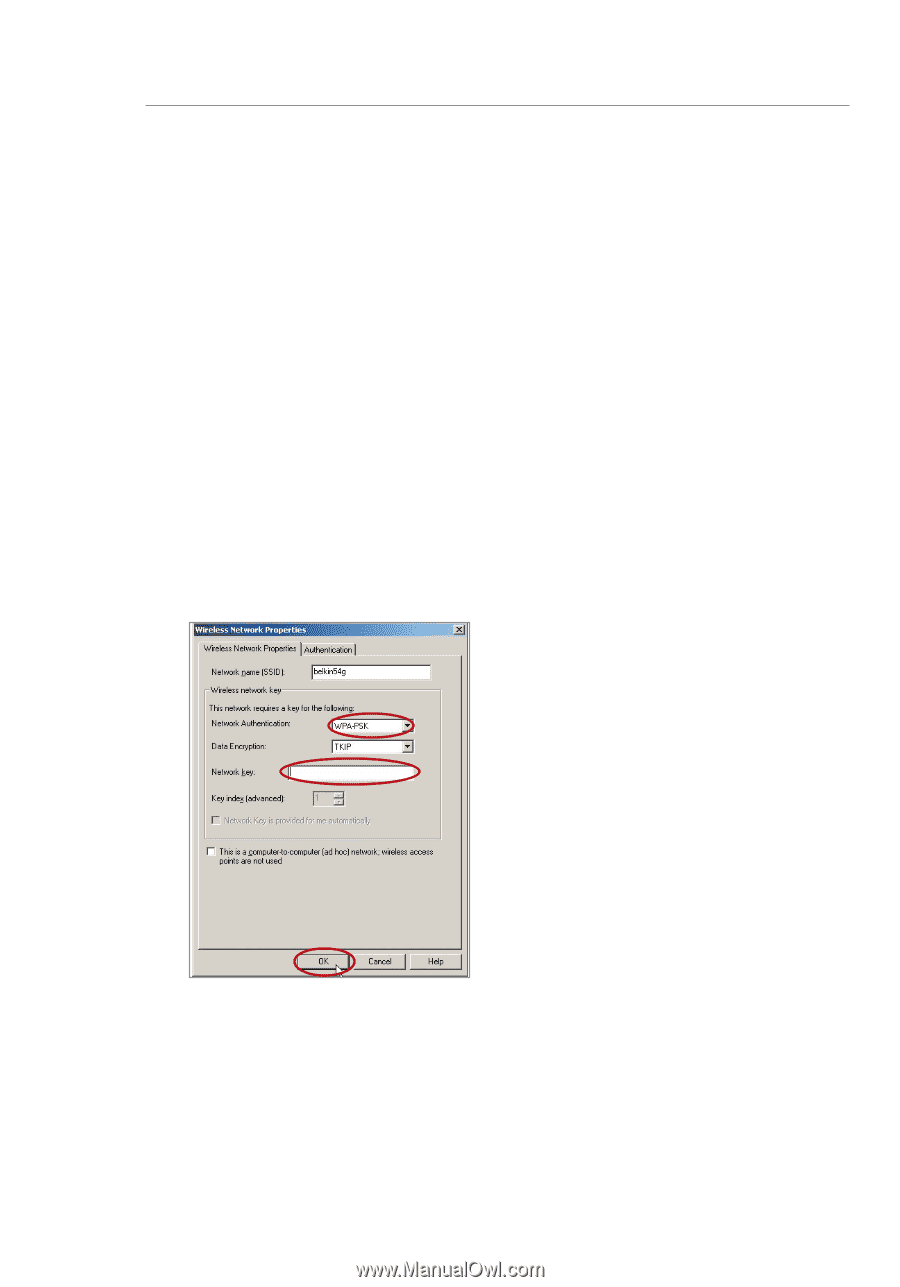
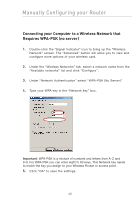
Manually Configuring your Router Connecting your Computer to a Wireless Network that Requires WPA-PSK (no server) 1. Double-click the "Signal Indicator" icon to bring up the "Wireless Network" screen. The "Advanced" button will allow you to view and configure more options of your wireless card. 2. Under the "Wireless Networks" tab, select a network name from the "Available networks" list and click "Configure". 3. Under "Network Authentication" select "WPA-PSK (No Server)". 4. Type your WPA key in the "Network key" box. Important: WPA-PSK is a mixture of numbers and letters from A-Z and 0-9. For WPA-PSK you can enter eight to 63 keys. This Network key needs to match the key you assign to your Wireless Router or access point. 5. Click "OK" to save the settings. 40
-
 1
1 -
2
-
3
-
4
-
5
-
6
-
7
-
8
-
9
-
10
-
11
-
12
-
13
-
14
-
15
-
16
-
17
-
18
-
19
-
20
-
21
-
22
-
23
-
24
-
25
-
26
-
27
-
28
-
29
-
30
-
31
-
32
-
33
-
34
-
 35
35 -
 36
36 -
 37
37 -
 38
38 -
 39
39 -
 40
40 -
 41
41 -
 42
42 -
 43
43 -
 44
44 -
 45
45 -
46
-
47
-
48
-
49
-
50
-
51
-
52
-
53
-
54
-
55
-
56
-
57
-
58
-
59
-
60
-
61
-
62
-
63
-
64
-
65
-
66
-
67
-
68
-
69
-
70
-
71
-
72
-
73
-
74
-
75
-
76
-
77
-
78
-
79
-
80
-
81
-
82
-
83
-
84
-
85
-
86
-
87
-
88
-
89
-
90
-
91
-
92
-
93
-
94
-
95
-
96
-
97
-
98
-
99
-
100
-
101
-
102
-
103
-
104
-
105
-
106
-
107
-
108
 |
 |