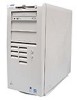
Dell OptiPlex GX300 User Guide
Dell OptiPlex GX300 Manual
 |
View all Dell OptiPlex GX300 manuals
Add to My Manuals
Save this manual to your list of manuals |
Dell OptiPlex GX300 manual content summary:
- Dell OptiPlex GX300 | User Guide - Page 1
Dell™ OptiPlex™ GX300 System User's Guide Introduction Setup and Operation System Setup Installing Upgrades Troubleshooting Specifications NOTE: You can obtain the latest version of this document from the Dell support Web site at http://support.dell.com. Model MMP Notes, Notices, and Cautions - Dell OptiPlex GX300 | User Guide - Page 2
Checks: Dell™ OptiPlex™ GX300 System User's Guide Overview Backing Up Your Files Basic Checks Checking Connections and Switches Look and Listen System Setup Overview If your Dell computer system is not working as expected, and if you are not sure what to do, start your troubleshooting with the - Dell OptiPlex GX300 | User Guide - Page 3
on the hard-disk drive. On a system running a Windows operating system, you can test the drive by opening Windows Explorer and clicking the icon for drive C. If the hard-disk drive access indicator does not light up, see "Troubleshooting Drives." A series of beeps See "Messages and Codes." An - Dell OptiPlex GX300 | User Guide - Page 4
Back to Contents Page Battery: Dell™ OptiPlex™ GX300 System User's Guide Overview Replacing the Battery Overview A 3.0-volt (V) CR2032 coin-cell battery installed on the system board maintains system configuration, date, and time information in a special section of memory. The operating life of the - Dell OptiPlex GX300 | User Guide - Page 5
1. Replacing the System Battery 1 Battery 2 Battery socket 6. Replace the AGP card brace. 7. Replace the computer cover, reconnect your computer and peripherals to their electrical outlets, and turn them on. 8. Enter System Setup, and confirm that the battery is operating properly. Enter the correct - Dell OptiPlex GX300 | User Guide - Page 6
Contents Page Contacting Dell: Dell™ OptiPlex™ GX300 System User's Guide Overview International Dialing Codes Americas Contact Numbers Europe Contact Numbers Asia and Other Regions Contact Numbers Overview When you need to contact Dell, use the telephone numbers, codes, and electronic addresses - Dell OptiPlex GX300 | User Guide - Page 7
) Brazil Canada (North York, Ontario) Chile (Santiago) Department Name or Service Sales, Customer Support, Technical Support Web site: http://www.dell.com/br Automated Order-Status System AutoTech (Automated technical support) Customer Care (From outside Toronto) Customer Care (From within Toronto - Dell OptiPlex GX300 | User Guide - Page 8
[local, state, or federal] or educational institutions): Customer Service and Technical Support (Return Material Authorization Numbers) toll free: 1-800-234-1490 Dell Sales toll free: 1-800-289-3355 toll free: 1-800-879-3355 Spare Parts Sales toll free: 1-800-357-3355 DellWare™ toll free - Dell OptiPlex GX300 | User Guide - Page 9
Home/Small Business Sales Corporate Sales Fax Switchboard Web site: http://support.euro.dell.com E-mail: [email protected] Czech Republic (Prague) Technical Support Customer Care Fax TechFax Switchboard Web site: http://support.euro.dell.com E-mail: [email protected] Denmark (Horsholm - Dell OptiPlex GX300 | User Guide - Page 10
) Web site: http://support.euro.dell.com E-mail: [email protected] Netherlands (Amsterdam) Technical Support Customer Care Home/Small Business Sales Home/Small Business Sales Fax Corporate Sales Corporate Sales Fax Fax Switchboard Web site: http://support.euro.dell.com E-mail: tech_nl - Dell OptiPlex GX300 | User Guide - Page 11
-5000 employees) Customer Care Central Government Customer Care Local Government Customer Care Home/Small Business Sales Corporate/Public Sector Sales AutoFax Web site: http://support.euro.dell.com E-mail: [email protected] Asia and Other Regions Contact Numbers 22 22 22 22 22 91 08 08 - Dell OptiPlex GX300 | User Guide - Page 12
Support (WorkStation, OptiPlex™, and Latitude™) Y2K Support Customer Care Home and Small Business Group Sales Preferred Accounts Division Sales Large Corporate Accounts Faxbox Service Switchboard Web site: http://support.jp.dell.com Korea (Seoul) Technical Support Sales Customer Service - Dell OptiPlex GX300 | User Guide - Page 13
. Corporate Sales South Africa Technical Support 011 (Johannesburg) Customer Care 011 Sales 011 Fax 011 Switchboard 011 Web site: http://support.euro.dell.com E-mail: [email protected] Southeast Customer Technical Support, Customer Service, and Asian/Pacific Sales (Penang - Dell OptiPlex GX300 | User Guide - Page 14
to Contents Page Dell™ Diagnostics: Dell OptiPlex™ GX300 System User's Guide Overview Features Before You Start Testing Starting the Dell Diagnostics Advanced Testing Overview If you experience a problem with your computer, run the Dell Diagnostics before you call Dell for technical assistance - Dell OptiPlex GX300 | User Guide - Page 15
option to perform a quick check of your computer or a specific device. Quick Tests runs only the subtests that run fast and do not require user interaction. Dell recommends that you select Quick Tests first to increase your chance of locating the problem quickly. 9. Select Extended Tests from the - Dell OptiPlex GX300 | User Guide - Page 16
or devices that are part of your computer system. For example, it may not list a printer even though it is connected to your computer. However, the parallel commands and gives instructions on how to use them Explains the functions of all keystrokes that can be used in the Dell Diagnostics Describes - Dell OptiPlex GX300 | User Guide - Page 17
, Tape, and CD-ROM Drives: Dell™ OptiPlex™ GX300 System User's Guide To install a diskette, tape, or CD-ROM drive in a 5.25-inch drive bay, perform the following steps. CAUTION: Before you remove the computer cover, see "Safety First-For You and Your Computer." 1. Unpack the drive and prepare it for - Dell OptiPlex GX300 | User Guide - Page 18
3). Make sure that both bracket tabs snap into place in the drive bay. Figure 3. Inserting the New Drive Into the Drive Bay 1 Drive 8. Connect a DC power cable to the power input connector on the back of the drive (see Figure 4). 9. Connect the appropriate interface cable to the interface connector - Dell OptiPlex GX300 | User Guide - Page 19
the front bezel. 13. Replace the computer cover, reconnect your computer and peripherals to their power sources, and turn them on. 14. Update your system configuration information in System Setup. For a diskette drive, update Diskette Drive A or Diskette Drive B to reflect the size and capacity - Dell OptiPlex GX300 | User Guide - Page 20
to Contents Page Expansion Cards: Dell™ OptiPlex™ GX300 System User's Guide Overview Installing an Expansion Card Removing an Expansion Card Overview The system accommodates up to six expansion cards, including up to five 32-bit Peripheral Component Interconnect (PCI) expansion cards and a 32-bit - Dell OptiPlex GX300 | User Guide - Page 21
. See "Chassis Intrusion" for instructions. NOTE: If a setup password has been assigned by someone else, contact your network administrator for information on resetting the chassis intrusion detector. While in System Setup, if you installed an entry-level OptiPlex sound card, change the setting for - Dell OptiPlex GX300 | User Guide - Page 22
empty card-slot openings is necessary to maintain Federal Communications Commission (FCC) certification of the system. The brackets also keep dust and dirt out of your computer. 7. Replace the AGP card brace. 8. Replace the computer cover, and reconnect your computer and peripherals to their power - Dell OptiPlex GX300 | User Guide - Page 23
procedures in this section. Before running the Dell Diagnostics, make sure that your system is set to boot from the CD-ROM drive. See "Starting the Dell Diagnostics" for complete instructions. Troubleshooting the Monitor Troubleshooting video problems involves determining which of the following is - Dell OptiPlex GX300 | User Guide - Page 24
Test fails, the system board may be faulty. See "Getting Help" for instructions on obtaining technical assistance. Troubleshooting I/O Ports This section provides a procedure for troubleshooting the ports on your computer's I/O panel and the equipment connected to them, such as a printer, scanner - Dell OptiPlex GX300 | User Guide - Page 25
and for your operating system for instructions on reinstalling the printer driver. 2. Turn off the parallel printer and computer, replace the parallel printer interface cable with a known working cable, and turn on the parallel printer and computer. If the problem is resolved, the original printer - Dell OptiPlex GX300 | User Guide - Page 26
Back to Contents Page Getting Help: Dell™ OptiPlex™ GX300 System User's Guide Help Overview Contacting Dell Back to Contents Page - Dell OptiPlex GX300 | User Guide - Page 27
Hard-Disk Drives: Dell™ OptiPlex™ GX300 System User's Guide Installing an EIDE Hard-Disk Drive Installing SCSI Devices Installing an EIDE Hard-Disk Drive Up to two enhanced integrated drive electronics (EIDE) drives (one of which must be 1 inch high or less) can be installed in the hard-disk drive - Dell OptiPlex GX300 | User Guide - Page 28
with your upgrade kit. If you are installing a drive in the 1.6-inch bay, use the four screw holes in the side of the bracket (see Figure 2). If you are installing a drive in the 1-inch bay, use the four screw holes in the bottom of the bracket. Figure 2. Inserting a 1.6-Inch Hard-Disk Drive in the - Dell OptiPlex GX300 | User Guide - Page 29
hard-disk drives, they will transfer data at Ultra ATA/33 speeds. Figure 4. Attaching Hard-Disk Drive Cables 1 Interface connector 2 Power input connector on drive 3 DC power Inside Your Computer." 11. Replace the computer cover. Then reconnect your computer and peripherals to their power sources, - Dell OptiPlex GX300 | User Guide - Page 30
computer system. 14. Enter System Setup, and update Primary Drive 0 or Primary Drive 1. After you update the System Setup settings, reboot the system. 15. Partition and logically format your drive before proceeding to the next step. See the documentation for your operating system for instructions - Dell OptiPlex GX300 | User Guide - Page 31
" for instructions. NOTE: If a setup password has been assigned by someone else, contact your network administrator for information on resetting the chassis intrusion detector. 9. If necessary, update the drive system configuration information in System Setup. After installing a SCSI hard-disk drive - Dell OptiPlex GX300 | User Guide - Page 32
programs than those provided with the operating system to partition and format SCSI hard-disk drives. Refer to the documentation that came with your SCSI software drivers for information on installing the appropriate drivers and preparing your SCSI hard-disk drive for use. Back to Contents Page - Dell OptiPlex GX300 | User Guide - Page 33
Express Service Code, open the Dell Accessories folder, double-click the Express Service Code icon, and follow the directions. NOTE: Dell's Express Service Code system may not be available in all countries. For instructions on using the technical support service, see "Technical Support Service" and - Dell OptiPlex GX300 | User Guide - Page 34
particular question. Our technical support staff uses computer-based diagnostics to provide fast, accurate answers to questions. To contact Dell's technical support service, see "Before You Call" and then call the number for your country as listed in "Contacting Dell." Problems With Your Order If - Dell OptiPlex GX300 | User Guide - Page 35
of the system's start-up files. If the computer is connected to a printer, print each file. Otherwise, record the contents of each file before calling Dell. Error message, beep code, or diagnostic code: Description of problem and troubleshooting procedures you performed: Back to Contents Page - Dell OptiPlex GX300 | User Guide - Page 36
Back to Contents Page Inside Your Computer: Dell™ OptiPlex™ GX300 System User's Guide Overview Internal Views System Board Components System Board Jumpers System Board Labels Removing and Replacing the AGP Card Brace Rotating the Power Supply Away From the System Board Removing and Replacing the - Dell OptiPlex GX300 | User Guide - Page 37
17 Peripheral Component Interconnect (PCI) expansion card connectors (5) 18 3.3-volt (V) power connector 19 Power connector 20 Diskette-drive interface connector 21 Rambus in-line memory module (RIMM) sockets (2) 22 Suspend-to-random-access memory (RAM) light-emitting diode (LED) 23 Primary - Dell OptiPlex GX300 | User Guide - Page 38
27 Remote Wakeup power connector 28 Standby LED 29 Password jumper 30 Auxiliary hard-disk drive access indicator connector 31 RTCRST jumper features are disabled. Real-time clock reset. Can be used for troubleshooting purposes. unjumpered System Board Labels Table 2 lists the labels for connectors - Dell OptiPlex GX300 | User Guide - Page 39
WUOL Microprocessor fan connector EIDE interface connector Chassis intrusion switch connector Keyboard connector Video connector Mouse connector Control panel connector Parallel port connector; sometimes referred to as LPT1 PCI expansion-card connector Main power input connector 3.3-V power input - Dell OptiPlex GX300 | User Guide - Page 40
as instructed in "Removing the Computer Cover." 2. Disconnect the AC power cable from the AC power receptacle on the back of the power supply (see Figure 6). Figure 6. Rotating the Power Supply 1 Power supply 2 Release latch 3 AC power cable 4 Securing tab 5 DC power cable 3. Free the power supply - Dell OptiPlex GX300 | User Guide - Page 41
To replace the bezel, fit the two retaining hooks on the bezel into their corresponding slots at the bottom of the chassis. Then rotate the top of the bezel toward the chassis until the top tabs snap into their corresponding slots on the bezel. Back to Contents Page - Dell OptiPlex GX300 | User Guide - Page 42
Back to Contents Page Installing Upgrades: Dell™ OptiPlex™ GX300 System User's Guide Inside Your Computer Expansion Cards System Memory Microprocessor Battery Diskette, Tape, and CD-ROM Drives Hard-Disk Drives Back to Contents Page - Dell OptiPlex GX300 | User Guide - Page 43
: Dell™ OptiPlex™ GX300 System User's Guide Overview Troubleshooting Expansion Cards Safety First-For You and Your Computer Troubleshooting System Memory Removing and Replacing the Computer Cover Troubleshooting the Video Subsystem Troubleshooting a Wet Computer Troubleshooting a Damaged - Dell OptiPlex GX300 | User Guide - Page 44
cables are not routed over the drive cage-they will prevent the cover from closing properly. 2. Check to see that no tools or extra parts (including screws) are left inside the computer's chassis. 3. Replace the computer cover as follows: a. Face the left side of the computer and hold the cover at - Dell OptiPlex GX300 | User Guide - Page 45
instructions in "Removing and Replacing the AGP Card Brace." 5. Remove all expansion cards installed in the computer except a drive controller card and video expansion card. 6. Replace the computer cover, reconnect the system to an electrical outlet, and turn it on. If the system has power, proceed - Dell OptiPlex GX300 | User Guide - Page 46
used batteries according to the manufacturer's instructions. If an error message indicates a problem with the battery or if System Setup loses the system configuration information when the computer is turned off, the battery may be defective. To troubleshoot the battery, perform the following steps - Dell OptiPlex GX300 | User Guide - Page 47
For instructions on which cables should be attached to specific connectors on an expansion card, see the expansion card's documentation. 6. Remove all expansion cards except the video card. 7. Replace the computer cover, reconnect the system to an electrical outlet, and turn it on. 8. Start the Dell - Dell OptiPlex GX300 | User Guide - Page 48
cover, see "Safety First-For You and Your Computer." 4. Remove the computer cover. 5. Remove the AGP card brace according to the instructions in "Removing and Replacing the AGP Card Brace." 6. Verify that the power cables from the power supply are firmly connected to the connectors on the system - Dell OptiPlex GX300 | User Guide - Page 49
7. Run the appropriate test group. 8. If the Dell Diagnostics identifies a faulty drive, replace the drive. If the Dell Diagnostics identifies a faulty controller, the system board may be faulty. See "Getting Help" for instructions on obtaining technical assistance. Back to Contents Page - Dell OptiPlex GX300 | User Guide - Page 50
, and computer speakers. The system basic input/output system (BIOS) supports USB keyboards and mice in MS-DOS® and other non-Windows® operating system environments. l Dell OptiFrame™ chassis for easy disassembly and improved serviceability. For additional hardware features, see "Specifications." - Dell OptiPlex GX300 | User Guide - Page 51
. l Network device drivers for several operating systems. l Desktop Management Interface (DMI) support, which enables the remote management of your computer system's software and hardware. l Support for Dell OpenManage™ IT Assistant. Manageability Features Your Dell OptiPlex GX300 Managed PC system - Dell OptiPlex GX300 | User Guide - Page 52
, file updates, and asset tracking at any time. To use the Remote Wake Up feature, each Managed PC system must contain a NIC that supports Remote Wake Up. You must also enable the Remote Wake Up option in System Setup. NOTE: This feature does not work if the system is shut off using a power strip - Dell OptiPlex GX300 | User Guide - Page 53
when the system becomes overheated or the power supply voltage is out of range. In either case, a message appears on the screen when Dell OpenManage IT Assistant is running or at the next system start-up notifying you of the problem. CIM Support CIM allows you to access system management information - Dell OptiPlex GX300 | User Guide - Page 54
Back to Contents Page System Memory: Dell™ OptiPlex™ GX300 System User's Guide Overview Installing RIMMs Removing RIMMs Overview Before you install new memory modules, download the most recent BIOS for your computer from the Dell Support website at http://support.dell.com. You can increase system - Dell OptiPlex GX300 | User Guide - Page 55
If the memory total is incorrect, turn off and disconnect your computer and peripherals from their electrical outlets. Remove the computer cover, rotate the power supply, and 10. When the System Memory total is correct, press to exit System Setup. 11. Run the Dell Diagnostics to verify that the - Dell OptiPlex GX300 | User Guide - Page 56
Page Messages and Codes: Dell™ OptiPlex™ GX300 System User's Guide Overview System Messages System Beep Codes Warning Messages Diagnostics Messages Diagnostic LEDs Overview Your application programs, operating system, and the computer itself are capable of identifying problems and alerting you - Dell OptiPlex GX300 | User Guide - Page 57
for a beep code and refer to Table 2. If no beep code is emitted, run the System Board Devices tests in the Dell Diagnostics. One or more RIMMs may be loose. See "Troubleshooting System Memory." The operating system is unable to carry out the command. This message is usually followed by specific - Dell OptiPlex GX300 | User Guide - Page 58
, see "Getting Help" for instructions does not match the memory on obtaining technical assistance. installed in the computer. The memory test did not complete. Rerun the memory test. The computer cannot find the diskette or hard-disk drive. Enter System Setup, check the system configuration - Dell OptiPlex GX300 | User Guide - Page 59
operating system cannot write See "Troubleshooting Drives." to the diskette or hard-disk drive. System Beep Codes When errors occur during a boot routine that cannot be reported on the monitor, your computer may emit a series of beeps that identify the problem. The beep code is a pattern of sounds - Dell OptiPlex GX300 | User Guide - Page 60
Help" for instructions on obtaining technical assistance. 3-3-1 NVRAM power loss Run the System Board Devices tests in the Dell Diagnostics, if possible. 3-3-2 NVRAM configuration Run the System Board Devices tests in the Dell Diagnostics, if possible. 3-3-4 Video Memory Test failure Run - Dell OptiPlex GX300 | User Guide - Page 61
power indicator light-emitting diode (LED) and the hard-disk drive LED on the front of the computer emit diagnostic codes that can help you troubleshoot a system problem. Table 3 lists the codes for the diagnostic LEDs, probable causes, and suggested corrective actions. CAUTION: Before servicing - Dell OptiPlex GX300 | User Guide - Page 62
Back to Contents Page Microprocessor: Dell™ OptiPlex™ GX300 System User's Guide Adding a Second Microprocessor Upgrading an Existing Microprocessor Adding a Second Microprocessor Use the following procedure to add a second microprocessor. NOTICE: The second processor must be of the same type and - Dell OptiPlex GX300 | User Guide - Page 63
Inside Your Computer." 1. Remove the computer cover according to the instructions in "Removing and Replacing the Computer Cover." 2. Rotate the power supply as described in "Rotating the Power Supply Away From the System Board." 3. Remove the AGP card brace according to the instructions in "Removing - Dell OptiPlex GX300 | User Guide - Page 64
Data area correctly identifies the installed processor(s). See "Using System Setup." 10. While in System Setup, reset the chassis intrusion detector by changing Chassis Intrusion to Enabled or Enabled-Silent. See "Chassis Intrusion" for instructions. NOTE: If a setup password has been assigned by - Dell OptiPlex GX300 | User Guide - Page 65
Back to Contents Page Setup and Operation: Dell™ OptiPlex™ GX300 System User's Guide Getting Started Connecting Peripheral Devices Controls and Indicators Chassis Intrusion Security Cable Slot and Padlock Ring Using the System Password Feature Using the Setup Password Feature Disabling a Forgotten - Dell OptiPlex GX300 | User Guide - Page 66
have the Microsoft® Windows® 98, Windows 95, or Windows NT® 4.0 operating system, Dell already installed the necessary mouse drivers on your hard-disk drive. If you need to reinstall the mouse drivers, see the documentation that accompanied your Dell ResourceCD for instructions. Keyboard Connector - Dell OptiPlex GX300 | User Guide - Page 67
a video graphics array (VGA)-compatible monitor to your system. Controls and Indicators Figure 2 shows the controls and indicators located on the front panel of your computer. Figure 2. Controls and Indicators 1 Diskette-drive access indicator 2 Power button 3 Power indicator 4 Reset button 5 Hard - Dell OptiPlex GX300 | User Guide - Page 68
have saved and closed all open files and application programs (if possible) to avoid losing any data. Then perform an orderly shutdown of the operating system (see your operating system documentation for instructions). Hard-Disk Drive Access Indicator The hard-disk drive access indicator lights up - Dell OptiPlex GX300 | User Guide - Page 69
computer unlocked so that someone can disable the password by changing a jumper setting, anyone can access the data stored on your hard-disk drive. Assigning a System Password Before you can assign a system password, you must enter System Setup to Unlocked. For instructions on changing the setting - Dell OptiPlex GX300 | User Guide - Page 70
one of these combinations, the speaker emits a beep. To erase a character when entering your Your system password is now set; you can exit System Setup and begin using your system. Note, however, that password password attempts: 3 System halted! Must power down. The number of unsuccessful attempts - Dell OptiPlex GX300 | User Guide - Page 71
the system emits a beep. NOTES: The setup password can be the same as the system password. If the two passwords are different, the setup password can be used remove the computer cover, see "Safety First-For You and Your Computer." 1. Remove the computer cover according to the instructions in " - Dell OptiPlex GX300 | User Guide - Page 72
a new system and/or setup password, you must replace the PSWD jumper plug. CAUTION: Before you remove the computer cover, see "Safety First-For You and Your Computer." 6. Remove the computer cover according to the instructions in "Removing and Replacing the Computer Cover." 7. Replace the PSWD - Dell OptiPlex GX300 | User Guide - Page 73
Page System Setup Options: Dell™ OptiPlex™ GX300 System User's Guide AC Power Recovery Asset Tag Auto Power On Boot Sequence CPU ID CPU Speed Diskette Drive A and Diskette Drive B Integrated Devices Keyboard NumLock PCI IRQ Assignment Primary Drive n and Secondary Drive n Primary Video Controller - Dell OptiPlex GX300 | User Guide - Page 74
from the hard-disk drive and then from the next device in the boot sequence list. IDE CD-ROM Device Selecting IDE CD-ROM Device causes the system to try booting from the CD-ROM drive first. If the system finds a CD that is not bootable in the drive or finds a problem with the drive itself - Dell OptiPlex GX300 | User Guide - Page 75
Drive Interface l Diskette Interface l USB Emulation l PC Speaker l Video press at the Dell logo screen during system boot. A and add an expansion card containing a port configured are using the Microsoft® Windows® 95 or IBM® option determines the direct memory access (DMA) channel - Dell OptiPlex GX300 | User Guide - Page 76
card installed in an expansion slot. As part of the boot routine, the system first checks for a primary hard-disk drive controller card installed in an expansion slot. If no card device driver, or operating system requires a specific IRQ line already in use by a PCI device. NOTE: Manually assigning - Dell OptiPlex GX300 | User Guide - Page 77
. Also, you cannot use the User 1 and User 2 drive types for hard-disk drives with a storage capacity that is greater than 528 megabytes (MB). Primary Video Controller Primary Video Controller determines whether the system looks for a video card in a PCI slot during the boot routine. When Auto is - Dell OptiPlex GX300 | User Guide - Page 78
the operation of the keyboard itself if a keyboard is attached to the computer. Second Processor Second Processor enables or disables a second microprocessor for troubleshooting purposes. If the system is having microprocessor-related problems, you can disable the second microprocessor to see if the - Dell OptiPlex GX300 | User Guide - Page 79
a Forgotten Password" for instructions on disabling a forgotten setup password. Chassis Intrusion Chassis Intrusion displays the status of the system chassis intrusion monitor and can be set to Enabled, Enabled-Silent, or Disabled. The default is Enabled. If the computer cover is removed while the - Dell OptiPlex GX300 | User Guide - Page 80
Time resets the time on the computer's internal clock. Time is kept Support ZIP Floppy Support enables or disables the support of Advanced Technology Attachment Packet Interface (ATAPI) ZIP devices by the system BIOS. When Enabled is selected, ATAPI ZIP devices are supported as diskette drives - Dell OptiPlex GX300 | User Guide - Page 81
Page Software Checks: Dell™ OptiPlex™ GX300 System User's Guide Overview Installing and Configuring Software Error Messages Input Errors Memory-Resident Programs Program Conflicts Memory Address Conflicts Interrupt Assignment Conflicts Overview Because most computers have several application - Dell OptiPlex GX300 | User Guide - Page 82
of video mode or monitor. In such cases, you may have to develop an alternative method of running that particular program-the creation of a boot file made especially for that program, for example. Call the support service for the software you are using to help you with this problem. Memory Address - Dell OptiPlex GX300 | User Guide - Page 83
IRQ13 IRQ14 IRQ15 Used by the math coprocessor (if applicable) Used by the primary integrated drive electronics (IDE) controller Used by the secondary IDE controller Back to Contents Page - Dell OptiPlex GX300 | User Guide - Page 84
to Contents Page Specifications: Dell™ OptiPlex™ GX300 System User's Guide Processor Memory System Information Video Audio Expansion Bus Drives Ports Key Combinations Controls and Indicators Power Physical Environmental Processor Microprocessor type Internal cache L2 cache memory Math coprocessor - Dell OptiPlex GX300 | User Guide - Page 85
; one 3.5-inch bay for a diskette drive two 3.5-inch bays: one for a 1-inch-high hard-disk drive and one for a 1.6-inch-high harddisk drive two 9-pin connectors; 16550-compatible one 25-hole connector (bidirectional) one 15-hole connector (on video card) RJ45 connector 6-pin mini-Deutsche Industrie - Dell OptiPlex GX300 | User Guide - Page 86
drive CD-ROM drive audio interface Remote Wakeup Fan Telephony 34-pin connector 4-pin connector 3-pin connector 3-pin connector 4-pin connector Key Combinations restarts (reboots) the system starts System Setup (during power - Dell OptiPlex GX300 | User Guide - Page 87
Operating Storage Relative humidity Maximum vibration: Operating Storage Maximum shock: Operating Storage Altitude: Operating Storage Back to Contents Page 10° to 35°C (50° to 95°F) -40° to 65°C (-40° to 149°F) 20% to 80% (noncondensing) 0.25 gravities (G) at 3 to 200 Hz at 1 octave/minute (min) - Dell OptiPlex GX300 | User Guide - Page 88
Back to Contents Page System Setup: Dell™ OptiPlex™ GX300 System User's Guide Using System Setup System Setup Options Back to Contents Page - Dell OptiPlex GX300 | User Guide - Page 89
Back to Contents Page Using System Setup: Dell™ OptiPlex™ GX300 System User's Guide Overview Entering System Setup System Setup Screen System Setup Navigation Keys Overview Each time you turn on your computer system or press the reset button, the system compares the hardware installed in the - Dell OptiPlex GX300 | User Guide - Page 90
Keys Table 1 lists the keys you use to view or change information on the System Setup screen and to exit the program. Table 1. System Setup Navigation Keys Keys or Action Moves to the next field. Moves to the previous field. or or or spacebar or or Cycles through the options - Dell OptiPlex GX300 | User Guide - Page 91
Back to Contents Page Troubleshooting: Dell™ OptiPlex™ GX300 System User's Guide Basic Checks Messages and Codes Software Checks Dell Diagnostics External Components Internal Components Getting Help Back to Contents Page
-
 1
1 -
 2
2 -
 3
3 -
 4
4 -
 5
5 -
 6
6 -
 7
7 -
8
-
9
-
10
-
11
-
12
-
13
-
14
-
15
-
16
-
17
-
18
-
19
-
20
-
21
-
22
-
23
-
24
-
25
-
26
-
27
-
28
-
29
-
30
-
31
-
32
-
33
-
34
-
35
-
36
-
37
-
38
-
39
-
40
-
41
-
42
-
43
-
44
-
45
-
46
-
47
-
48
-
49
-
50
-
51
-
52
-
53
-
54
-
55
-
56
-
57
-
58
-
59
-
60
-
61
-
62
-
63
-
64
-
65
-
66
-
67
-
68
-
69
-
70
-
71
-
72
-
73
-
74
-
75
-
76
-
77
-
78
-
79
-
80
-
81
-
82
-
83
-
84
-
85
-
86
-
87
-
88
-
89
-
90
-
91
 |
 |

Dell™ OptiPlex™ GX300 System User's Guide
Model MMP
Notes, Notices, and Cautions
Throughout this guide, there may be blocks of text printed in bold type or in italic type. These blocks are notes, notices, and cautions, and they are
used as follows:
NOTICE: A NOTICE indicates either potential damage to hardware or loss of data and tells you how to avoid the problem.
Information in this document is subject to change without notice.
©
2000-2003 Dell Computer Corporation. All rights reserved.
Reproduction in any manner whatsoever without the written permission of Dell Computer Corporation is strictly forbidden.
Trademarks used in this text:
Dell, OptiPlex, OptiFrame
,
Dell OpenManage
,
Dimension
,
Latitude
,
Inspiron
,
and DellWare
are trademarks of Dell Computer Corporation;
Microsoft
,
Windows
,
MS-DOS
, and
Windows NT
are registered trademarks of Microsoft Corporation;
Intel
and
Pentium
are registered trademarks of Intel Corporation;
3Com
is
a registered trademark of 3Com Corporation;
IBM
and
OS/2
are registered trademarks of International Business Machines Corporation;
Novell
and
NetWare
are registered
trademarks of Novell, Inc. As an ENERGY STAR Partner, Dell Computer Corporation has determined that this product meets the ENERGY STAR guidelines for energy
efficiency.
Other trademarks and trade names may be used in this document to refer to either the entities claiming the marks and names or their products. Dell Computer Corporation
disclaims any proprietary interest in trademarks and trade names other than its own.
Initial release: 8 Aug 1999
Last revised: 31 Jan 2003
Introduction
Setup and Operation
System Setup
Installing Upgrades
Troubleshooting
Specifications
NOTE: You can obtain the latest version of this document from the Dell support Web site at
.
NOTE: A NOTE indicates important information that helps you make better use of your system.
CAUTION: A CAUTION indicates a potentially hazardous situation which, if not avoided, may result in minor or moderate
injury.