Dell OptiPlex GX300 User Guide - Page 14
Dell™ Diagnostics: Dell OptiPlex™ GX300 System User's Guide
 |
View all Dell OptiPlex GX300 manuals
Add to My Manuals
Save this manual to your list of manuals |
Page 14 highlights
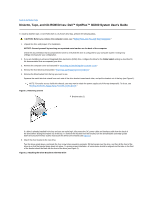
Back to Contents Page Dell™ Diagnostics: Dell OptiPlex™ GX300 System User's Guide Overview Features Before You Start Testing Starting the Dell Diagnostics Advanced Testing Overview If you experience a problem with your computer, run the Dell Diagnostics before you call Dell for technical assistance. The diagnostics tests check your computer's hardware without additional equipment and without the risk of destroying data. When the diagnostics tests complete without indicating problems, you can have confidence in your computer's operation. If the tests indicate a problem you cannot solve, the test error messages provide important information you need when talking to Dell's service and support personnel. NOTICE: Only use the Dell Diagnostics to test your Dell computer system. Using this program with other computers may cause incorrect computer responses or result in error messages. Features The diagnostic test group features allow you to take the following actions: l Perform quick checks or extensive tests on one or all devices l Choose the number of times a test group or subtest is repeated l Display or print test results or save them in a file l Suspend testing if an error is detected or terminate testing when an adjustable error limit is reached l Access online Help screens that describe the tests and tell how to run them l Read status messages that inform you whether test groups or subtests completed successfully l Receive error messages that appear if problems are detected Before You Start Testing l Read "Safety First-For You and Your Computer" and the safety instructions in your System Information Guide. l Turn on your printer if one is attached, and make sure it is online. l Enter system setup, confirm your computer's system configuration information, and enable all of its components and devices, such as ports. l Perform the checks in "Basic Checks." Starting the Dell Diagnostics NOTE: Dell recommends that you print these procedures before you begin. 1. Shut down and restart the computer. 2. Press at the start of the boot routine to access the System Setup screen. 3. Select the Boot Sequence option and press . NOTE: Record your current boot sequence in the event you want to restore it after running the Dell Diagnostics. 4. Select CD/DVD/CD-RW Drive as the first device in the boot sequence. 5. Insert the Dell ResourceCD into the CD-ROM drive.
-
 1
1 -
2
-
3
-
4
-
5
-
6
-
7
-
8
-
 9
9 -
 10
10 -
 11
11 -
 12
12 -
 13
13 -
 14
14 -
 15
15 -
 16
16 -
 17
17 -
 18
18 -
 19
19 -
20
-
21
-
22
-
23
-
24
-
25
-
26
-
27
-
28
-
29
-
30
-
31
-
32
-
33
-
34
-
35
-
36
-
37
-
38
-
39
-
40
-
41
-
42
-
43
-
44
-
45
-
46
-
47
-
48
-
49
-
50
-
51
-
52
-
53
-
54
-
55
-
56
-
57
-
58
-
59
-
60
-
61
-
62
-
63
-
64
-
65
-
66
-
67
-
68
-
69
-
70
-
71
-
72
-
73
-
74
-
75
-
76
-
77
-
78
-
79
-
80
-
81
-
82
-
83
-
84
-
85
-
86
-
87
-
88
-
89
-
90
-
91
 |
 |
