Epson ES-300C User Manual - Page 16
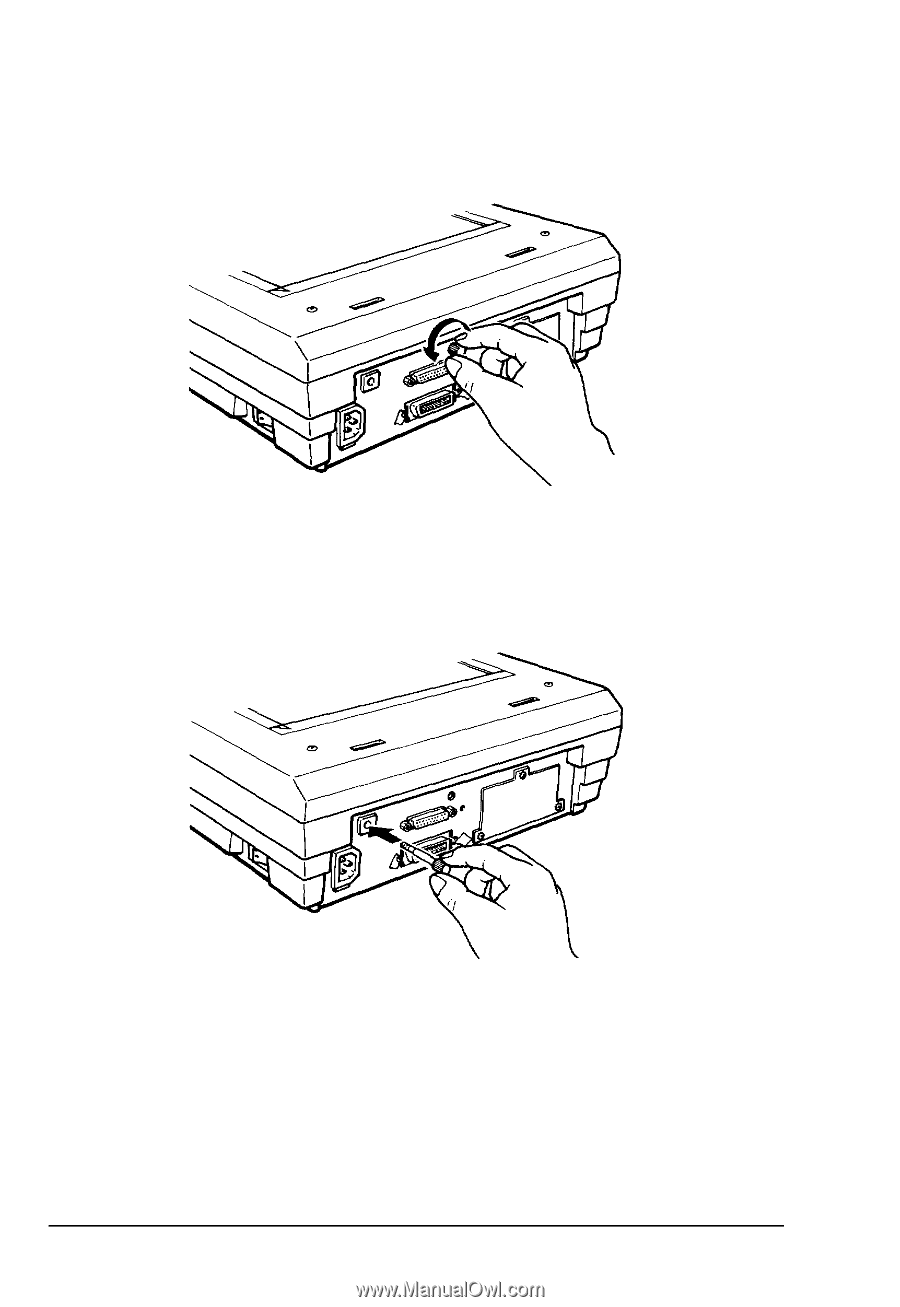
Assembling the, side of the back panel. Push the screw all the way into the hole
 |
View all Epson ES-300C manuals
Add to My Manuals
Save this manual to your list of manuals |
Page 16 highlights
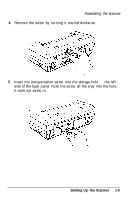
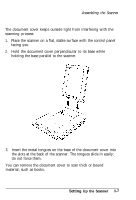
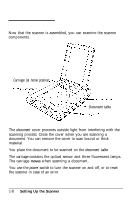
Assembling the Scanner 4. Remove the screw by turning it counterclockwise. 5. Insert the transportation screw into the storage hole on the left side of the back panel. Push the screw all the way into the hole; it does not screw in. Setting Up the Scanner 1-5
-
 1
1 -
2
-
3
-
4
-
5
-
6
-
7
-
8
-
9
-
10
-
 11
11 -
 12
12 -
 13
13 -
 14
14 -
 15
15 -
 16
16 -
 17
17 -
 18
18 -
 19
19 -
 20
20 -
 21
21 -
22
-
23
-
24
-
25
-
26
-
27
-
28
-
29
-
30
-
31
-
32
-
33
-
34
-
35
-
36
-
37
-
38
-
39
-
40
-
41
-
42
-
43
-
44
-
45
-
46
-
47
-
48
-
49
-
50
-
51
-
52
-
53
-
54
-
55
-
56
-
57
-
58
-
59
-
60
-
61
-
62
-
63
-
64
-
65
-
66
-
67
-
68
-
69
-
70
-
71
-
72
-
73
-
74
-
75
-
76
-
77
-
78
-
79
-
80
-
81
-
82
-
83
-
84
-
85
-
86
-
87
-
88
-
89
-
90
-
91
-
92
-
93
-
94
-
95
-
96
-
97
-
98
-
99
-
100
-
101
-
102
-
103
-
104
-
105
-
106
-
107
-
108
-
109
-
110
-
111
-
112
-
113
-
114
-
115
-
116
-
117
-
118
-
119
-
120
-
121
-
122
-
123
 |
 |
Assembling the
Scanner
4.
Remove the screw by turning it counterclockwise.
5.
Insert the transportation screw into the storage hole
on
the left
side of the back panel. Push the screw all the way into the hole;
it does not screw in.
Setting Up the Scanner
1-5