Epson ES-300C User Manual - Page 37
Using the Scanner Functions, Output Resolution - es 300 c scanner
 |
View all Epson ES-300C manuals
Add to My Manuals
Save this manual to your list of manuals |
Page 37 highlights
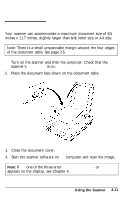
Using the Scanner Functions Numerous image processing functions are built into the ES-300C and many can be combined to produce a variety of effects. Note: l Do not use DIP switch settings or the control panel to control scanner functions unless you are using the direct print function (see Appendix D). l With some scanner software, not all of the scanner functions may be available or the range of settings may be limited. When using application software, see its documentation for details. l Because each image, CRT, and printer combination creates a unique scanning scenario, it is recommended that you use your scanner software to experiment with a variety of functions and settings to achieve the output you like best. ES-300C functions and tips on how to achieve the best results using your scanner are covered in this chapter. The Epson Color Image Scanner Image Samples booklet illustrates some of the effects you can create with these image processing functions. See your software manual for details on using these functions. Output Resolution The output resolution determines how many pixels, or dots, are used for reproducing an image. Resolution is measured in units of dpi (dots per inch) and can be selected independently for the horizontal scan and vertical scan. The ES-300C offers 19 settings: 50, 72, 75, 80, 90, 100, 120, 144, 150, 160, 180, 200, 240, 300, 320, 360, 400, 480, and 600 dpi. 2-12 Using the Scanner
-
 1
1 -
2
-
3
-
4
-
5
-
6
-
7
-
8
-
9
-
10
-
11
-
12
-
13
-
14
-
15
-
16
-
17
-
18
-
19
-
20
-
21
-
22
-
23
-
24
-
25
-
26
-
27
-
28
-
29
-
30
-
31
-
 32
32 -
 33
33 -
 34
34 -
 35
35 -
 36
36 -
 37
37 -
 38
38 -
 39
39 -
 40
40 -
 41
41 -
 42
42 -
43
-
44
-
45
-
46
-
47
-
48
-
49
-
50
-
51
-
52
-
53
-
54
-
55
-
56
-
57
-
58
-
59
-
60
-
61
-
62
-
63
-
64
-
65
-
66
-
67
-
68
-
69
-
70
-
71
-
72
-
73
-
74
-
75
-
76
-
77
-
78
-
79
-
80
-
81
-
82
-
83
-
84
-
85
-
86
-
87
-
88
-
89
-
90
-
91
-
92
-
93
-
94
-
95
-
96
-
97
-
98
-
99
-
100
-
101
-
102
-
103
-
104
-
105
-
106
-
107
-
108
-
109
-
110
-
111
-
112
-
113
-
114
-
115
-
116
-
117
-
118
-
119
-
120
-
121
-
122
-
123
 |
 |