Epson ES-300C User Manual - Page 20
Setting Up the Scanner, interface board slot.
 |
View all Epson ES-300C manuals
Add to My Manuals
Save this manual to your list of manuals |
Page 20 highlights
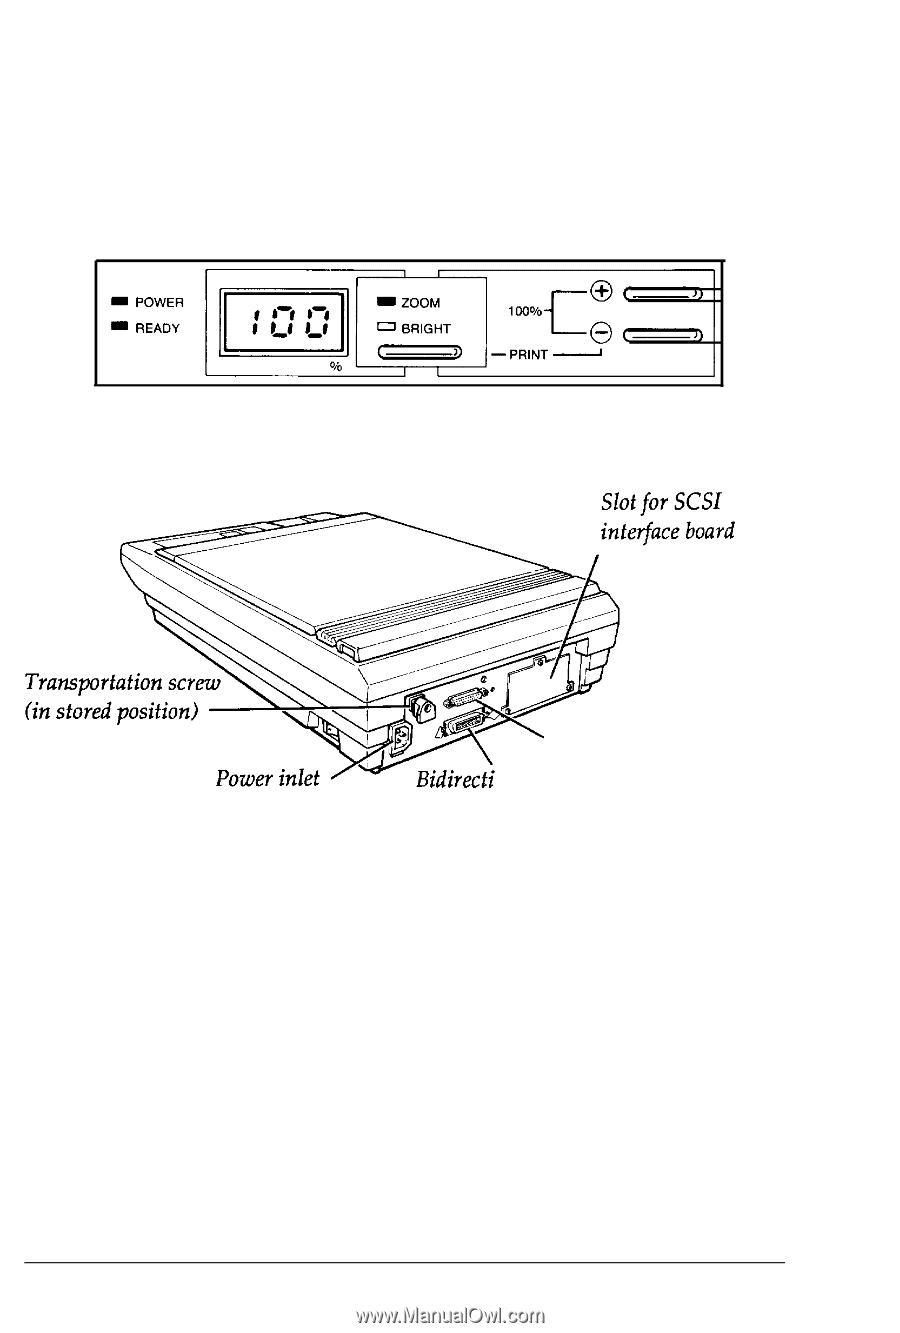
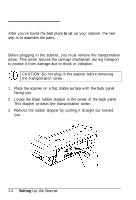
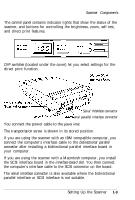
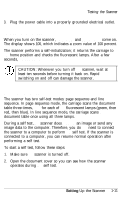
Scanner Components The control panel contains indicator lights that show the status of the scanner, and buttons for controlling the brightness, zoom, self test, and direct print features. DIP switches (located under the cover) let you select settings for the direct print function. Serial interface connector onal parallel interface connector You connect the power cable to the power inlet. The transportation screw is shown in its stored position. If you are using the scanner with an IBM compatible computer, you connect the computer's interface cable to the bidirectional parallel connector after installing a bidirectional parallel interface board in your computer. If you are using the scanner with a Macintosh computer, you install the SCSI interface board in the interface board slot. You then connect the computer's interface cable to the SCSI connector on the board. The serial interface connector is also available where the bidirectional parallel interface or SCSI interface is not suitable. Setting Up the Scanner 1-9
-
 1
1 -
2
-
3
-
4
-
5
-
6
-
7
-
8
-
9
-
10
-
11
-
12
-
13
-
14
-
 15
15 -
 16
16 -
 17
17 -
 18
18 -
 19
19 -
 20
20 -
 21
21 -
 22
22 -
 23
23 -
 24
24 -
 25
25 -
26
-
27
-
28
-
29
-
30
-
31
-
32
-
33
-
34
-
35
-
36
-
37
-
38
-
39
-
40
-
41
-
42
-
43
-
44
-
45
-
46
-
47
-
48
-
49
-
50
-
51
-
52
-
53
-
54
-
55
-
56
-
57
-
58
-
59
-
60
-
61
-
62
-
63
-
64
-
65
-
66
-
67
-
68
-
69
-
70
-
71
-
72
-
73
-
74
-
75
-
76
-
77
-
78
-
79
-
80
-
81
-
82
-
83
-
84
-
85
-
86
-
87
-
88
-
89
-
90
-
91
-
92
-
93
-
94
-
95
-
96
-
97
-
98
-
99
-
100
-
101
-
102
-
103
-
104
-
105
-
106
-
107
-
108
-
109
-
110
-
111
-
112
-
113
-
114
-
115
-
116
-
117
-
118
-
119
-
120
-
121
-
122
-
123
 |
 |