Epson R1800 User's Guide - Page 72
If you want to try a third Color Correction setting, you can repeat steps 2 through
 |
UPC - 010343853072
View all Epson R1800 manuals
Add to My Manuals
Save this manual to your list of manuals |
Page 72 highlights
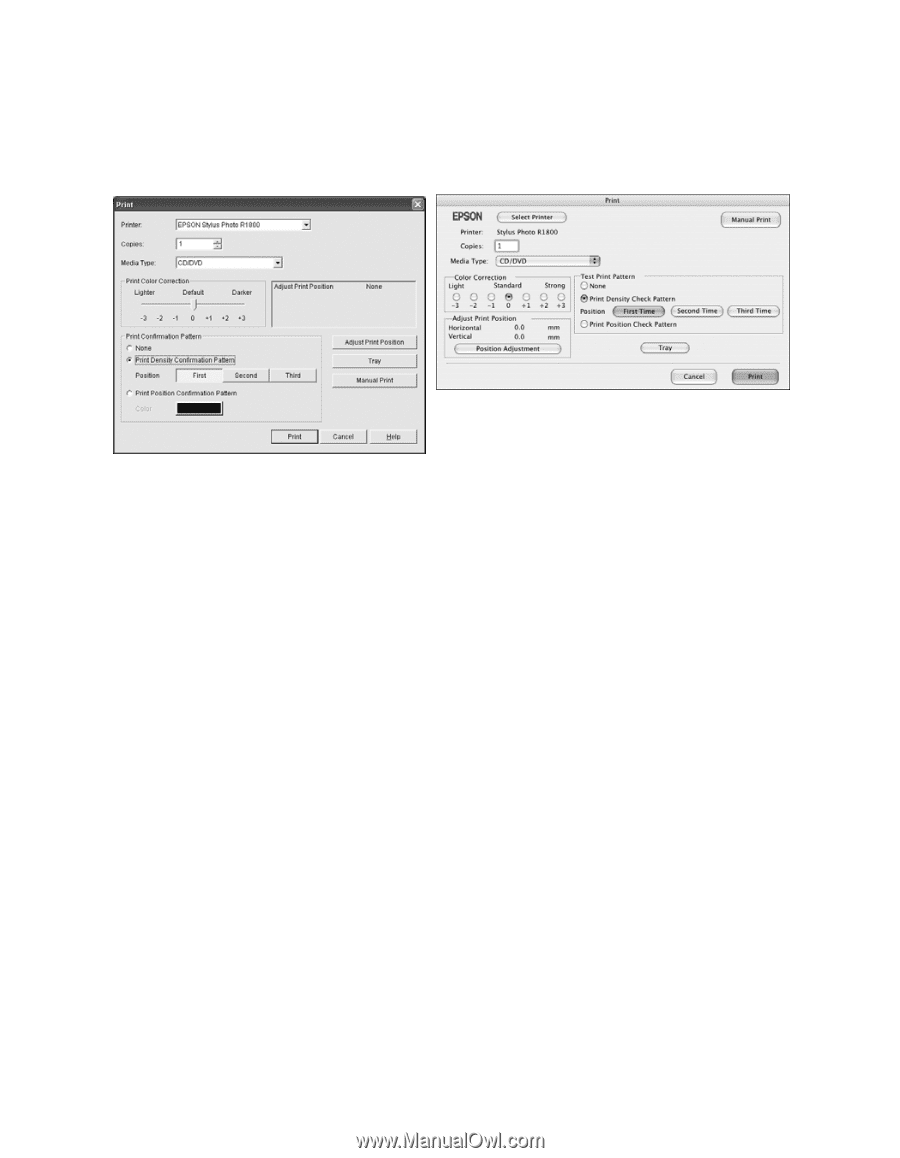
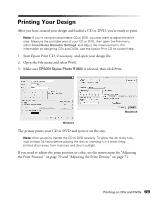
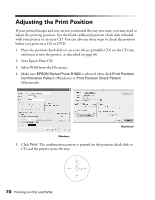
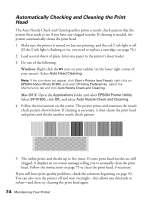
4. Make sure EPSON Stylus Photo R1800 is selected, then click Print Density Confirmation Pattern (Windows) or Print Density Check Pattern (Macintosh). Macintosh Windows 5. Click Print. The printer prints the pattern and ejects the tray. 6. After the pattern is printed, examine the print and make the Print Color Correction (Windows) or Color Correction (Macintosh) setting lighter or darker as necessary. You can print three density patterns on one disc. Each pattern is printed in a different location. 7. After the first pattern is printed, adjust the setting, then repeat steps 2 through 6, selecting Second or Second Time to print the second pattern. 8. If you want to try a third Color Correction setting, you can repeat steps 2 through 6 again and select Third or Third Time. 9. Remove the CD or DVD and let it dry for at least 24 hours. Then check the saturation levels again. You can also use the Brightness and Contrast settings in Epson Print CD to adjust color saturation. See the Epson Print CD on-screen Help for instructions. 72 Printing on CDs and DVDs
-
 1
1 -
2
-
3
-
4
-
5
-
6
-
7
-
8
-
9
-
10
-
11
-
12
-
13
-
14
-
15
-
16
-
17
-
18
-
19
-
20
-
21
-
22
-
23
-
24
-
25
-
26
-
27
-
28
-
29
-
30
-
31
-
32
-
33
-
34
-
35
-
36
-
37
-
38
-
39
-
40
-
41
-
42
-
43
-
44
-
45
-
46
-
47
-
48
-
49
-
50
-
51
-
52
-
53
-
54
-
55
-
56
-
57
-
58
-
59
-
60
-
61
-
62
-
63
-
64
-
65
-
66
-
 67
67 -
 68
68 -
 69
69 -
 70
70 -
 71
71 -
 72
72 -
 73
73 -
 74
74 -
 75
75 -
 76
76 -
 77
77 -
78
-
79
-
80
-
81
-
82
-
83
-
84
-
85
-
86
-
87
-
88
-
89
-
90
-
91
-
92
-
93
-
94
-
95
-
96
-
97
-
98
-
99
-
100
-
101
-
102
-
103
-
104
-
105
-
106
-
107
-
108
-
109
-
110
-
111
-
112
-
113
-
114
-
115
-
116
 |
 |