Epson R1800 User's Guide - Page 90
Running a Printer Check, Problems and Solutions, Setup and Software Installation Problems
 |
UPC - 010343853072
View all Epson R1800 manuals
Add to My Manuals
Save this manual to your list of manuals |
Page 90 highlights
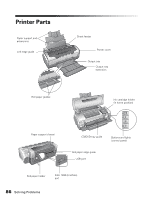
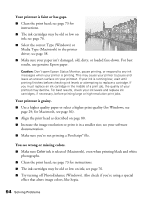
Running a Printer Check You can run a printer check to determine whether a problem comes from the printer or some other source. 1. Turn off your printer and computer, then disconnect the printer's interface cable. 2. Load letter-size paper in the sheet feeder. 3. Hold down the ) paper button, then press and release the P power button. Continue to hold down the ) paper button until the P power light flashes. 4. A test page prints the printer's ROM version number and a nozzle check pattern. ■ If the check page prints, the problem probably lies in your software settings, interface cable, or computer, or your software may not be installed correctly. ■ If the check page doesn't print, you may have a problem with your printer. Try the suggestions in "Problems and Solutions" below. 5. Turn off the printer, connect the interface cable, and turn on your printer and computer. Problems and Solutions Setup and Software Installation Problems The printer makes noise after ink cartridge installation. ■ When you install ink cartridges, the printer must charge its print head for about two and a half minutes. Wait until it's finished (the green P power light stops flashing) before you turn off the printer, or it may use excess ink the next time you turn it on. ■ Make sure the ink cartridges are inserted completely, the ink cover is closed, and no packing material remains in the printer. Turn off the printer, wait a moment, then turn it back on to clear the error. 90 Solving Problems
-
 1
1 -
2
-
3
-
4
-
5
-
6
-
7
-
8
-
9
-
10
-
11
-
12
-
13
-
14
-
15
-
16
-
17
-
18
-
19
-
20
-
21
-
22
-
23
-
24
-
25
-
26
-
27
-
28
-
29
-
30
-
31
-
32
-
33
-
34
-
35
-
36
-
37
-
38
-
39
-
40
-
41
-
42
-
43
-
44
-
45
-
46
-
47
-
48
-
49
-
50
-
51
-
52
-
53
-
54
-
55
-
56
-
57
-
58
-
59
-
60
-
61
-
62
-
63
-
64
-
65
-
66
-
67
-
68
-
69
-
70
-
71
-
72
-
73
-
74
-
75
-
76
-
77
-
78
-
79
-
80
-
81
-
82
-
83
-
84
-
 85
85 -
 86
86 -
 87
87 -
 88
88 -
 89
89 -
 90
90 -
 91
91 -
 92
92 -
 93
93 -
 94
94 -
 95
95 -
96
-
97
-
98
-
99
-
100
-
101
-
102
-
103
-
104
-
105
-
106
-
107
-
108
-
109
-
110
-
111
-
112
-
113
-
114
-
115
-
116
 |
 |
