HP BladeSystem bc2800 Administrator's Guide HP Session Allocation Manager (HP - Page 44
Customization Steps, Linux-Based Client, HP Blade Workstation Client Series
 |
View all HP BladeSystem bc2800 manuals
Add to My Manuals
Save this manual to your list of manuals |
Page 44 highlights
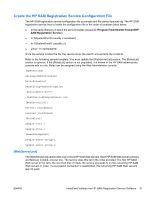
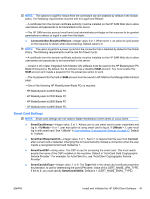
Customization Steps (Recommended) 1. Start up the HP SAM client. 2. Type the HP SAM Web server name. 3. Click the Options button. 4. Change appropriate connection settings. 5. Click the Save Settings button. 6. Save the config file (hprdc.sam) to the default location, if possible (this may be locked down on some thin clients). When you launch the HP SAM client, your saved settings will take effect. Additional settings can be set by manually editing the .SAM files (configuration files). 1. The HP SAM connection client searches first for the user-specific .SAM file, hprdc.sam. 2. It then checks the access device file, hprdc_accessdevice.sam, in the folder in which you installed HP SAM. Parameters found in the access device file replace or are added to the merged file. 3. Then, the connection client checks the global file, hprdc_admin.sam, in the same folder. Parameters found in the global file replace or are added to the merged file. Refer to Configuration Settings on page 38 for a list of the options available for the Windows XPebased client. Linux-Based Client Different procedures are used to install the Linux Client onto the following platforms: ● HP Blade Workstation Client Series on page 36 ● HP ThinPro GT Client for the HP gt7725 Thin Client on page 37 ● Red Hat Enterprise Linux (RHEL) Client on page 38 HP Blade Workstation Client Series The HP SAM client is delivered preinstalled on the HP Blade Workstation Client series. To upgrade to a newer HP SAM client, go to www.hp.com, click software & driver downloads, select the appropriate client, select Workstation Blade Client Embedded OS, and reimage the client. Customization Steps (Recommended) 1. Start up the HP SAM client. 2. Type the HP SAM Web server name. 3. Type the username and domain. (This step is optional.) 4. Click the Options button. 36 Chapter 3 Installation ENWW
-
 1
1 -
2
-
3
-
4
-
5
-
6
-
7
-
8
-
9
-
10
-
11
-
12
-
13
-
14
-
15
-
16
-
17
-
18
-
19
-
20
-
21
-
22
-
23
-
24
-
25
-
26
-
27
-
28
-
29
-
30
-
31
-
32
-
33
-
34
-
35
-
36
-
37
-
38
-
 39
39 -
 40
40 -
 41
41 -
 42
42 -
 43
43 -
 44
44 -
 45
45 -
 46
46 -
 47
47 -
 48
48 -
 49
49 -
50
-
51
-
52
-
53
-
54
-
55
-
56
-
57
-
58
-
59
-
60
-
61
-
62
-
63
-
64
-
65
-
66
-
67
-
68
-
69
-
70
-
71
-
72
-
73
-
74
-
75
-
76
-
77
-
78
-
79
-
80
-
81
-
82
-
83
-
84
-
85
-
86
-
87
-
88
-
89
-
90
-
91
-
92
-
93
-
94
-
95
-
96
-
97
-
98
-
99
-
100
-
101
-
102
-
103
-
104
 |
 |